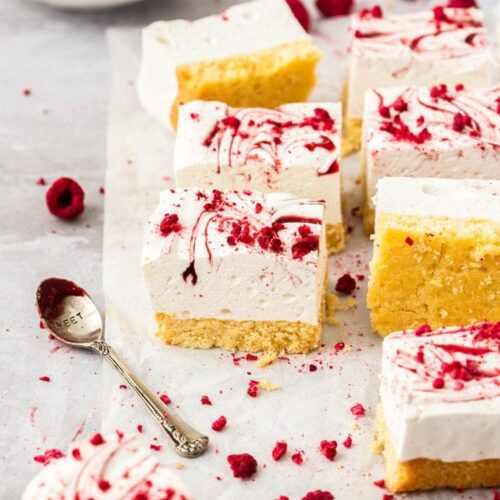

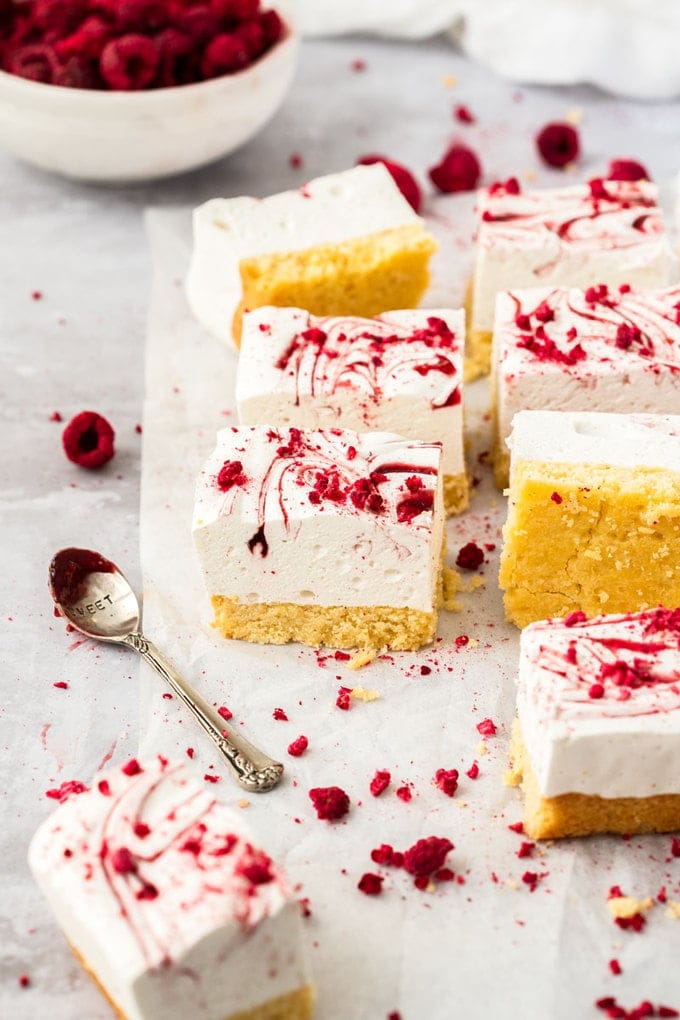
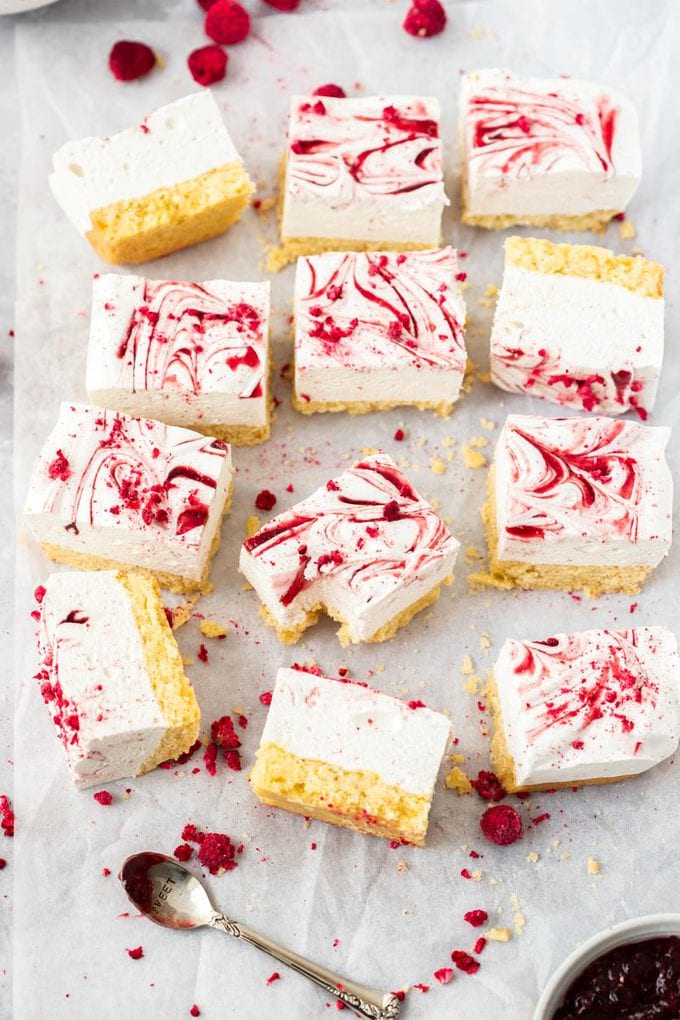
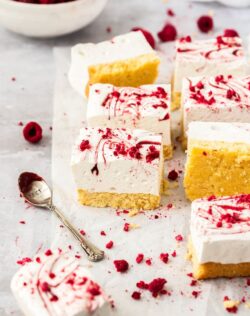
If you love marshmallow, then this raspberry marshmallow slice is the next level. The thick, soft and fluffy homemade marshmallow is swirled with raspberry jam and sits atop an easy coconut cookie.
And, if you’ve never made marshmallow from scratch before, don’t be intimidated because it’s very easy. It’s also worlds above the store-bought variety in both flavour and texture.
You could also try making this orange eggless marshmallow, Chocolate marshmallows or this caramel swirl marshmallow for the topping.
Want more marshmallowy goodness? Try this No Bake Marshmallow Slice.

Never Miss a Recipe!
Get the latest recipes straight to your inbox.
What are marshmallows made of?
A pillowy soft and sweet candy, marshmallows feel decadent and light all at once. The ingredients they are typically made is gelatin, sugar, egg whites and glucose or corn syrup.
Air is whipped into the mixture to create this cloud-like confection.
So, so much better than store-bought, homemade marshmallows are lighter and totally melt in your mouth. I urge you to try them just once and you’ll never look back. In this recipe, a vanilla marshmallow topping is set on top of an easy coconut biscuit base but you could skip the base and just make a batch of marshmallows.
Tools you’ll need
- A candy thermometer will ensure you get the syrup to the right temperature.
- A stand mixer to whip the marshmallow since you need to whip it for around 10-12 minutes. The time combined with the thick mixture is likely to cause smaller handheld beaters to burn out.
- A square 8 inch cake tin
How To Make marshmallow slice
Jump to the recipe for full ingredients and instructions.
The coconut biscuit base
The coconut biscuit base for this marshmallow slice is extremely simple to make with just 4 ingredients, mixed together in a bowl, then pressed into an 8×8 inch baking tin. This is baked until turning golden brown.
The Marshmallow Topping
Making marshmallow, while it has technical elements, is actually not that difficult, you just need to have everything prepared first. Read my tips towards the bottom of the post for making perfect mallows.
- Start by whipping the egg whites to soft peaks and preparing some powdered gelatine and water to bloom (blooming just means softening the gelatine in water)
- Combine water, sugar and glucose (or corn syrup) in a saucepan and bring it to a boil without touching it until it gets to 130C / 260F.
- When it’s almost to temperature, start beating those egg whites again until they hit stiff peak stage.
- Now heat the gelatine mixture in the microwave for 20 seconds and mix it well. Add it to the finished syrup and mix it through. Be careful as it will froth up.
- Return to the stand mixer and with it running on low, pour the syrup in a slow, steady stream down the side of the bowl into the egg whites.
- Now beat the mixture on medium-high for around 10 -12 minutes – see below for how to tell when it’s ready.
- Pour the marshmallow over the base, then drop small spoonfuls of raspberry jam over the top, then use the blade of a knife to drag through and swirl the marshmallow.
Now you just need to wait patiently while it sets – the longer the better. I like overnight.
How can you tell when marshmallow is ready?
The marshmallow is ready when it starts to look a little stringy around the edges of the mixing bowl and when you lift the whisk, it runs back leaving a thick trail and not blending straight in.
I like this consistency as it is still malleable and pourable but sets perfectly. Some recipes will ask you to wait until it’s super sticky and stringy and at this point it’s extremely thick and difficult to work with.
How to cut homemade marshmallows
Since they can be sticky, marshmallows can tear before they’ll cut if you don’t take the right measures. Grease just the blade of a sharp knife with some spray oil or butter, then make a decisive cut straight through. Rinse and dry the knife, then re-grease it between each cut. This method will give you perfect sharp corners.
Storage
Store the cut marshmallow slice in an airtight container for 2-3 days in a cool place (not the fridge).
Variations
Now you know how to make this marshmallow slice, how about some ways to change it up.
- Intensify the raspberry – starting with the base recipe, you could add a layer of raspberry jam between the coconut biscuit base and the marshmallow topping. If it’s going to be eaten fairly soon after making, then try pushing some real raspberries into the marshmallow before it sets.
- Lemon – Use this lemon curd recipe and spread a layer of lemon curd on top of the cookie base before adding the marshmallow, then swirl some through the marshmallow. Try adding some lemon zest to the cookie base as well. You could also try blood orange curd or passionfruit curd.
- Caramel – I’m currently working on a caramel chocolate version of this slice recipe but you can easily turn it into a caramel marshmallow slice using the caramel from this recipe. Add a layer of the caramel between the base and topping, use brown sugar in the cookie base, then swirl some caramel through the marshmallow.
Tips and tricks
While marshmallow isn’t overly difficult to make, here are a few tips to make your marshmallow slice just perfect.
- Make sure to use a saucepan that will allow the base of your candy thermometer to be submerged otherwise it may not give you a correct reading.
- Grease everything! Marshmallow is a sticky substance so greasing everything with a little spray oil immediately before you use it will make it easy to tame. You can also use butter or coconut oil.
- Measure everything exactly – There are only a few ingredients and they all play a very important role.
- If you’re new to making marshmallow, use the right equipment. A stand-mixer and sugar thermometer are going to get you the best results.
- Read the recipe before you start. This is so you have a heads-up of when things need to happen. The syrup can be time-sensitive once it’s ready so you’ll need to be able to move quickly at that point.
- Speaking of the syrup, make sure to add it to the egg whites in a slow steady stream so that it doesn’t scramble them.
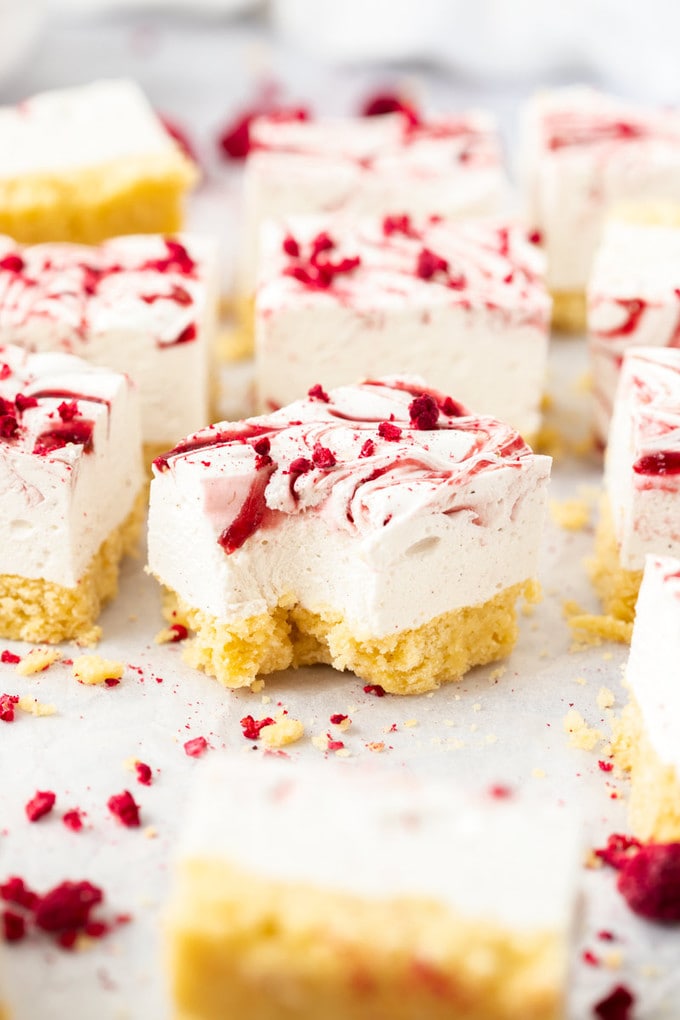
With a luscious layer of cloud like whipped marshmallow sitting on top of a crunchy coconut cookie base, this Raspberry Marshmallow Slice is a winner every single time!
More recipes you’ll love
⭐⭐⭐⭐⭐
Did you try this marshmallow slice recipe?
Leaving a rating and comment below the recipe is so helpful!
Hungry for more? Subscribe to the newsletter for free recipes straight to your inbox. Also, follow along on Facebook, Pinterest and Instagram.
Ingredients
FOR THE COCONUT BISCUIT BASE
- ⅓ cup caster sugar (superfine sugar) (65g / 2.3oz)
- 195 g plain flour (all purpose flour) (6.9oz / 1 ½ cups)
- ⅔ cup fine desiccated coconut
- 170 g unsalted butter, melted (1 ½ sticks / ¾ cup)
FOR THE MARSHMALLOW
- 2 egg whites
- 1 ¼ cups water (310ml)
- 5 teaspoons powdered gelatine
- 400 g caster sugar (superfine sugar) (2 cups / 14oz)
- 4 teaspoons liquid glucose (or light corn syrup)
- 1 teaspoon vanilla extract
- 2 tablespoons raspberry jam, strained (notes 1)
- handful freeze-dried raspberries
For best results, always weigh ingredients where a weight is provided
Equipment
- A candy thermometer will ensure you get the syrup to the right temperature.
- A stand mixer is best to whip the marshmallow
- An 8×8 inch square cake pan or slice tin
Instructions
FOR THE COCONUT BISCUIT BASE
- Preheat oven to 180C (160C fan forced) / 350F. Line an 8 inch square cake pan with baking paper.
- In a medium bowl, whisk together the flour, sugar and coconut to disperse evenly, then add the melted butter and mix through.
- Press the mixture into the base of the lined tin and bake for 28-30 minutes until starting to turn golden on top then set aside to cool down.
FOR THE MARSHMALLOW
- In the bowl of stand mixer with whisk attachment, whisk the egg whites to soft peaks on medium speed.
- Place ½ cup of water in a small bowl and sprinkle over the gelatine, then give it a good mix with a fork. Set aside.
- Place the sugar, glucose and remaining ¾ cup of water into a medium, heavy based saucepan without stirring. Sit a sugar thermometer into the pan and place it over medium-high heat until the mixture starts to boil.
- Once it reaches 130C / 260F on the thermometer, take it off the heat. Move quickly at this point so the syrup doesn’t cool down too much.
- Turn the whisk on again to start beating the eggs to stiff peaks.
- Place the gelatine mixture in the microwave and heat for 20 seconds. Stir well, then add it to the sugar syrup, carefully stirring it through. Be careful as it may splatter and will froth up
- With the mixer still running on low-medium, slowly pour in the sugar syrup in a steady stream down the side into the egg whites, until all incorporated. Not too quickly or the egg white will split.
- Turn the mixer up to high speed and beat for 10-12 minutes until doubled in volume. You'll know its ready when it runs slowly off the whisk in a thick stream that doesn't disappear for a while.
- Brush a little oil around the inside edges of the tin with the cookie base in it.
- Now carefully spread the marshmallow mix over the cookie and jam base (a greased spatula will assist here).
- Dot the top with spoonfuls of raspberry jam, then run the blade of a dinner knife through it back and forth to make it streaky.
- Allow it to set for at least 4 hours (overnight is better) before slicing.
- Please take a moment to leave a comment & rating. It's appreciated and so helpful.
Notes
- Tablespoons: I use a standard Australian 20ml tablespoon (equal to 4 teaspoons). Check yours before measuring.
- You will need a candy thermometer for this recipe
- Will set best overnight. Let it cool completely before placing the tin into a large airtight container.
- To cut clean square slices, use a sharp knife with a greased blade to make decisive cuts. Rinse in hot water, dry, re-grease and repeat for each cut.
This post may contain affiliate links that earn me a small commission for my referral, at no extra cost to you. Thank you for supporting Sugar Salt Magic.


11 Comments on “Raspberry Marshmallow Slice”
Thank you Marie for such a delicious receipt I loved it 🙂 could you please tell me how make a nice and easy KCF receipt 🙂 to be eaten at the holiday season 🙂
So happy you love it, Shereen. Do you mean KFC as in fried chicken? If so, try my crispy chicken burgers recipe.
Delicious recipe!!! Should I keep it in the pantry or fridge?
So happy you love it, Emma. It will keep fine in a cool spot (not in the fridge though).
You got me at coconut base biscuit, I’ll take anything with coconut! These look so fun and delicious, layered desserts are always the best because I feel like I’m getting a twofer 🙂
I agree with previous poster, your photography is beautiful, thoughtfully done and so well executed. I have followed you for a while now and love your recipe choices.,. I will be making this one!
Thank you so, so much Belinda. I’m so happy you’re loving the recipes. Let me know if there’s anything you’d love to see on the site 🙂
These look SO delicious Marie!!!! So many things to love about it! Raspberry and coconut! So good!
Thanks so much Katherine 🙂 It’s a great combo
Whenever I watch your photos (and believe me I do) they show to me, at least, a lot of patience and dedication; not to mention how carefully you pick what to publish. Well, you have a fan over here 🙂 Enjoy your weekend !
Thank you so much for the kind comments. My photography and styling is definitely something I’m always striving to improve.