

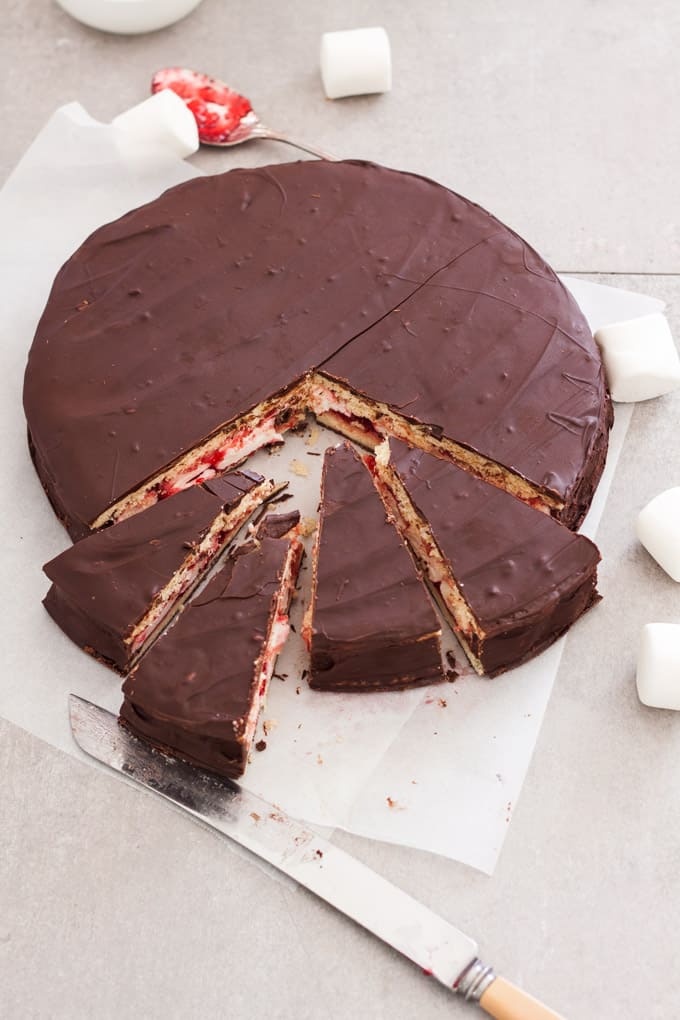
Yep, you heard right. A GIANT Homemade Wagon Wheel recipe. Just like the Wagon Wheel biscuit of your childhood, except 8 times bigger. Served as a slice, this is a bit of fun and keeping that retro biscuit alive.
Why you’ll love this Giant Home Wagon Wheel Biscuit
It’s so much fun to make plus it’s a trip back to yummy childhood memories. If you didn’t grown up with wagon wheels, you’ll still love the combination of cookie, marshmallow, jam and chocolate.
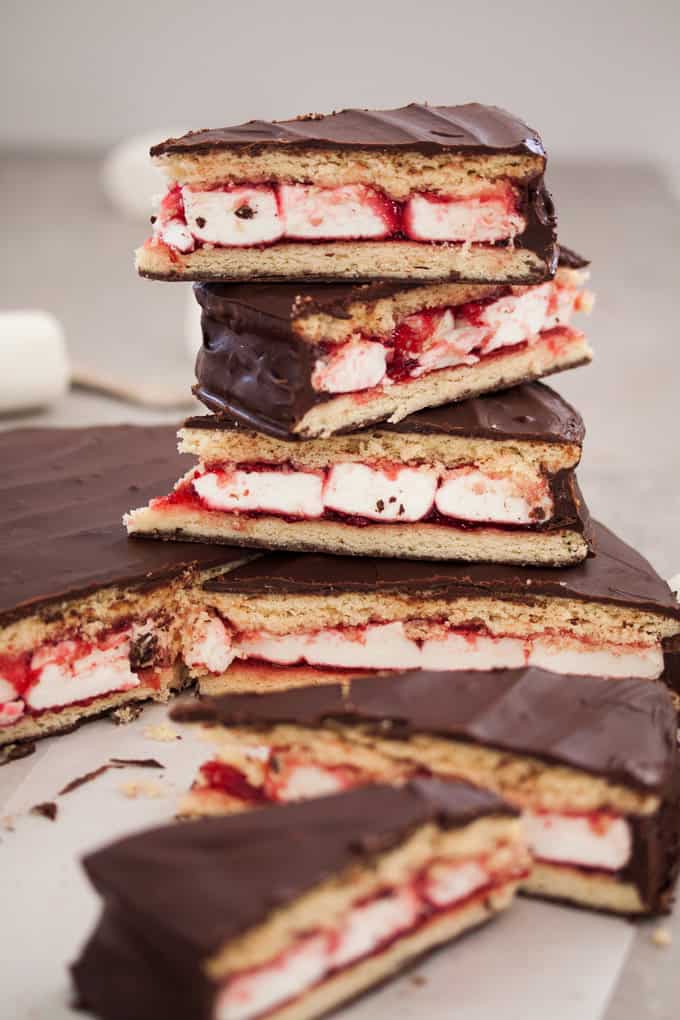
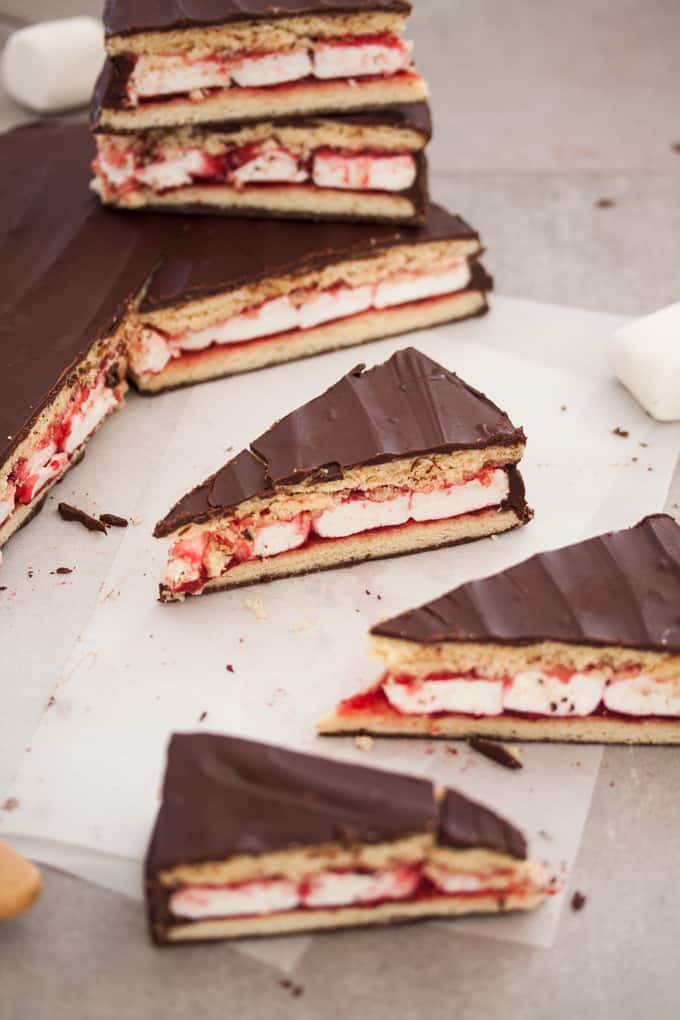
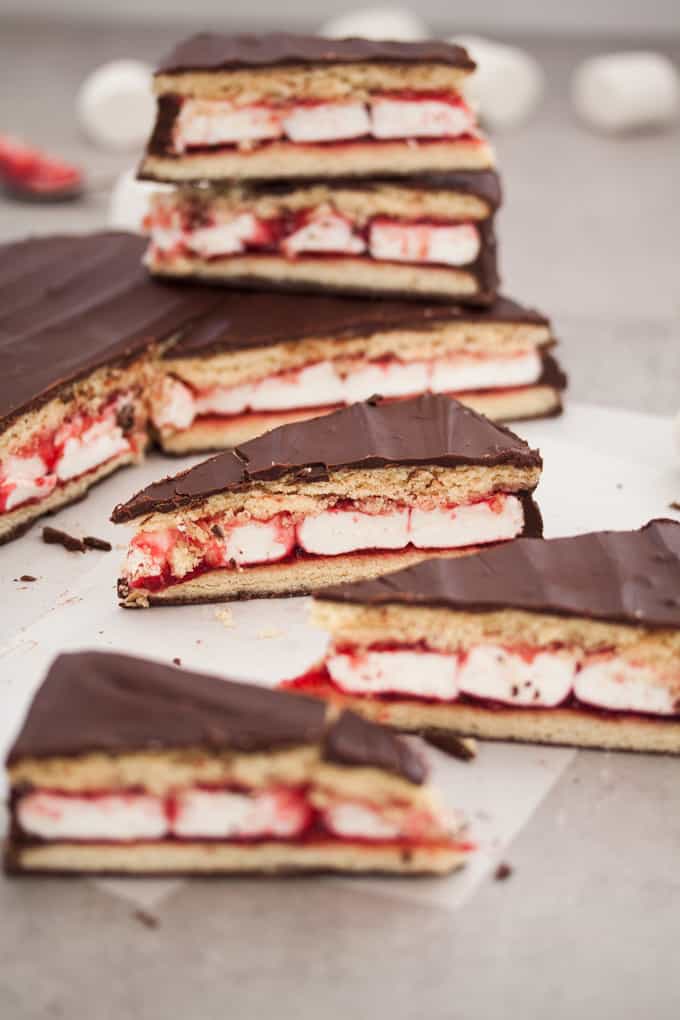
What is a wagon wheel exactly? It’s two sugar cookies, a filling of marshmallow and jam and it’s all coated in chocolate. Normally a palm sized biscuit (at least they used to be), this one is nearly 1 foot in diameter and so much fun to make.
Stretching the truth for a childhood favourite
Whilst not technically Australian, wagon wheels have a big place in Aussie hearts. They are sold in lots of countries but the humble Wagon Wheel was invented by an Aussie guy who took over his Aussie dads business ….. in the UK. That’s close enough for me though and this one is a homemade Wagon Wheel on steroids.
I’ve got a whole list of Aussie desserts to choose from these days from the absolute reader favourite my Golden Gaytime Slice, to Lamington Cupcakes and some cute little Neenish Tarts. But for now lets focus on this glorious massive wagon wheel.
It’s actually pretty simple to make, although a prior career as a circus juggler will be really helpful, to move the delicate biscuits around. You’ll see what I mean. Don’t worry it’s for fun and if you don’t want to do that, then just make regular sized one or these itty bitty baby wagon wheels.
So how do you make a Giant Wagon Wheel Biscuit?
You make up the biscuit bases (just a simple Sugar Cookie recipe), easy peasy but it is very important to measure out the ingredients properly.
After making the biscuits, you slather on some yummy raspberry jam (a small offset spatula is really handy for jobs like this), then top one side with simple store bought vanilla marshmallows, chopped in half. (I know, I normally like the challenge of making that sort of stuff myself but I wanted to keep this recipe a little simpler).
Then you put them back in the oven for 3 minutes until the marshmallow starts to puff up and get all gooey. Put the 2 halves together (this is where the juggling career comes in helpful). Finally, you coat the whole thing in melted dark chocolate and sit in the fridge to set.
PIN IT:
Click to Pin this recipe for later!
Perfection is not necessary
I’ve not mastered the art of tempering chocolate as you can see but this wagon wheel recipe proves you don’t need to either. Just coat it in good old melted chocolate that looks all rustic when set. That’s perfection in my book.
More recipes you’ll love
Never Miss a Recipe!
Get the latest recipes straight to your inbox!

Ingredients
- 113 g unsalted butter, softened (½ cup / 1 stick)
- 200 g white granulated sugar (1 cup / 7 oz)
- 1 large egg
- 1 teaspoon vanilla extract
- 295 g plain (all purp) flour (2 ¼ cups / 10.5oz)
- ¼ teaspoon salt
- 1 ½ teaspoon baking powder
- ¾ cup raspberry jam
- 200 g vanilla marshmallows,regular size chopped in half (7oz)
- 400 g dark chocolate (14oz)
For best results, always weigh ingredients where a weight is provided
Instructions
- Preheat the oven to 180C / 350F / 160C fan forced.
- Cream together the butter and sugar until pale and fluffy. This will take a few minutes, so while that’s happening, in a separate bowl mix the flour, salt and baking powder until it is all well mixed through. Add the egg and vanilla to the butter / sugar mix and beat until well combined.
- Add the flour mix to the wet mix and beat until just combined. It will start to come together into a dryish, crumbly dough. This is good.
- Use your hands to pull all the dough together, then split into 2 halves. Lay out 2 sheets of baking paper and roll out each of the halves on top of a sheet of baking paper, until they are about 4mm thick.
- Put a dinner plate upside down on each half and cut around it with a knife. Discard the off-cuts and remove the plate. Now use the baking paper to slide each biscuit onto a flat baking tray. Bake in the oven for 7 minutes or until just golden at the edges.
- Spread each biscuit with half of the jam, then top one biscuit with the cut marshmallows in a single layer leaving a gap around the edge of about 1cm. Put both biscuits back in the oven for 3 minutes. The marshmallows should be starting to puff up a bit.
- Allow the baking tins to cool a little bit then place the biscuit with just the jam on it into the freezer for ½ an hour until quite firm. Flip this biscuit upside down onto the marshmallow biscuit, so that the jam is on the inside. So now you have a massive sandwich biscuit.
- Melt the chocolate in 30 second increments in the microwave, stirring well between each until just melted.
- Line a large baking tin or plate with baking paper (something big enough to hold the wagon wheel and with sides so the chocolate doesn’t escape). Pour a third of the melted chocolate on the baking paper and spread it out to a large enough area to cover the bottom of the Wagon Wheel. Carefully place the Wagon Wheel on top. Then pour the rest of the chocolate over the top and spread out over the top and around the sides, making sure to push it into the gaps at the side. Now place in the fridge until it sets.
Notes
- Smaller wagon wheels may be much easier to handle but much less impressive.
- Point 7 states to put the biscuit / cookie into the freezer to firm up. This is a very important step. Without doing this the biscuit will be much harder to handle and likely crack – so don’t skip it.
- I prefer melting chocolate in the microwave but if you prefer using a bowl over simmering water on the stove that’s fine too. If you do use the microwave it’s important not to heat any more than 30 seconds at time and you must give it a good stir at the end of each 30 second burst. Only do this until just melted – it shouldn’t be boiling hot.
- For best results you should always weigh ingredients like flour and sugar. Kitchen scales are relatively cheap but if you can’t weigh the ingredients, use the spoon and level method (don’t scoop).
This post may contain affiliate links that earn me a small commission for my referral, at no extra cost to you. Thank you for supporting Sugar Salt Magic.
6 Comments on “Giant Homemade Wagon Wheel Biscuit”
I haven’t made your recipe, as yet. But I HAVE been making Wagon Wheels for decades and about 8 years ago decided to give giant wagon wheels a shot. Turned out well. As the littlies grew up and left the nest they took the recipes with them and it is a delight to indulge in intergenerational fun as a whole new generation have emerged. We now have family fun days…. a stack of pizza trays and an enthusiastic bunch of kids can whip them up in no time! Cheers….. Caz 🙂
A giant wagon wheel is just plain fun 🙂
These are so so yummy….have you ever frozen these?
Hello Emma, no I haven’t tried freezing the complete wagon wheel. The cookie dough and the cookies themselves can definitely be frozen. I’m just not sure how the marshmallows would go as I’ve not tested them. So glad you like it though 🙂
These remind me of the ChocoPie I used to eat as a kid, but of course these are sooooo much more delicious and bigger too which is definitely not a bad thing! 😉
I’ve never heard of ChocoPie but if it’s anything like a wagon wheel I bet it’s delicious. Thanks Trang 🙂