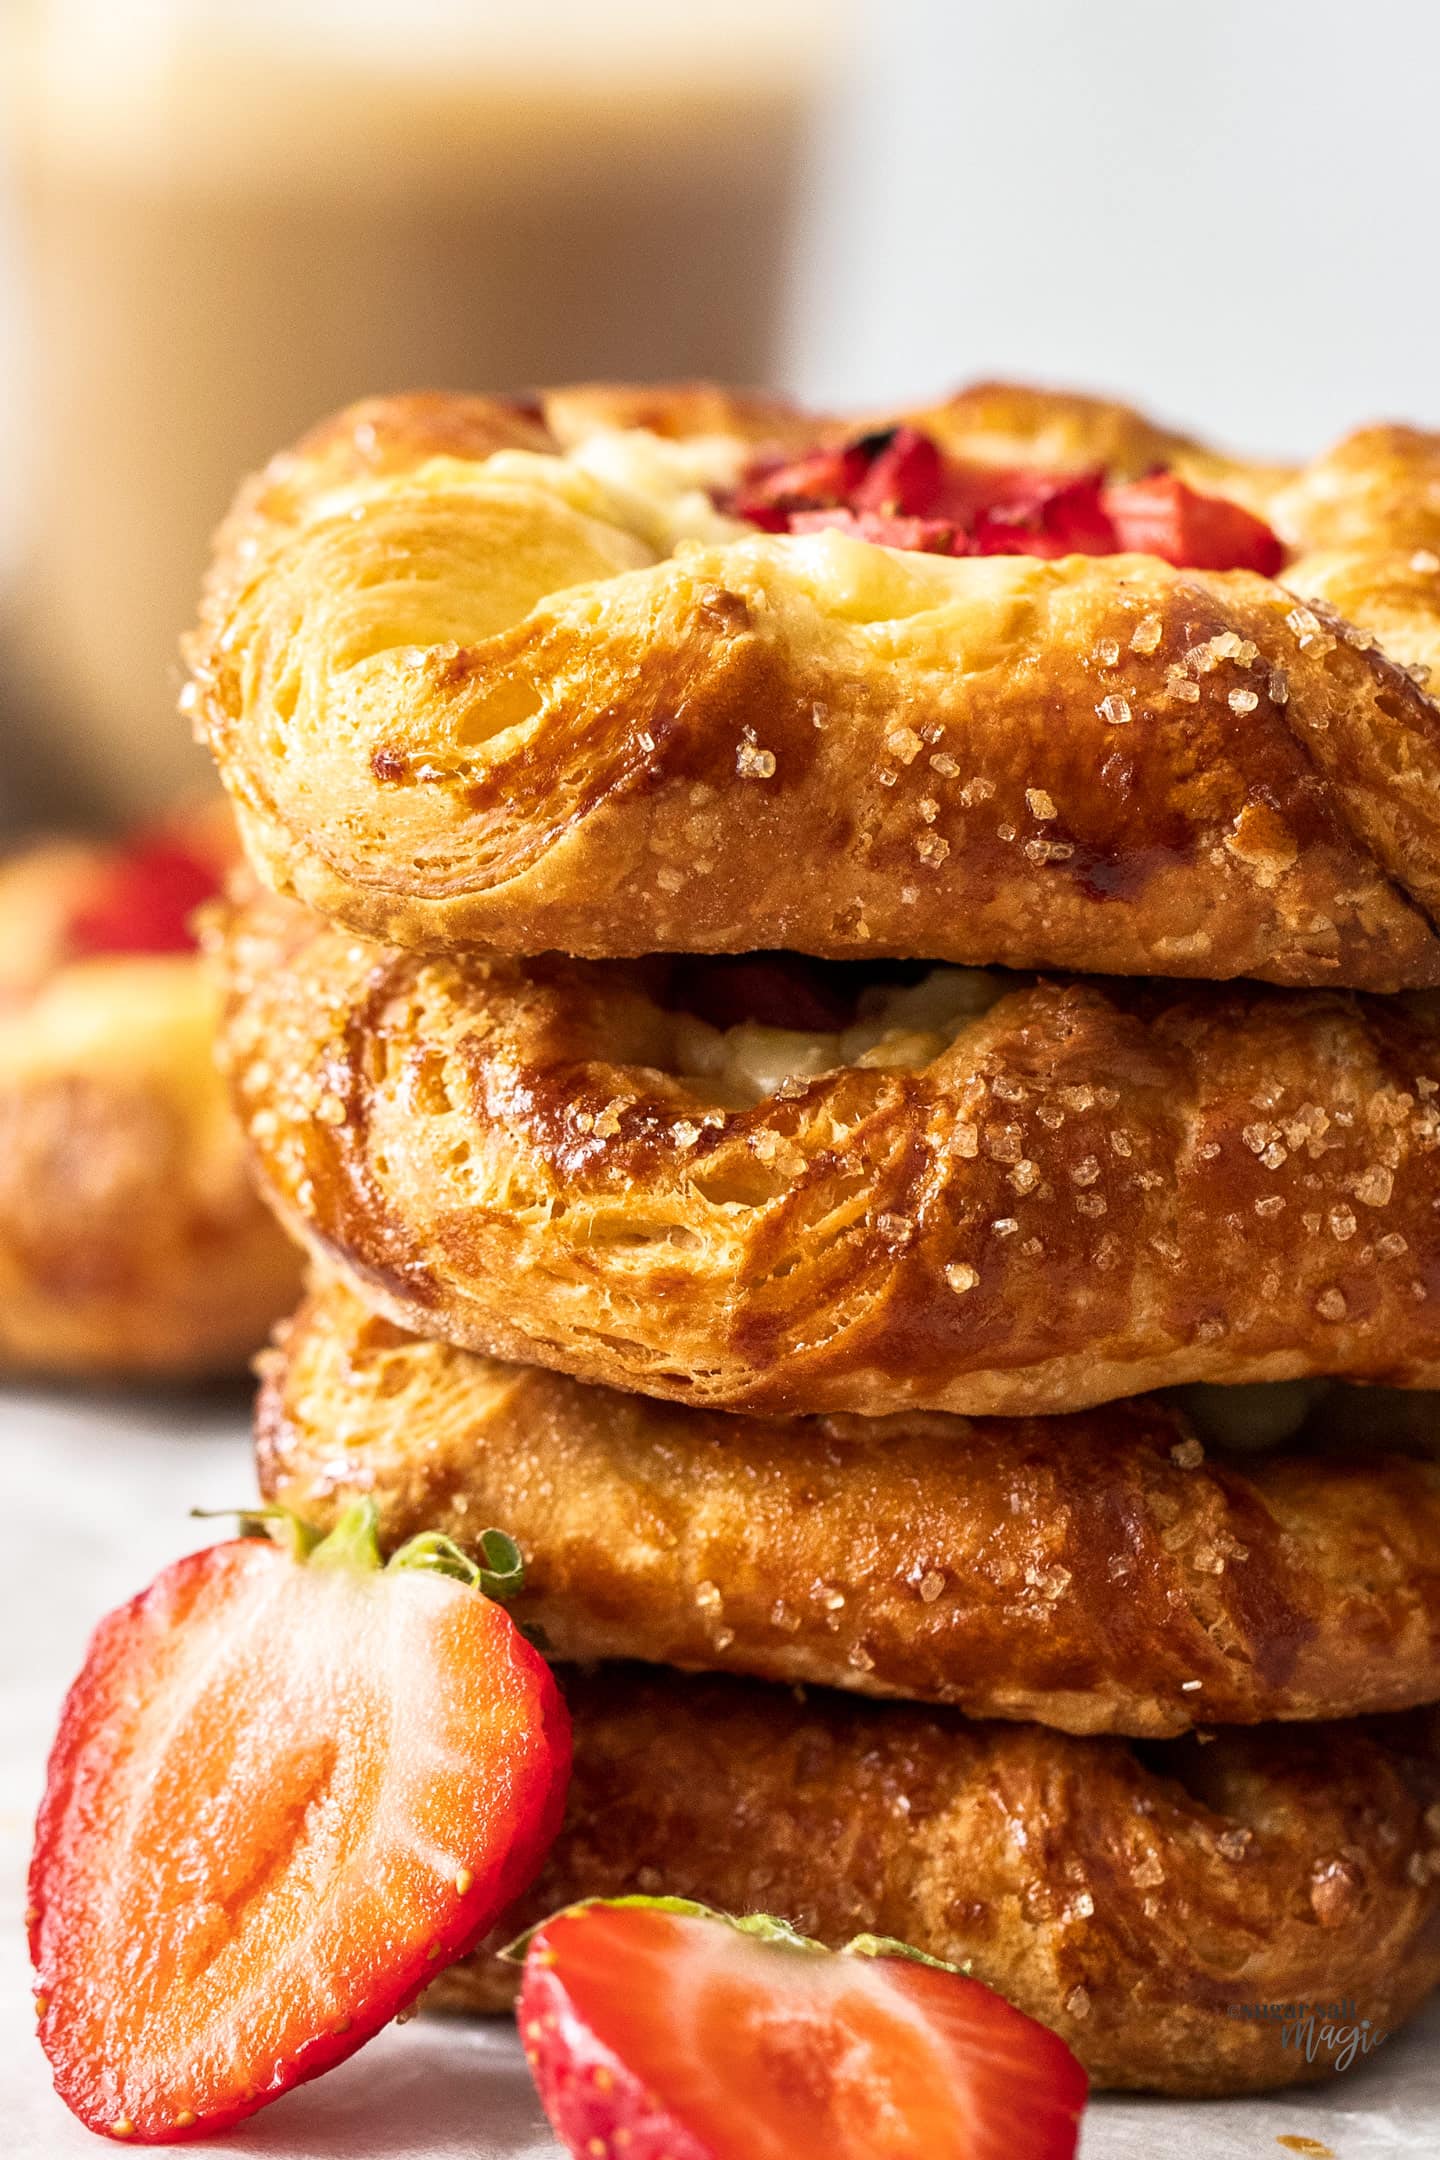
The perfect sweet brunch, this cream cheese strawberry Danish recipe is a fun weekend baking project. It takes less time than you may think to make perfect flaky, buttery pastry and a delectable sweet filling.
I was so happy to master my easy Danish pastry recipe and it’s become a firm blog favourite as have these custard danishes.

Why you’ll love it
If you’re looking for a special recipe to serve up gorgeous pastries for brunch or a lovely afternoon tea, then these strawberry cream cheese Danishes are what you need.
- Danish pastry, made from scratch – it’s easier than you think
- Puffy, flaky, buttery and so tasty
- Textures of crunchy exterior and soft interior is amazing
- Sweet from strawberries, creamy from cream cheese – the flavour is so good
I’m so excited for you to try these at home – can you tell?!
First up, plan ahead! While I say this pastry dough is easy, and it really is, it does still take time in resting periods. I like to make this dough the day before as it needs a minimum of 8 hours to rest. You can make it the morning before, then roll and fold it in the evening ready for pastries in the morning.
Traditional Danish pastry requires a laminated dough which basically means sheets of butter are rolled between layers of dough and rolled and folded over and over. It’s great but it takes some elbow grease and time.
My easier version is just a rough pastry made in a bowl, which is then very simple to roll and fold as the butter is worked into the dough in smaller pieces.
If you’re looking to serve these up as part of brunch for a crowd, why not add this puff pastry breakfast tart too.
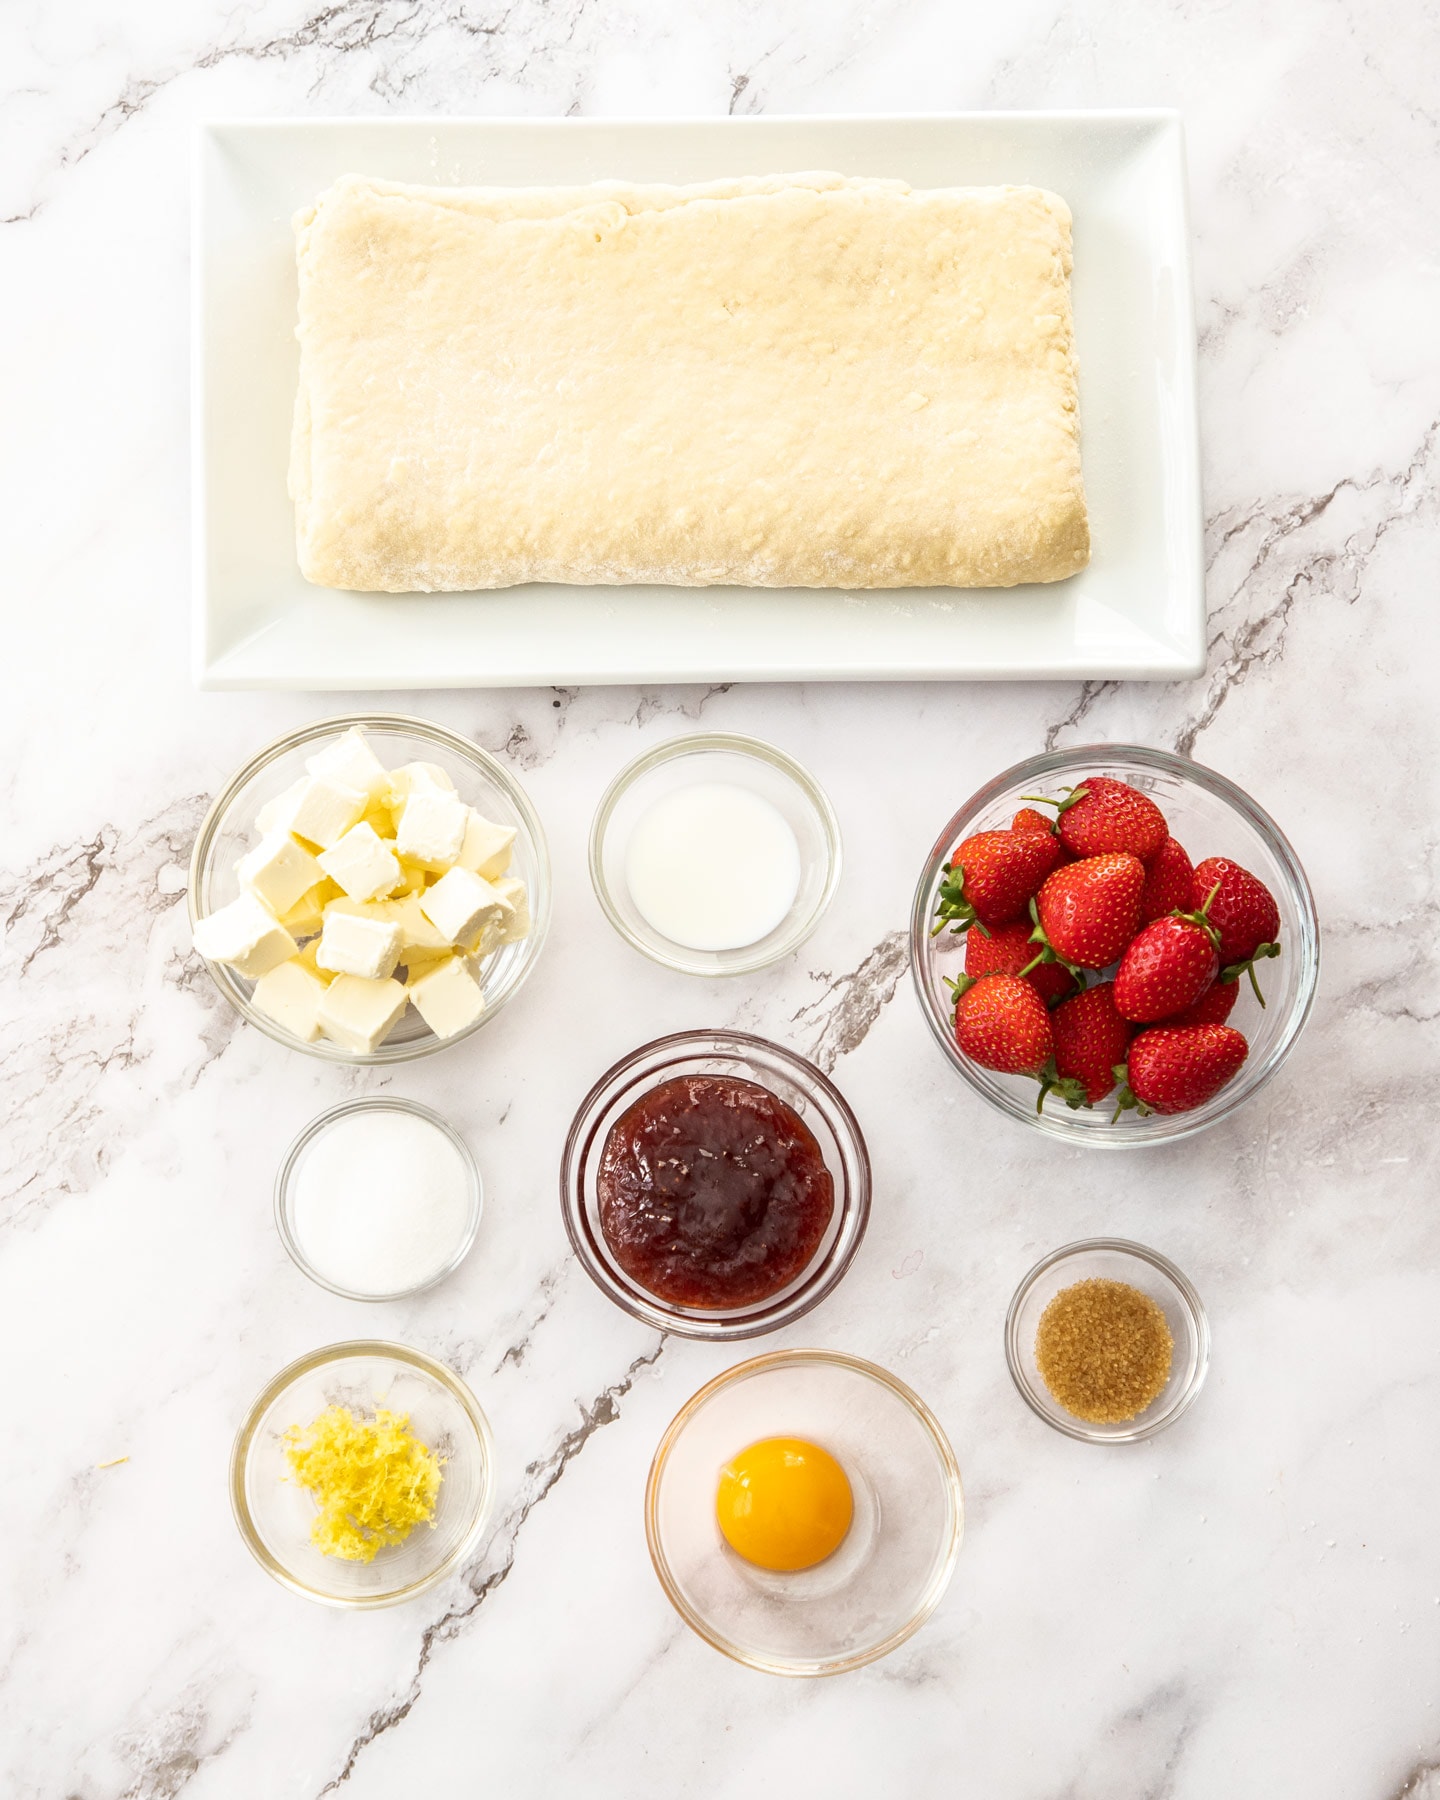
Ingredients for strawberry Danish

Detailed quantities and instructions in the recipe card below.
- Danish dough: I use my tried and tested, everybody-loves-it, homemade Danish pastry dough. You could swap for frozen puff pastry but you may not get quite as good a rise or the same texture.
- Cream cheese: You don’t need a lot of cream cheese so stick to full fat for a better flavour.
- Sugar: There are two types of sugar here – regular white granulated sugar and demerara sugar / turbinado sugar for topping. I recommend you don’t skip that topping as it adds extra crunch.
- Milk: Just a little milk will lighten up the cream cheese mixture.
- Lemon zest: The lemon-strawberry-cream-cheese combo is just so good.
- Strawberry jam: Hidden under that layer of cream cheese is a little good quality strawberry jam for added strawberry flavour.
- Strawberries: Fresh strawberries at their ripest top these off beautifully.
- Egg yolk: The egg yolk gives a lovely golden colour to the outside of the Danish pastries.
How to make strawberry Danish

Detailed quantities and instructions in the recipe card below.
I recommend starting the dough the morning of the previous day. This will allow you to roll and fold that evening and then you can make your cream cheese strawberry Danish first thing in the morning. I promise it doesn’t take up a lot of time, it just requires plenty of rest.
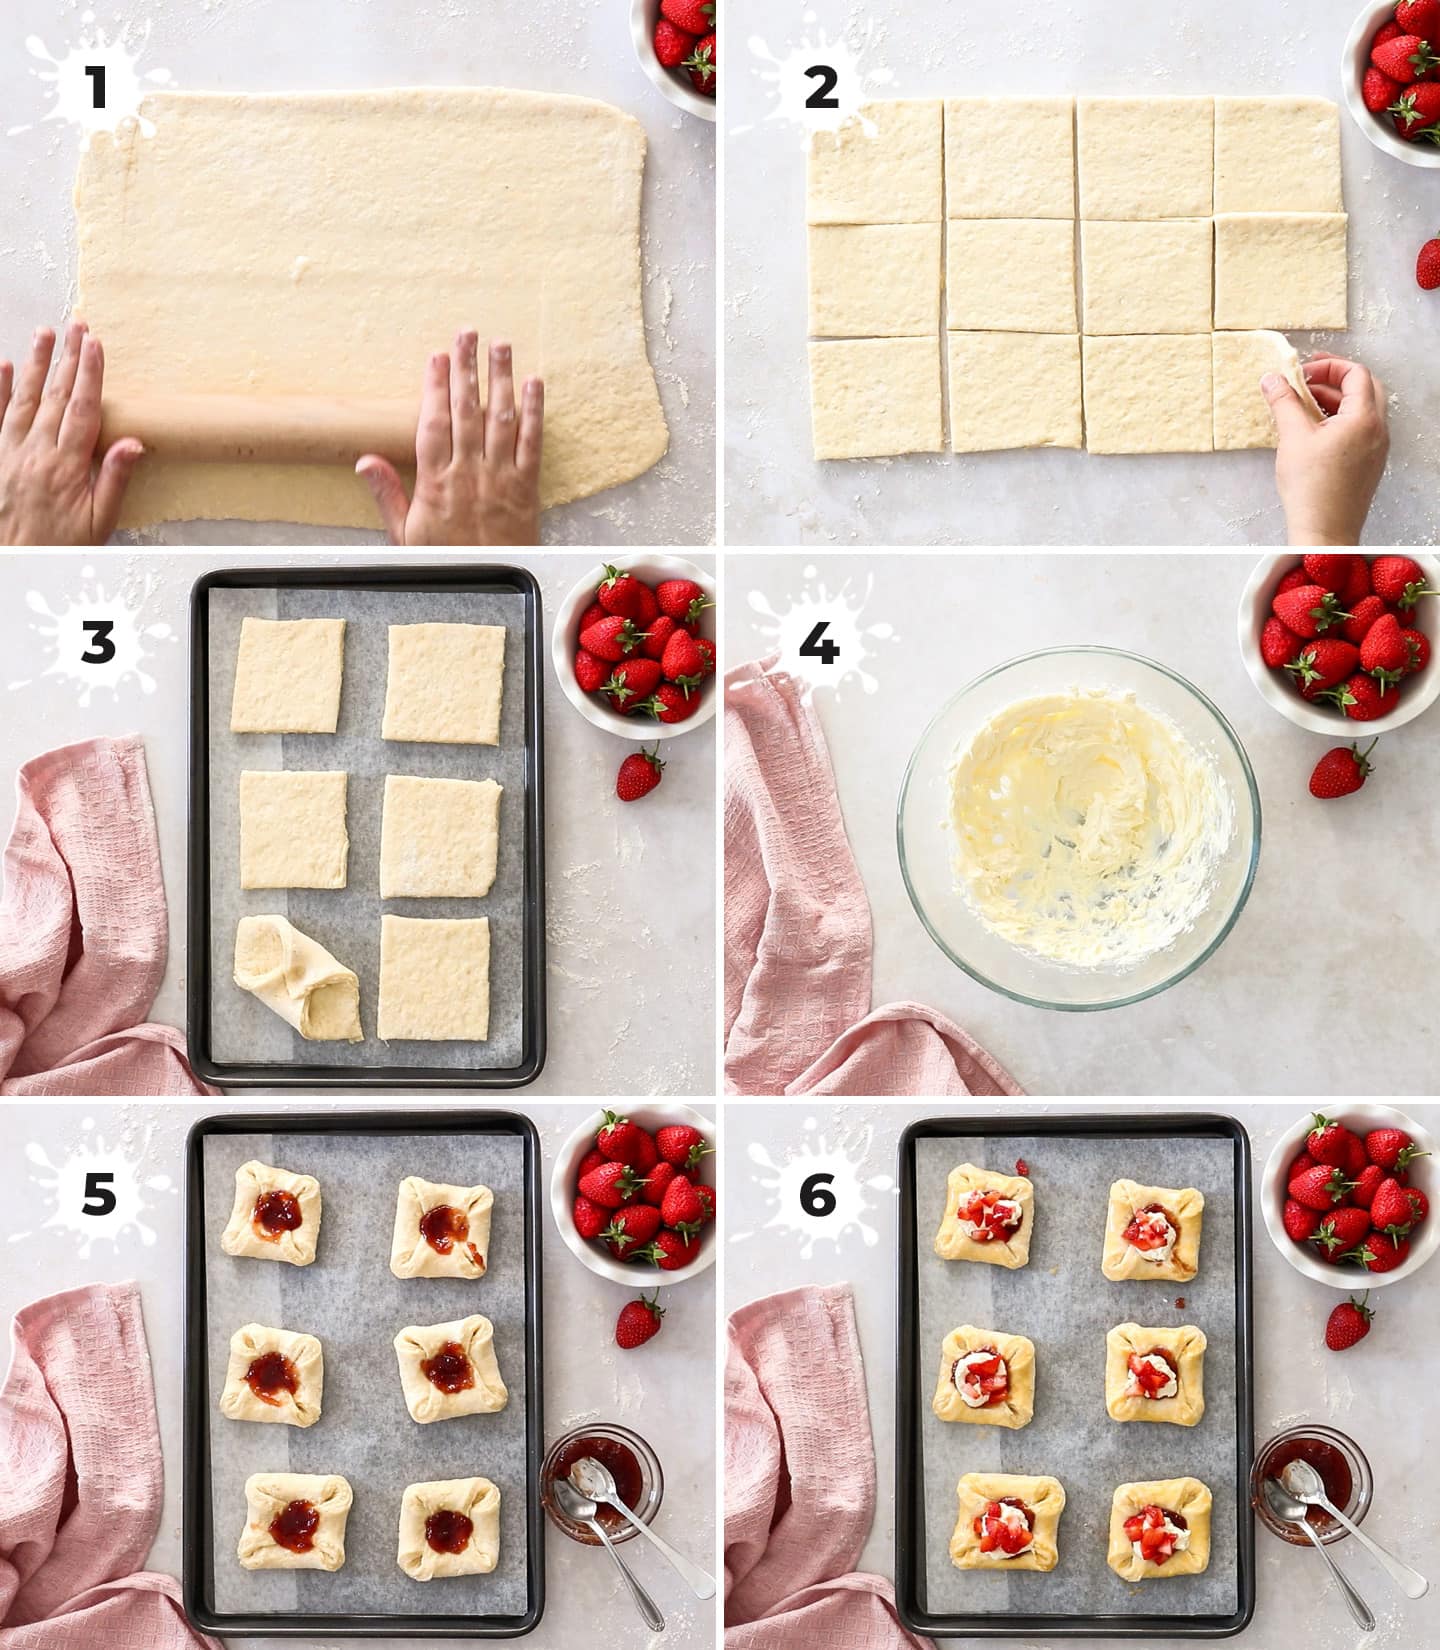
- Roll out the dough: Roll the dough out into a large rectangle (photo 1) and cut out 12 or 20 squares from it (photo 2). Obviously 12 will give you larger pastries while 20 will give you smaller ones but the latter are still nearly the size of my palm.
- Shape the danishes: Dab a little dot of water in the centre then fold each of the 4 corners into that centre point (photo 3), pressing each down firmly to stick. Let them rest while you make the filling.
- The filling: Cut up fresh strawberries into small pieces. In a bowl beat together cream cheese, sugar, milk and lemon zest (photo 4).
- Fill the danishes: Fill the centres with a little dot of jam and press it into the centre (photo 5). Top the jam with the cream cheese mixture, spreading it down over the jam so it doesn’t escape. Dot the top with strawberry pieces, then brush the exposed pastry with egg wash (photo 6). Sprinkle over demerara sugar then bake until golden.
Tips and tricks
- Plan ahead: These strawberry Danish don’t take much hands on time, but the dough does need to rest for an extended period.
- Start the day before: If you make the dough in the morning (takes all of 10 minutes) then rest it, then roll and fold (another 10 minutes) in the evening, the dough is now ready to turn into danishes, first thing in the morning.
- Cream cheese should be softened: Make sure the cream cheese is softened and you can literally beat the cream cheese filling together with a spatula in 2 minutes.
- Don’t overfill: Be careful not to overfill your danishes or it may just run off the sides. The amount of jam and cream cheese don’t seem much but it’s the perfect amount to fill them.
- Egg wash not negotiable: The egg wash is so important for getting a gorgeous shiny, golden exterior.
- Nor is the demerara (turbinado) sugar: Ok, technically it’s optional but the big granules of sugar add an unbeatable crunch to these pastries.

Variations
- Other fruits: You can use just about any fruits you like here. Berries are classic on breakfast pastries so try your favourite – blueberries, blackberries, raspberries. All are yum. Oh, and cherries. This fresh cherry sauce (leave behind some of the juice) or cherry pie filling works a treat.
- Too much dough: This Danish pastry dough can be frozen so if you don’t want to make a full batch, just cut the prepared dough in half (after the roll and fold), wrap one half well in plastic wrap and freeze until needed.
- Braid it: Turn this into a pastry braid. Using just half the dough, roll it out to about ¼ inch thick. With the long side facing you, use a sharp knife to cut the left and right thirds of the dough into strands about ½ inch thick, leaving the centre third completely intact. Spread the jam followed by the cream cheese down the middle, top with fresh strawberry pieces then fold the strands over the top – one left, one right and so on over and over until you get to the end. Brush with egg wash, sprinkle with demerara and bake until golden.
Storage
- Leftover pastries should be stored in the fridge, in an airtight container for up to 3 days. Let them come to room temperature before eating or place them in the oven for 10 minutes to warm and crisp them again.
- The dough can be frozen. This means you can freeze half and make a smaller batch now and one later. You can even prepare and fill the individual pastries (leaving off the fresh strawberries) and then place them in an airtight container in the freezer for up to 3 months.
PIN IT:
Click to PIN this recipe for later!

If you try this strawberry Danish recipe, please take a moment to leave a rating and comment below. I love hearing from you, and it helps other readers too!
More recipes you’ll love
- Spandauer (Jam and Marzipan Danishes)
- Puff pastry blueberry turnovers
- Lemon Danish Pastry
- Strawberry puff pastry tart
- Puff Pastry Cherry Strudel
- Strawberry Cream Puffs
- Homemade Strawberry Topping
- Bear claw pastry
Never Miss a Recipe!
Get the latest recipes straight to your inbox!

Video
Ingredients
- 1 batch homemade Danish pastry
- 125 g full-fat cream cheese, softened (4oz)
- 1 tablespoon granulated white sugar (notes 1)
- 2 teaspoons milk
- Zest of half a small lemon
- ¼ cup good quality strawberry jam
- 12 small fresh strawberries
- 1 egg yolk mixed with a dash of water
- 1 teaspoon demerara (turbinado) sugar
For best results, always weigh ingredients where a weight is provided
Instructions
- DAY BEFORE: Make the Danish pastry.
- Preheat the oven to 200C / 395F / 180C fan forced. Line 2 baking trays with baking paper.
- SHAPE THE DANISHES: On a lightly floured surface, roll the dough out to just over 30x40cm (about 12×16 inches). Trim the edges from the rolled dough, then cut into 12 even squares about 10cm / 4in square (4 from the long side, 3 from the wide side). For smaller pastries, cut them into 20 pieces rough 8cm square (so cut the dough 5 squares long x 4 squares wide)
- Place the squares of dough onto the baking sheet / trays (6 on each), dot just a touch of water in the centre, then fold each of the corners into the centre. Press the centres down a little to make a dent. Let them rest for 10-15 minutes
- THE FILLING: Wash, dry and cut the strawberries into small pieces and set aside.
- Add the cream cheese, sugar, milk and lemon zest to a medium bowl and beat together until smooth. You can use an electric mixer or just a spatula.
- FILL THE PASTRIES: The following quantities are written for 12 or 20 pastries respectively.
- Place ½ -1 teaspoon of jam into the dent of each pastries, pressing it in slightly.
- Top the jam with 1 – 2 teaspoons of cream cheese mixture, then use a spoon to gently fan out the edges, so that it covers the jam (this just helps to keep the jam in place when they bake).
- Scatter the tops with the fresh strawberry pieces.
- Brush the exposed pastry areas with the egg wash and sprinkle the demerara sugar around the edges.
- Bake for 18-22 minutes (depending on size) or until golden brown, turning the trays after 10 minutes.
- Please take a moment to rate this recipe. I really appreciate it and it helps me create more recipes.
Notes
- Tablespoons: I use a standard Australian 20ml tablespoon (equal to 4 teaspoons).
- This recipe should be started the day before so the dough can rest (a minimum of 10 hours in total).
- Can I use puff pastry? Yes, you can use frozen puff pastry however the texture will be different. Still flaky but crisp right through instead of soft inside.
- All ovens vary, check for doneness 2-3 minutes before the recipe suggests.
- Serving: Lovely served warm or room temperature.
- Storage: Leftover strawberry danishes can be stored in an airtight container in the fridge for up to 3 days.
- Freezing: Dough can be frozen so you can freeze half for up to 3 months and make a smaller batch of pastries.
This post may contain affiliate links that earn me a small commission for my referral, at no extra cost to you. Thank you for supporting Sugar Salt Magic.


18 Comments on “Cream Cheese Strawberry Danish”
This was super helpful!!!
Great, thanks Kylinn.
Can I use frozen Strawberry 🍓?
I personally wouldn’t as they don’t have the same nice texture as fresh and don’t tend to look as nice either.
Delicious!!! Turned out great!
So happy you love it, Autumn. Thanks so much for dropping back to review 🙂
I made these with fresh raspberries and blackberries and they were amazing. I used your recipe for the Danish dough as well. Yum.
I’m so happy you love them, Misty. Thanks so much for trying my recipes 🙂
These were amazing and pretty easy to make. Thanks for sharing this recipe!
So happy you love them, Ryan.
Hello and thank you for sharing this delicious looking recipe! Quick question: if I make these pastries and freeze prior to baking, should I add the topping of fresh strawberries immediately before baking? And how would you adjust the baking time for frozen pastries straight out of the freezer?
Not many people make danish from scratch. I was so excited to find your recipe! Thanks again!
Hi Alexandra. So happy I could create this recipe. Yes, they’ll freeze fine with toppings. I find it best to freeze them in a single layer on a tray. If you want to freeze them more than just overnight, once they’re solid transfer them to an airtight container with baking paper between them. You can bake them from frozen, although, I’d move them onto a new tray (you don’t want to damage your baking tray by going straight from freezer to hot oven). They may take an extra 5-10 minutes to bake from frozen.
Delish. Will definitely be making this again.
So happy you love them, Victoria.
These came out amazing! I made them today. I followed your How to make danish pastry recipe followed by this recipe. They where the best Pastries I’ve ever eaten!
You’ve made my day, Colleen. I’m so happy you love this recipe and truly appreciate you trying it.
These Danish pastries look fantastic Marie! They’re so flaky and beautifully golden. And I do love the combination of cream cheese, strawberry jam, and fresh strawberries – great flavour combination!
Thanks so much, Ben.