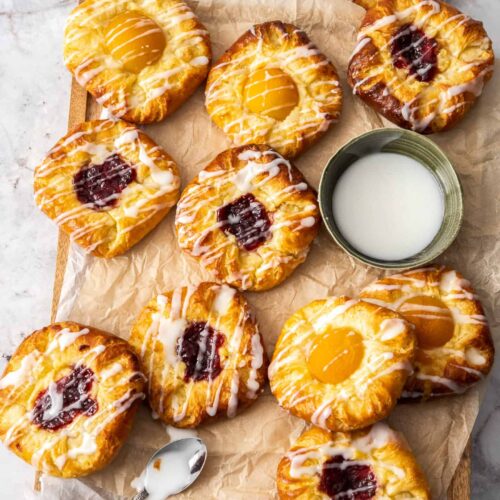

Custard Danish? Apricot Danish? Jam Danish? Pick your favourite or combine them all, this custard Danish pastry recipe can be made ahead of time for fresh buttery pastries for breakfast.
I make these with my easy Danish pastry dough but you could also use a good quality puff pastry. Try these Lemon Danish Pastry too. Or, if you feel like a savoury breakfast try this puff pastry breakfast tart.

Why you’ll love this recipe
The classic custard Danish pastry, also known as Spandauer, are popular for good reason. Spandauer generally have a filling of either custard or marzipan and are topped with jam. Try my marzipan spandauer recipe too.
Imagine biting into buttery, flaky dough that’s crisp on the outside and soft on the inside. Then the soft Danish pastry filling of custard and jam or apricots. Sweet but not too sweet and totally satisfying.
Don’t be intimidated by making your own Danish pastry too. You can make it ahead of time even to the point of having these fully assembled and ready to bake fresh in the morning.
Never Miss a Recipe!
Get the latest recipes straight to your inbox!
Table of contents
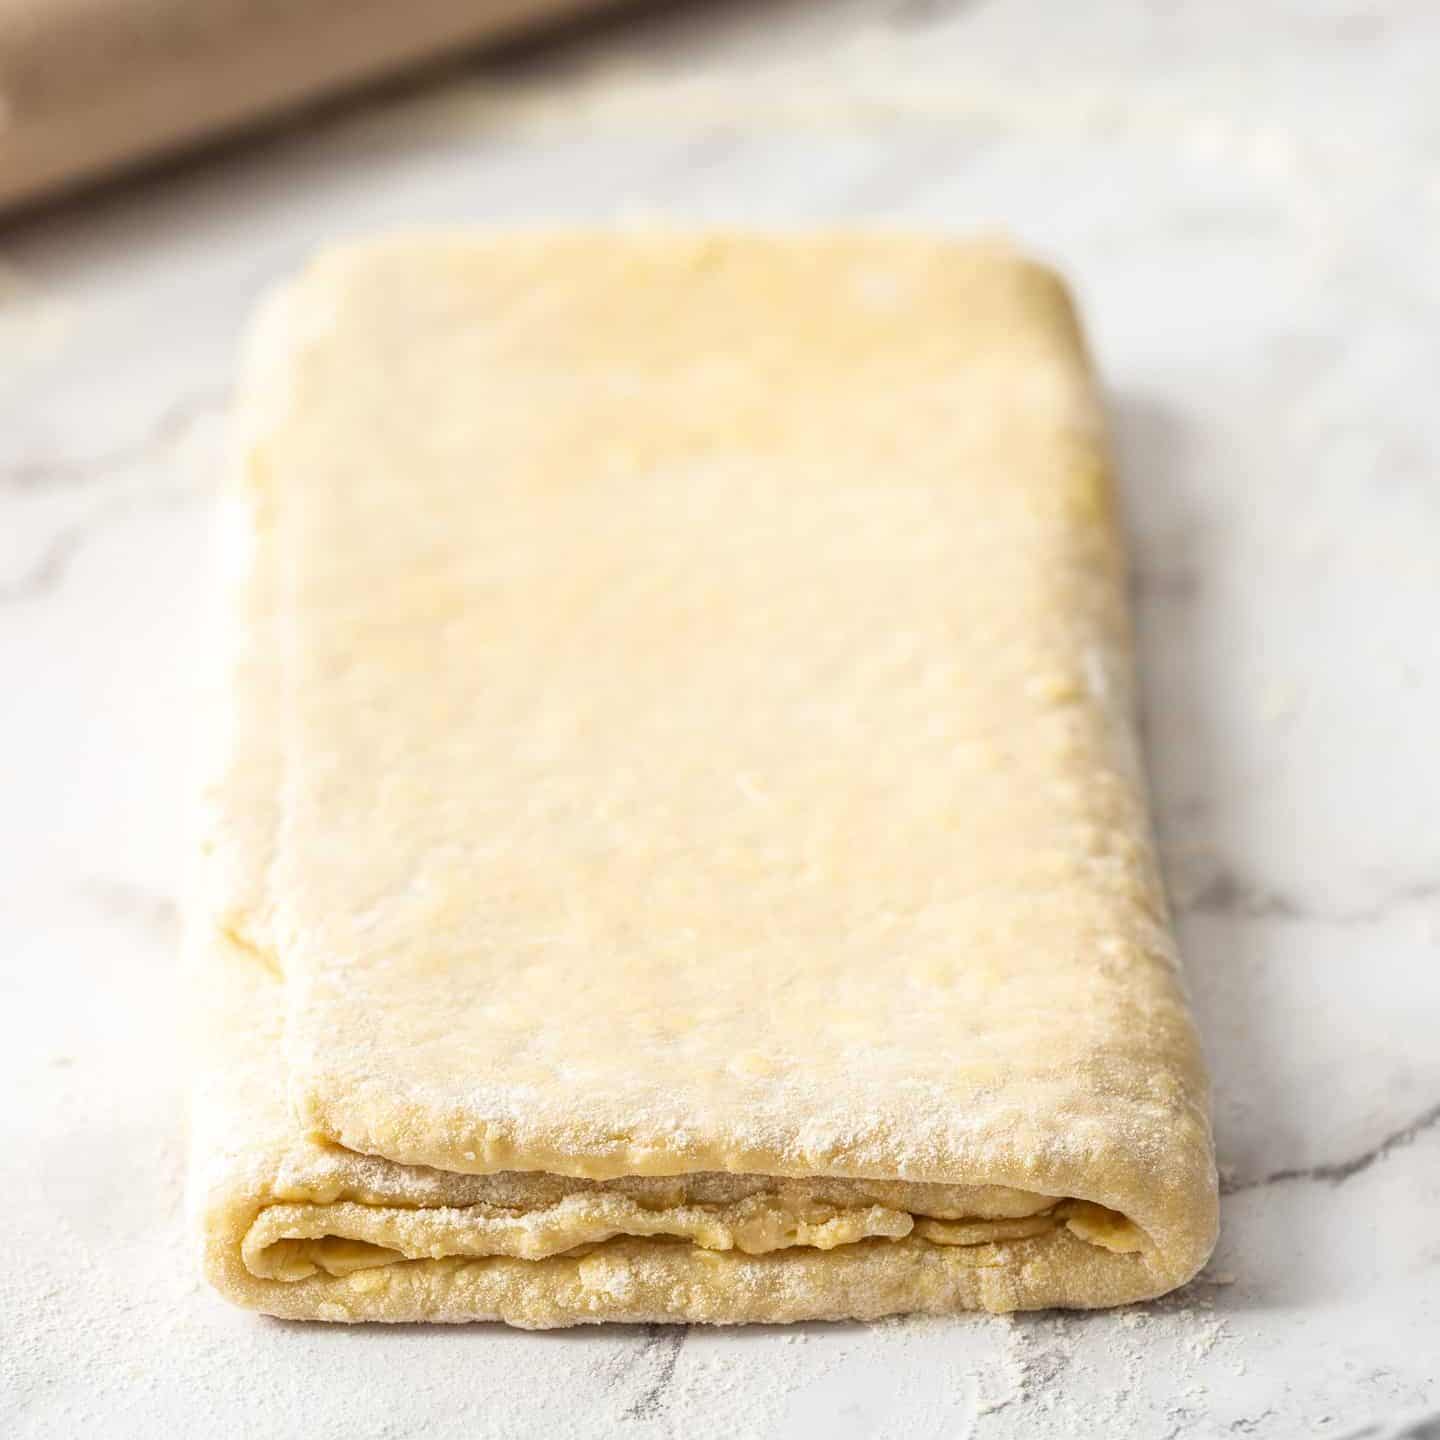
The laminated dough?
You’ll start with a simplified version of Danish pastry dough. It’s a yeasted, laminated dough (laminated meaning layered with butter, essentially).
You can check out my recipe and, while there is a bit of resting time involved, there is very little hands on time. All up I can make these pastries, completely from scratch, in only 45 minutes active time. You’ll just need to plan ahead for resting time and you won’t be disappointed.
Ingredients you’ll need
These simple custard Danish pastry need 9 ingredients (that’s including the already made dough).

- Dough: As mentioned above, this is an easy Danish dough. The method is simplified but the result is perfect. Buttery, layered, flaky pastry. Plan ahead to allow for resting but if you really don’t want to, you can use puff pastry.
- Apricots / Jam: Do you like an apricot Danish or jam Danish? I love the jam version but the apricot version is very popular too. You could make a combination like I have here.
- Milk: Part of the easy custard recipe that takes less than 10 minutes to make.
- Sugar: Just a little as we want the custard to be sweet but not overpoweringly so.
- Eggs: You’ll need two egg yolks only. One to go into the custard and one to brush the danishes with before baking.
- Cornflour: This is used as a thickener for the custard.
- Icing sugar: The icing drizzled over the top is a simple mix of icing sugar and water.
How to make custard danish
Make sure to plan ahead if you’re making the dough from scratch. The dough can be made and frozen until required – just thaw it in the fridge overnight.

- Make the custard: Heat milk sugar and vanilla (photo 1) in a small saucepan until steaming. In a bowl combine the egg yolk, milk and cornflour (photo 2). Slowly pour the warm milk into the egg mixture (photo 3) before returning it to the stove to get very thick (photo 4).

- Roll out the dough: Roll the dough out to a rectangle about 30x40cm (roughly 12×16 inches) then trim off the edges with a sharp knife (photo 5). Cut the rectangle into 12 even squares (photo 6).
- Assemble the custard Danish: Fold each of the corners into the centre and press down to stick (photo 7). Let them rest for a little before making a dent in the centre (photo 8) that you’ll fill first with custard (photo 9) then with jam or apricot halves (photo 10). Bake.
They really are simple to assemble and this is one of the easiest Danish pastry shapes you can do.
Want to try your hand at choux pastry? Give these chocolate chouxnuts a try.

Can I make them ahead
You can make these custard Danish pastry ahead of time. Prep and assemble them the day before you want to bake them and keep them covered in the fridge. When you want to bake them you can do so, straight from the fridge.
You can also freeze them and bake directly from frozen.
Pro tips and tricks
- Plan ahead: If you’re making the dough, it’s easy but does need time to rest so start that at least 24 hours prior. You can see all my tips for getting this made ahead of time in my Danish pastry dough post.
- Use a sharp knife: When trimming the edges and cutting the squares, make sure to use a very sharp knife. If your knife is blunt you may press all those layers together and it wont’ rise as nicely.
You could try these breakfast pastries with blueberries or cinnamon apple as well.

More sweet breakfast recipes you’ll love
- How to make Danish Pastry Dough
- Spandauer (Jam and Marzipan Danishes)
- Puff pastry blueberry turnovers
- Cream cheese strawberry Danishes
- Easy Jam Tarts
- Blueberry Cinnamon Rolls
- Caramel Apple Cinnamon Rolls
- Jumbo Swedish Cinnamon Buns
- Bear claw pastry
If you try this custard Danish pastry recipe, please take a moment to leave a rating and comment below. I love hearing from you and it helps other readers too! You can also take a photo and tag @sugarsaltmagic on Instagram.
Hungry for more? Subscribe to the newsletter for free recipes straight to your inbox. Also, follow along on Facebook, Pinterest and Instagram.

Ingredients
- 1 batch Danish Pastry
- ¾ cup whole milk (180ml)
- 2 tablespoons white granulated sugar (notes 1)
- 1 teaspoon vanilla extract
- 1 ½ tablespoons cornflour (cornstarch) (notes 1)
- 1 egg yolk from a large egg
- Jam of choice or 12 apricot halves
- 1 egg yolk mixed with a dash of water
- 1 cup icing sugar (130g / 4.6oz)
For best results, always weigh ingredients where a weight is provided
Instructions
FOR THE CUSTARD DANISH RECIPE
- Pour ½ cup of milk into a heavy based saucepan, and add sugar and vanilla, then heat on low-medium heat until steaming, stirring regularly to dissolve the sugar. Remove from heat.
- In a large bowl, whisk together the remaining ¼ cup milk, egg yolk and cornflour until smooth and fully combined.
- While whisking, very slowly pour the hot milk mixture into the egg mixture in a slow but steady stream. Don’t pour it too quickly or the heat will scramble the eggs.
- Once everything is combined, return the mix to the saucepan. Heat over medium heat, stirring with a whisk constantly, until it gets very thick and no longer settles into itself when you move it around. This will happen quite quickly after about 5 minutes so it’s important to keep gently whisking increasing intensity as it gets very thick. You will end up with lumpy custard if you don’t.
- Swap to a silicone spatula and pass the custard through a strainer into a clean bowl, then press plastic wrap to the surface and allow to cool to room temperature
- Preheat the oven to 200C / 395F / 180C fan forced. Line 2 baking trays with baking paper.
- On a lightly floured surface, roll the dough out to just over 30x40cm (about 12×16 inches). Trim the edges from the rolled dough, then cut into 12 even squares about 10cm / 4in square each.
- Place the squares of dough onto the baking trays (6 on each), then fold each of the corners into the centre of each square. Press down lightly with your palm. Let them rest for 10-15 minutes
- Use a spoon or similar to press a dent into the centre of each danish, then brush all over with the egg wash.
- Add 2-3 teaspoons of custard to dent in each pastry. Top each with 1-2 teaspoons of jam or an apricot half.
- Bake for 20-22 minutes or until golden, turning the trays after 10 minutes.
TO MAKE THE ICING
- Mix together the icing sugar and 1 tablespoon of water. Add more water if you need to thin it or more icing sugar to thicken it. When it’s a consistency you like, drizzle it over the warm pastries.
Notes
- I use a standard Australian 20ml tablespoon (equal to 4 teaspoons).
- All ovens vary, check for doneness 2-3 minutes before the recipe suggests.

This post may contain affiliate links that earn me a small commission for my referral, at no extra cost to you. Thank you for supporting Sugar Salt Magic.
29 Comments on “Custard Danish Pastry”
This recipe…. AMAZING. Thank you. Freshly grown apricots were added and fresh apricot jam. I wish I could post a picture because this recipe is going to be saved, for all variations of Danish Pastry. Thank you! -Australia
Makes my day to hear this, Hayden. Happy baking and thanks so much for dropping back to leave a review.
Mine ended up quite bready. I must have added too much flour while rolling them out. Buy the dough was so sticky. And tips appreciated. I’m going to try again.
Hello Audg. That’s right. Danish dough is more bread-like that something like croissants, for instance. If it’s really bready with no visible layers on the outside, then it may be because the butter was too soft and got too worked into the flour. Try to use a really light touch as the pieces of cold butter are what will turn to steam and create layers. Also, yes, it’s meant to be sticky. Not so sticky that you can’t handle it at all but do try to resist the urge to add too much flour or it will make it more bready and dense. If you have a bench scraper and/or dough scraper these are so helpful when making doughs 🙂
I had no ads or pop ups do that must be a setting in your browser. Wonderful website and mouth watering recipes. Thank you
Thank u for sharing
You’re welcome. Thank you so much for your support, Camille.
I love your recipe but don’t like your website. Way too many pop up’s and advertising. I realize it pays the bills but would not go on your website again. Sorry
Hello Bob. Thanks for your thoughtful feedback. I am acutely aware of user experience and for that reason have NO pop ups on my site and I allow less ads that many bloggers. Recipe creation doesn’t just need the website, it takes hour upon hours of testing, researching, writing, editing plus costs for ingredients and equipment. To be able to provide recipes to my readers for free, I have ads on the site. I don’t think scrolling past a few ads is much to ask for a free service but there is always the jump to recipe button at the top of the page so you can skip them all entirely.
Bob, what an ass of a thing to say…this is the same as those folks who whinge about having to Q up to get a free beer, or having to fill out a questionnaire to get a free burger…You should have just said thanks for the recipe and left…
Appreciate your support, Beverley. Thanks so much.
Hi. Cam Ibuse bpxed pudding mix instead?
Hello Naunnie. Sorry, I’ve not tried boxed pudding mix and don’t even know if it can be baked.
3 teaspoons is 15 ml or 1 tablespoon
Not in Australia, it’s not. I use a standard Australian tablespoon which is 20ml (4 teaspoons).
Hi just wondering if I’m using store bought puff pasty do I need to roll it out
Hello Emily. If you’re using puff pastry sheets, you won’t need to roll them out but if you get it in block form, you will need to roll it out.
Amazing! Went down a treat
So happy you love them, Jackie.
I’d love to make this recipe it looks fabulous, just to clarify do you not have to let them proof after forming before you bake?
You’ll just let them rest for 10-15 minutes (step 8). Happy baking, Elaine.
Thank you so much for replying so quickly I’ll let you know how it goes when I make this
Can’t wait to hear, Elaine.
Hi Marie,
I baked these custard danishes today and they turned out fantastic. My entire family loved it. Thank you so much.
I’m a little confused though about the 2 baking temperatures mentioned, ie. 200C and 180C?
I preheated at 200C and then baked the batch at 200C for 20 mins, turning the tray at 10 mins.
They turned out beautiful except the bottom burnt a little bit.
Any idea what I could do to correct this? Am I baking at too high a temperature? Should I reduce to 180C after 10 mins?
Hello Rhea. So happy you all love them.
The 200C is for conventional oven and 180C for fan forced. So, if you’re using a fan forced oven, 180C is what you need to set it on. If using conventional, the 200C is correct but maybe you put the tray too close to the bottom of the oven or your oven may be running a bit hot (not unusual). Either way, 180C should work for your oven perfectly. Let me know when you try them again.
These turned out perfect – everyone loved them. I used a blackberry jam.
Thanks so much for your support
Oh my goodness, these Danish pastries look phenomenal Marie! As I’ve already mentioned earlier, they look so positive and beautiful – just like sunshine. Everyone needs one or two of these to boost their happiness 🙂 I’ll take 3 with apricots and one with jam, thank you very much 🙂
Thank you so much Ben.