Why you’ll love them
All the right kinds of chewy, dense and sweet, these Oreo blondies are absolutely scrumptious.
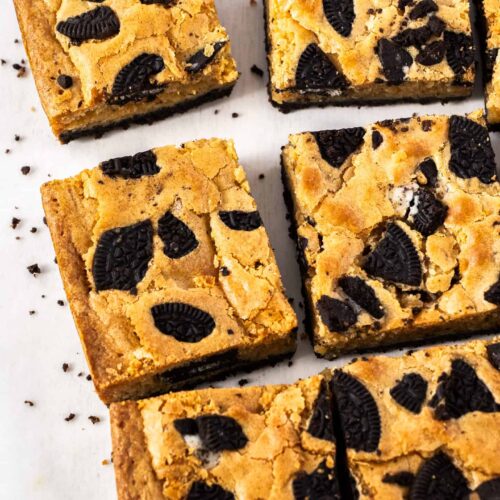
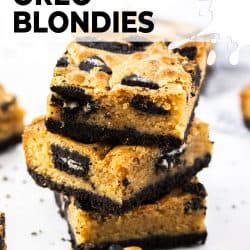
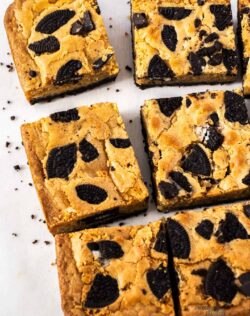
The texture is just right with a dense, rich and soft centre and chewy edges. It’s all sandwiched between an Oreo cookie base and pieces of cookie on top. So, with a crunchy base, crunchy bits on top – it’s like texture overload in the very best way.
How about the flavour? Well, these Oreo blondies are buttery, sweet and creamy with a hit of chocolate cookie. The batter has just a hint of white chocolate which adds to that creamy flavour.
They’re extra indulgent and comforting when warm so do yourself a favour and give them a short burst in the microwave to warm them slightly and you’ll be in blondie bliss!
And if you’re a true blondie lover, you should definitely try these Macadamia Caramel Blondies and Raspberry Chocolate Chip Blondies too.

Never Miss a Recipe!
Get the latest recipes straight to your inbox!
Ingredients in cookies and cream blondies
You should have most of these everyday ingredients in your pantry already.

Jump to the recipe for full ingredients and instructions.
- Oreos: I use regular Oreos in these blondies but, to be honest, you could use any cream filled cookie, or any flavour of Oreo.
- Eggs: Eggs help with the texture, flavour and structure.
- White chocolate: There isn’t a lot of white chocolate in these blondies – just enough to add fudgy texture and add a little creaminess to the flavour to give that real cookies and cream flavour. White chocolate in block form or white chocolate chips will both work though blocks normally melt a little easier.
- Sugar: I use white and brown sugar in these. Brown sugar has added moisture and adds chewiness to the brownies.
- Butter: I use unsalted but you could use salted and get a nice sweet and salty flavour, though I’d leave out the additional salt in this case.
- Baking powder: Blondies don’t need a lot of lift as you don’t want to lose the fudgy texture, so just a little baking power is perfect.
- Vanilla: Adding some vanilla extract adds to the cookies and cream flavour.
- Flour: All you need is plain flour / all-purpose flour.
- Salt: Only add this if you are using unsalted butter.
How to make Oreo blondies
Oreo blondies are so easy to make, with just one bowl for the batter and a food processor or blender for the base.

Jump to the recipe for full ingredients and instructions.
- The Oreo base: Blend or process Oreos to crumbs, then mix in a little melted butter. Press the mixture into the base of a lined 8 inch square pan (photo 1).
- The batter: First whisk together the dry ingredients, then add the wet ingredients (photo 2) and mix it all together. Spread the blondie batter over the Oreo base (photo 3).
- The topping: Add some chopped Oreo cookies to the top (photo 4) and gently nudge them down into the batter, then bake.

Tips and tricks
- The melted butter and chocolate: Make sure both the melted butter and chocolate have cooled slightly. You don’t want to add them to the batter whilst hot. Warm is fine.
- Let them cool in the tin: This gives them time to do their final cooking as they cool and allows them to set nicely.
- Cut them when they’ve cooled: If you try to get them out of the tin while they’re still warm, Oreo blondies can break into pieces – albeit delicious pieces. Let them cool completely before removing them from the tin and cut with a very sharp knife.
- Use an 8 inch tin: A smaller or larger tin will adjust the cooking time and you may end up with undercooked or cakey blondies as a result.
- Want even more Oreos? No problem – feel free to add 2-3 more Oreos to the top or even into the batter.
Storing your blondies
Keep your Oreo blondies perfectly soft by storing them in an airtight container in a cool placed, like the pantry.
These are best eaten at room temperature or slightly warm. Wherever you store them, pantry or fridge, do yourself a huge favour and heat them in the microwave for 10 to 20 seconds – 10 for room temp and 20 for fridge cold. This makes them taste extra indulgent and totally comforting
They’re best eaten within 3-4 days but can also be frozen very successfully.

More Blondie recipes you’ll love
Did you try this Oreo blondies recipe?
Leaving a comment and rating below the recipe is so helpful!
Hungry for more? Subscribe to the newsletter for free recipes straight to your inbox. Also, follow along on Facebook, Pinterest and Instagram.
Ingredients
- 28 Oreo cookies (2 packets / 266g / 9.4oz)
- 57 g unsalted butter, melted & slightly cooled (¼ cup / ½ stick / 2oz)
- 130 g plain (all-purp) flour (1 cup / 4.6oz)
- ¼ teaspoon baking powder
- ¼ teaspoon salt
- ½ cup granulated sugar (100g / 3.5oz)
- ½ cup light brown sugar, packed (100g / 3.5oz)
- 113 g unsalted butter, melted & slightly cooled (½ cup / 1 stick / 4oz)
- 2 ½ teaspoons vanilla extract
- 2 large eggs
- 50 g white chocolate, melted & slightly cooled (1.8oz)
For best results, always weigh ingredients where a weight is provided
Instructions
- Preheat your oven to 180C (160C fan forced) / 350F. Line an 8×8 inch square baking pan with baking paper.
FOR THE BASE
- Set aside 6 cookies, then place the rest into a food processor and blitz to crumbs. Mix together with the ¼ cup of melted butter then press the mixture into the base of your prepared pan.
- Break the remaining cookies into quarters and set aside.
FOR THE BLONDIES
- Combine the flour, baking powder, salt and both sugars in a large bowl and mix well until there are no lumps left. '
- To the flour mixture, add the melted butter, melted chocolate, eggs and vanilla and fold until just combined.
- Spread the batter over the base as evenly and level as possible. Scatter the Oreo chunks over the top and press them in gently.
- Bake for 35-40 minutes until the top is dry and golden and a toothpick comes out clean.
- Leave to cool completely in the tin to room temperature before using the edges of the baking paper to lift it out. Then cut into slices and serve.
- Please take a moment to leave a comment & rating. It's appreciated and so helpful.
Notes
- I use a standard Australian 20ml tablespoon (4 teaspoons worldwide)
- For best results you should always weigh ingredients like flour and sugar. Kitchen scales like these are relatively cheap but if you can’t weigh the ingredients, use the spoon and level method (don’t scoop).
- All ovens vary. What takes 40 minutes in my oven may take 35 or 45 in yours. Many ovens also don’t heat evenly or may even run hot or cold so it’s a good idea to keep an oven thermometer in the centre of your oven at all times. They’re very cheap and are a good back up.
- Nutrition details are approximate only – scroll below the recipe to find the full nutritional information.
This post may contain affiliate links that earn me a small commission for my referral, at no extra cost to you. Thank you for supporting Sugar Salt Magic.
4 Comments on “Oreo Blondies”
This recipe is the bomb!!!! Easily made by Mr 11 solo and very yummy. Looks fantastic so great for gifting too. Like all @sugarsaltmagic recipes we’ve tried…. We would recommend it and it will become a regular.
Thanks so much CD. I’m so happy you and Mr 11 loved them. So great to hear that kids enjoy making these too.
These are to die for! I’ve always been a big fan of blondies, and the cookies and cream twist is just perfect!!
oh I looove blondies. Thanks so much Katherine 🙂