
Why you’ll love it
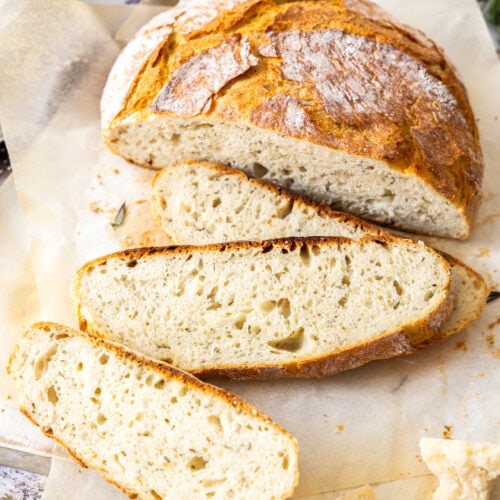
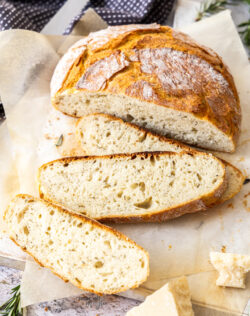
Aside from being no-knead (aka so easy), this rosemary parmesan bread is full of flavour too. With as little as 1 ½ hours rising time or the amazing added flavour from an overnight rise, this gorgeous no-knead loaf results in soft, airy bread with a thick artisanal-style crust.
Like with any yeasted bread recipe, you will need to plan ahead for rising time but this bread takes about 10 minutes of actual effort and I just know you’ll love it.
This no knead bread recipe is made in a dutch oven which acts as a mini steam oven to give it that sensational artisanal looking crunchy crust. It’s the easiest bread to make at home requiring no stand mixer, no kneading, no expert knowledge and no poolish or starter to get it going. With a couple of tweaks, you could even make it without a dutch oven.
On top of all of that amazing-ness, it’s flavoured with parmesan and rosemary and so good slathered with butter while it’s still warm from the oven. It’s easy to change up the flavours too. You could add olives, garlic, thyme and I’ve even made it successfully with sundried tomatoes. Delicious!
Try serving this crusty bread with this tomato confit.

Never Miss a Recipe!
Get the latest recipes straight to your inbox!
Ingredients you’ll need
This rosemary parmesan bread has some very simple ingredients but a few are worth explanation.

Jump to the recipe for full ingredients and instructions.
- Bread flour: While you could get away with plain flour (aka all purpose flour) you’ll get the absolute best result with bread flour. It has a higher protein content which gives it a more classic chewy texture that you get from bread (as opposed to the softer texture you’d get in cakes).
- Yeast: Instant dry yeast is perfect here. Active dry yeast works in the same quantities and with no other changes to the recipe.
- Sugar: You only need a little sugar which feeds the yeast to help it grow. You can swap the white granulated sugar for brown sugar, honey or even maple syrup.
- Rosemary: Use fresh rosemary for the best flavour and the most amazing aroma. That said, dried rosemary does work but you’ll need to cut it down to 2-3 teaspoons.
- Parmesan cheese: Please use a block of parmesan / Parmigiano Reggiano and shred it yourself. It’s not only a much better flavour than the shelf-stable stuff or the pre-shredded variety that has a more stale flavour, but home grated parmesan doesn’t have any coatings (the way pre-shredded ones often do to stop the shreds sticking together).
- Flaky sea salt: While this is totally optional, if you’re feeling a bit extra and want a truly savoury bread, a sprinkle of sea salt flakes on the top right before baking is lovely. However, every time I remake this, I totally forget to put it on and the bread does not suffer from not having it on top.
How to make no knead dutch oven bread
This no knead bread is seriously simple to make. Using a dutch oven will give it the best crust however you can still get good results without one. See my notes at the end of this section.
Jump to the recipe for full ingredients and instructions.

- Activate the yeast: While instant yeast does not technically require this step, active dry yeast does. I do it even though I use instant so that I know the yeast is actually working before adding the remaining ingredients only to find out it doesn’t rise. Just add the yeast to warm water and sugar (photo 1), and let it sit for 5-10 minutes until it gets frothy (photo 2).

- Add everything else: Add the remaining ingredients (photo 3) then stir them together with a wooden spoon (or just a stiff spoon) until you have a sticky, shaggy dough (photo 4).
- First rise: Now let it sit and rise until doubled in size (photo 5). It will look all puffy with lots of air pockets. You can either do this at room temperature for about 1 hour or overnight in the fridge for an even better flavour.
If you are doing the fridge rise no-knead bread, you would cover the mixed dough with plastic wrap, then let it rise in the fridge for 12-18 or even up to 48 hours.

- Fold and rise: Now you simply want to fold it, a bit like an envelope with each of the four sides (or think of compass points – north, south, east and west) folded into the centre (photo 6). Now let it rest (photo 7) and rise again – this time it will take 30-45 minutes.

- Shape and bake: So close now! Tip the dough out onto some baking paper after the second rise, dust with a little flour and shape into a round (photo 8). If it seems to be too loose and is not really holding a decent circle shape, just gently add a little flour shaping it as you do until it does. Drop it into a pre-heated dutch oven (photo 9) and bake with the lid on for 30 minutes. Remove the lid (photo 10) and bake for a further 12-15 minutes until golden brown on top.
- Let your parmesan rosemary bread cool just slightly on a cooling rack if you want to eat it warm or fully to room temperature if that’s how you’re going to serve it. Then use a serrated sharp knife to slice it.
What if I don’t have a dutch oven?
You can still make this no-knead bread without a dutch oven.
Just add a tray of hot water to the bottom shelf of the oven, while the bread sits in a cake pan or simply on a baking tray – the water will effectively turn your oven into a steam oven to give you that crispy crust. Whenever I make baguettes at home, this is the exact method I use.
Rising time
This bread can rise or proof in as little as 90 minutes total (broken up into two proving times) just like a regular bread loaf, but you’ll get an even more outstanding flavour and texture from an overnight rise in the fridge.
The bread also gets a better rise from the overnight rise and it means you can have fresh bread at breakfast or brunch. The colour difference in the images below of the middle of the bread is purely from the angle of daylight. Both rises result in the same colour in the bread.

Tips and tricks
- Activate the yeast first: Even if using instant yeast, where this is not necessarily required, it will show you straight away if your yeast is good or expired. I always do this for any yeasted bake I make, from bread to cinnamon rolls to Danish pastries.
- This dough is, and should be, sticky: The moisture in the bread dough, creates a lovely soft bread. Don’t worry, you don’t need to handle it too much and light hands dusted in flour or rubbed with a little oil make it very easy.
- Preheat the Dutch oven: You’ll get the crustiest crust by making sure the dutch oven is preheated before you add your no-knead bread dough and always add the lid. This helps to create a steamy environment for the bread almost immediately.
Variations
- Sun dried tomatoes: Add ⅓ of a cup of chopped sundried tomatoes, drained of oil to this recipe. Yum!
- Other herbs: Swap the rosemary for other herbs or a combination of other herbs like chives, thyme or sage.
- Roasted garlic: Roast a whole head / bulb of garlic, wrapped in aluminium foil, for about 30 minutes at 210C/400F or until tender. Let it cool completely, then squeeze the garlic out of the skins and add it to your dough mixture before mixing it all together.
- Olives: Add ¾ cup of chopped unpitted olives to the dough mixture before mixing it all together.
- Turn it into this spinach cob loaf dip!

Storage
Only slice as much of your rosemary parmesan bread as you’re using at one time then store leftovers wrapped in plastic wrap in an airtight container in the pantry for 1-2 days.
How to keep homemade bread from going stale
Not all bread is equal. Since homemade bread doesn’t have the preservatives and stabilisers that commercially made bread has, it has a tendency to go stale quicker. It isn’t losing moisture as such, but the moisture in the bread is being redistributed.
To save your homemade bread from going stale as quickly;
- Only slice as much as you need at any one time.
- Do not store it in the fridge (the refrigerator actually sucks moisture from foods making them dry out quicker).
- Wrap it well and store it at room temperature in a cool spot like the pantry. A bread box is perfect too and made for the job.
- Freeze it if you know you aren’t going to get to it fairly quickly. One whole loaf of this rosemary parmesan bread will take about 3 hours to thaw completely.
- Refresh it in the oven: Scrunch up a large piece of baking paper and wet it under the tap, shaking out excess water. Wrap it around your loaf and reheat in the oven at 180C/350F for 10-15 minutes.
- Lastly, if it does go stale, don’t throw it away. Blitz it into breadcrumbs and freeze them ready for some spectacular chicken schnitzels later!

Did you try this no knead rosemary parmesan bread recipe?
Leaving a rating and comment below the recipe is so helpful!
Hungry for more? Subscribe to the newsletter for free recipes straight to your inbox. Also, follow along on Facebook, Pinterest and Instagram.
Ingredients
- 1 ½ teaspoons instant yeast (or active dry yeast)
- ½ teaspoon sugar
- 1 ½ cups warm water
- 390 g bread flour (3 cups /13 ¾oz)
- 1 teaspoon salt
- 2 tablespoon finely choppped fresh rosemary
- ⅓ cup finely shredded parmesan (35g/1 ¼oz)
- ½ tablespoon extra virgin olive oil
- ½ teaspoon flaky sea salt
For best results, always weigh ingredients where a weight is provided
Equipment
- Large mixing bowl
- Wooden spoon
- Dutch oven
Instructions
- Combine the yeast sugar and warm water and mix well. Sit for 5-10 minutes until frothy.
- Add flour, salt, rosemary and parmesan. Mix with a wooden spoon to a shaggy dough. This will be a sticky dough which is perfect. Don’t be tempted to add more flour, you won’t have to handle it too much.
- Drizzle over the olive oil and turn the dough in the bowl to coat it all over. If you have a dough scraper, it’s handy here – rub it or your hands with a little oil first.
- Cover the bowl with plastic wrap and rest in a warm spot for 45-60 minutes or until doubled in size. If you have a dough proving setting on your oven use that or under a warm lamp is good too. (The dough can be chilled for 12 or up to 48 hour instead of rising at room temp, then brought to room temperature 30 minutes before shaping).
- DON’T punch the dough down. Oil your fingertips and, leaving the dough in the bowl, gently stretch and fold 4 sides into the center. Think of it as a compass. At the north side, reach your fingers down under the dough at the side of the bowl, stretch up slightly and fold into the centre. Turn it 90° and repeat with the new north. Do this for all 4 “sides”.
- Repeat the stretch and fold 2 more times but instead of turning it 90°, for the first fold, just turn the bowl 45° so that you’re starting between 2 folds from the last time. Do the first stretch and fold, then turn 90° again each time.
- Cover with plastic wrap again rest for 30-45 minutes until puffy and airy again.
- While the dough rises, preheat oven to 230C (210C fan forced) / 450F. Place dutch oven with the lid on into the oven to preheat. If your house is cold, you can sit the dough in front of the oven while it heats.
- When the oven is ready and the dough has doubled again, take two large pieces of baking or parchment paper and cross them over on top of each other. Tip the dough out onto the middle of the paper. Dust with just enough flour to help you shape it into a round shape, then sprinkle over the flaky sea salt.
- Using oven mitts, remove the dutch oven from the oven, then carefully lift the dough using the corners of the bottom sheet of paper and lower it into the dutch oven – be careful not to touch the sides of the burning hot pan. Place the lid on top and bake 30 minutes.
- Remove the lid and bake for a further 12-15 minutes until the crust is golden brown and cracked.
- Serve with butter or olive oil and balsamic or cool and serve as sandwiches. Yum!
- Please take a moment to leave a comment & rating. It's appreciated and so helpful.
Notes
- Tablespoons: I use a standard Australian 20ml tablespoon (equal to 4 teaspoons). Check yours before measuring.
- Rise time: While you could let this rise for as little as 90 minutes, a longer fermentation (aka overnight in the fridge) will give better flavour and a more chewy, holey texture to the bread. It will also give it a better crust.
- Add-ins: See the post for more add-in ideas like sun dried tomatoes, roasted garlic and olives.
- Nutrition details are approximate only – scroll below the recipe to find the full nutritional information.
This post may contain affiliate links that earn me a small commission for my referral, at no extra cost to you. Thank you for supporting Sugar Salt Magic.
4 Comments on “No Knead Rosemary Parmesan Bread”
The best bread I have ever eaten 😋
I’m so happy to hear this, Jody. Thanks so much for dropping back to leave a review.
OMG! This bread is amazing and so easy to make. I used AP Flour because it was too cold to go to the store to get bread flour!! It’s probably even better with the correct flour! Thank you for the recipe!! Oh, and you really don’t have to knead the dough — bonus!
So happy you love it, KBell. Truly appreciate you dropping back to leave a review.