Why they’re so good!
These spandauer are the classic version of Danish pastries, filled with marzipan and a dollop of jam. They’re buttery, flaky, nutty, and sweet all at once, and an absolute delight.
The pastry itself is my simplified version of traditional Danish pastry dough. I have my super easy Danish dough recipe and this newer one is a slight step up from that. It results in perfectly flaky and buttery Danish pastry with more defined layers but I use some shortcuts so that it’s still quicker to make than traditional dough.
Beloved by the Danes, spandauer are the most common style of pastry you’ll find in Denmark. Named after the borough of Spandau in Berlin, it is a supposed reference to the Spandau prison (built square with 4 turrets). While this Danish pastry looks round after it’s baked, it’s very much a square beforehand with 4 corners where the filling is poking out.

Table of contents
- Why they’re so good!
- Ingredients
- How to make Spandauer
- 1. Activate the yeast
- 2. Mix the rough dough
- 3. Roll out the dough
- 4. Add the butter
- 5. Fold the dough
- 6. The roll and folds
- 7. Chill the dough
- 8. Make the marzipan filling (remonce)
- 9. Roll and trim the dough
- 10. Cut it into squares
- 11. Pipe the marzipan
- 12. Fold the spandauer
- 13. Rest and rise
- 14. Fill and bake
- Storage
- FAQs
Never Miss a Recipe!
Get the latest recipes straight to your inbox!
Ingredients
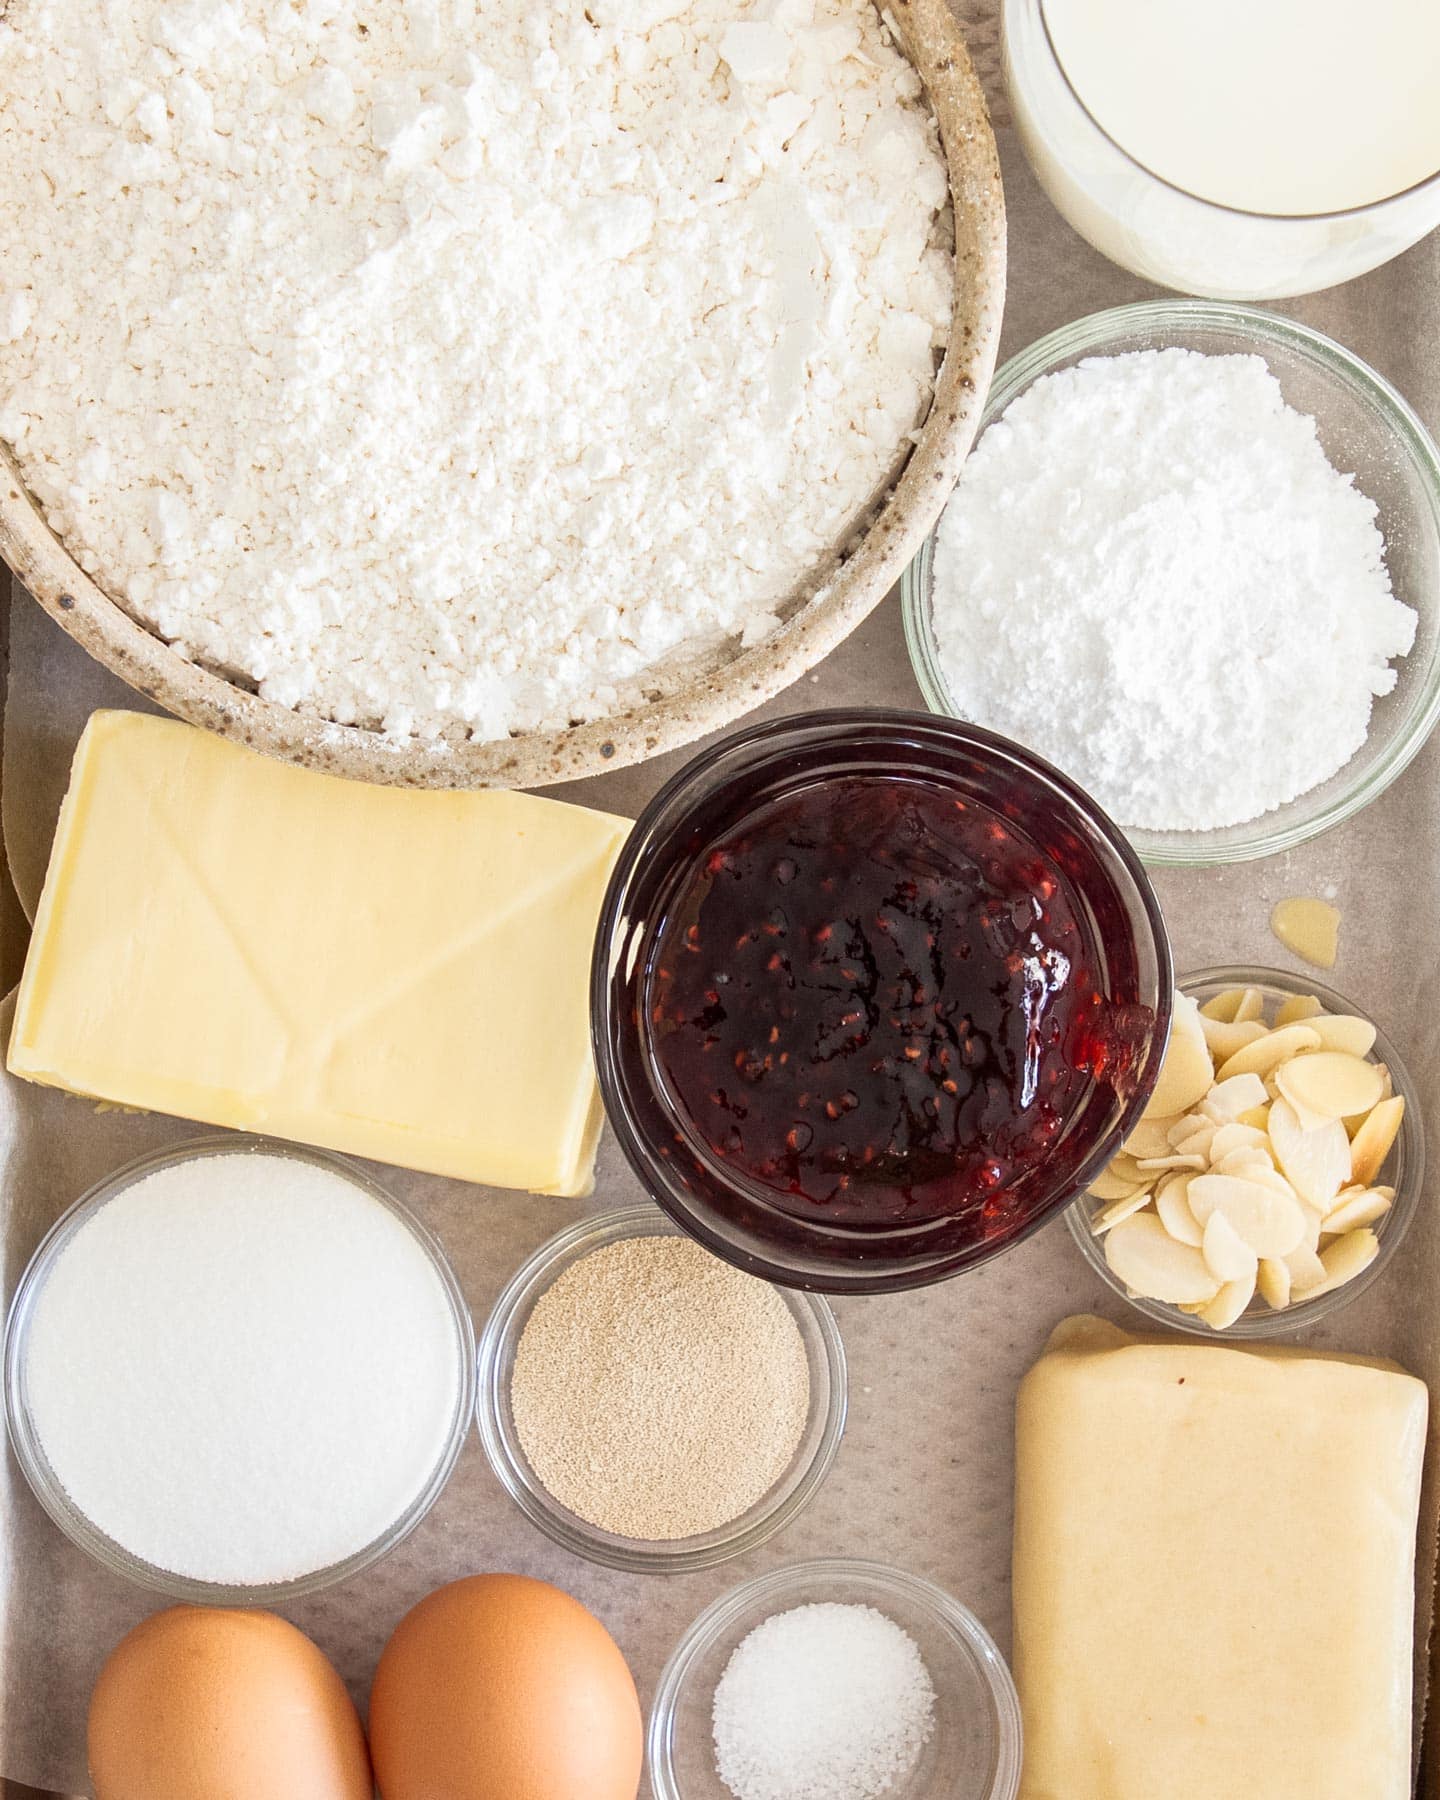
Jump to the recipe for full ingredients and instructions.
- Milk: You’ll want to use whole milk here for the best result.
- Yeast: I use instant yeast or instant dry yeast but you can also use active dry yeast with no other adjustments to the recipe.
- Flour: You just need plain flour / all purpose flour.
- Sugar: White granulated sugar is used in the Spandauer dough and icing sugar (powdered sugar) is used in the filling and icing.
- Egg: I use large eggs in my baking. You’ll just need 2 eggs. One is in the dough, the other is separated, the egg white is used in the filling, and the yolk is used in the egg wash.
- Unsalted butter: Stick to unsalted butter here as yeast can lose it’s efficacy if there is too much salt in the recipe and as there is no standard amount of salt added to salted butters, it’s better to control it yourself.
- Marzipan: Marzipan is used in the filling. You could make the almond filling from my bear claw pastries if you can’t find it. That will work just fine. Spandauer are commonly made with a custard filling too (or pastry cream), similar to my custard Danishes.
- Raspberry jam: This is a classic combo for Danish pastry – almond and raspberry jam. Use a good quality one as it will be front and centre.
- Flaked almonds: These thinly sliced almonds are used to scatter over the top of the Danishes before baking. You could use other nuts if you prefer. Roughly chop up nuts like hazelnuts, walnuts or pecans for something different.

How to make Spandauer
I simply love making these buttery pastries, known in Denmark as wienerbrød (Viennese bread) since they were first created by Austrian bakers. The traditional Danish dough can be very time-consuming so, in my quest to make it easier for everyone to make at home, I created my easy Danish dough recipe. Loads of shortcuts but still a good layered and buttery pastry.
My dough, or at least the method of making it, evolved when I created these bear claw pastries. With this new recipe, the classic Spandauer, it’s evolved again or rather, been refined. It now has more butter (aka more flavour) and more defined layers, whilst remaining very easy to make.
I’ve included loads of photos below so you know how it should look at each point.
Jump to the recipe for full ingredients and instructions.
1. Activate the yeast
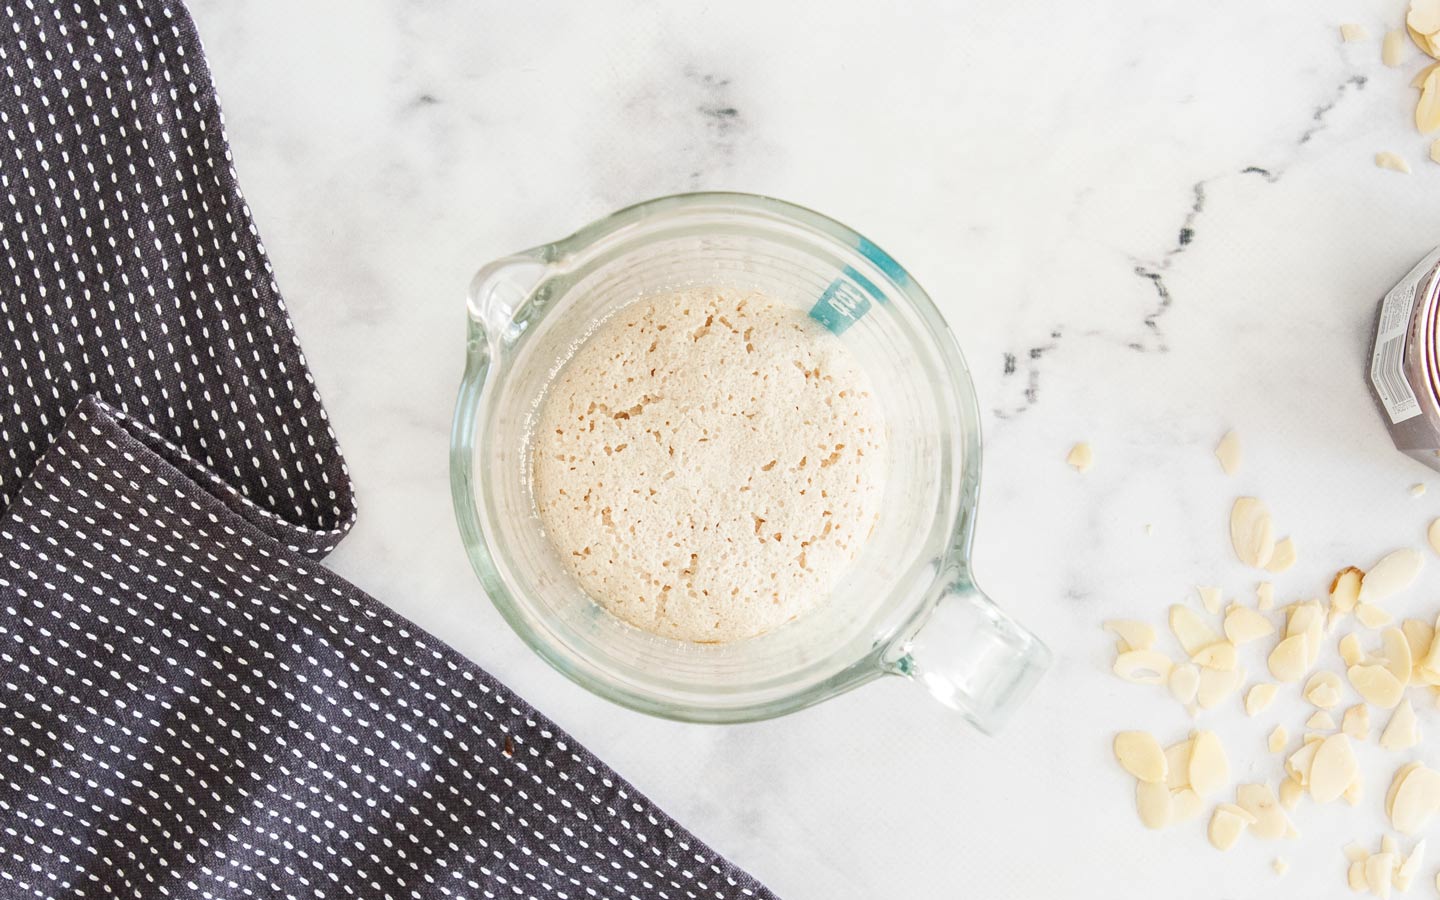
While you don’t technically need to activate instant yeast, it’s a good step to get into the habit of doing as it will show you if your yeast is working or expired before you go and add the rest of the ingredients and waste time and ingredients. Active dry yeast does need to be activated.
Simply mix the yeast and a little sugar into some warm milk and give it 5-10 minutes to get all puffy. If it does, it’s working and you can proceed. If the yeast doesn’t start to look puffy, you may need to buy a new batch. It may not always get as puffy as my picture below, but as long as you can see the yeast is definitely starting to puff, you’re good to go.
2. Mix the rough dough
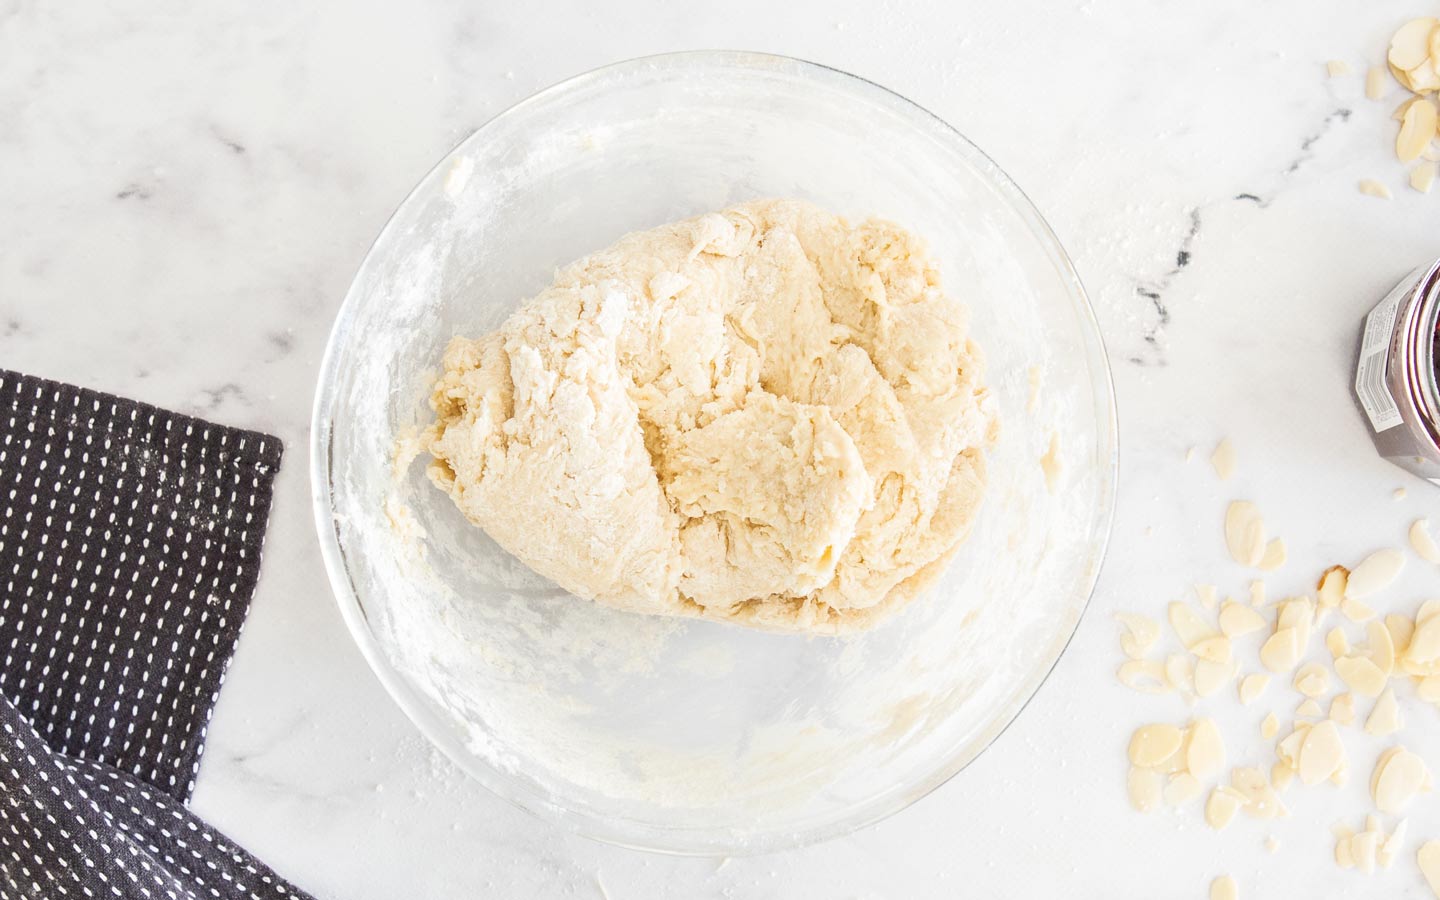
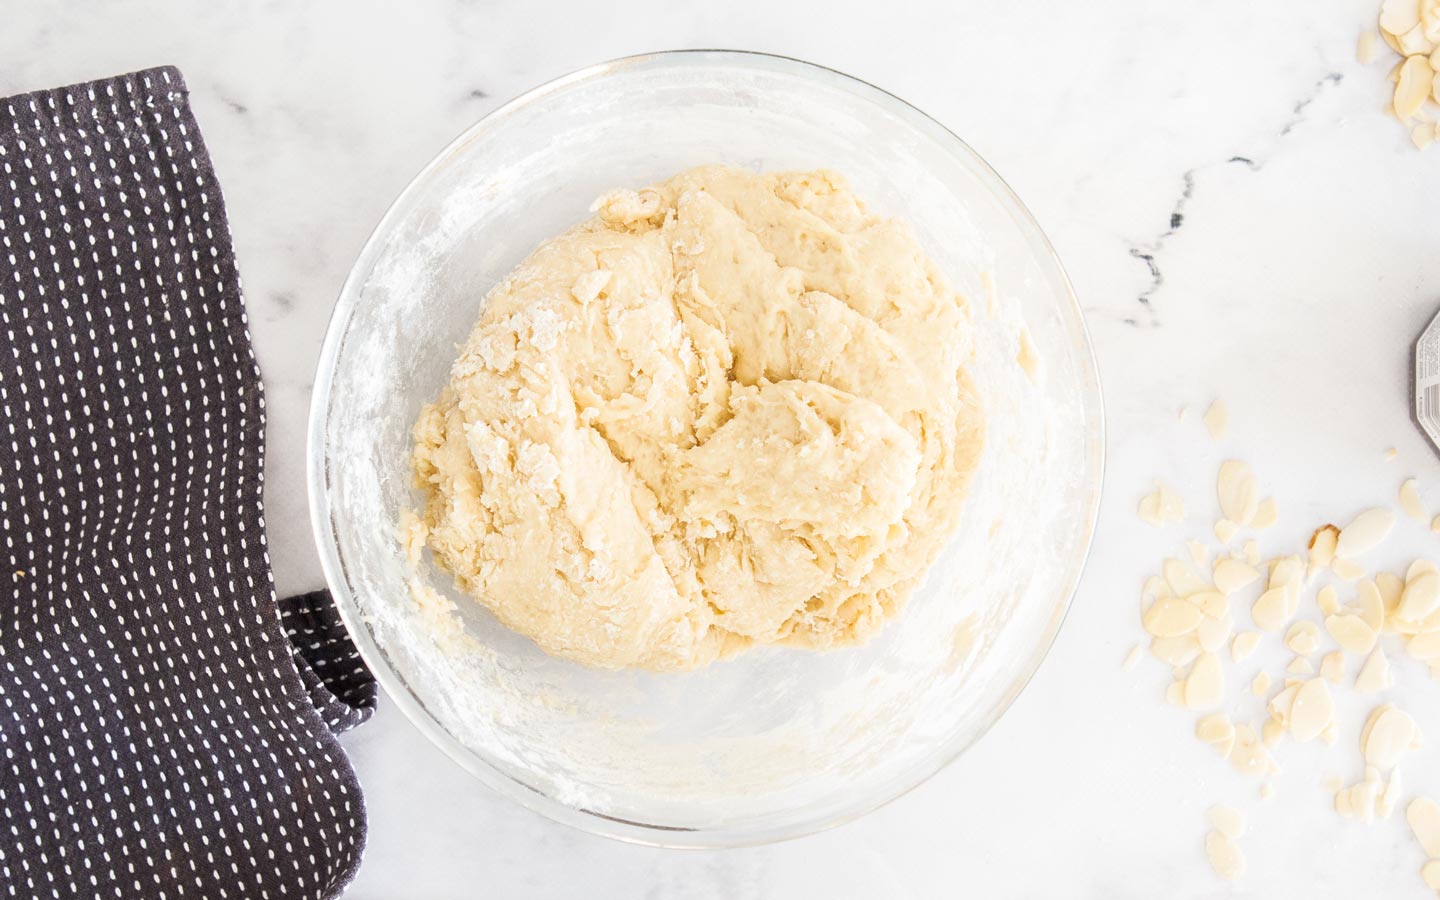
My easy Danish dough is a no-knead version. Simply mix the ingredients together in a bowl and set aside to rest for 20 minutes. The dough won’t double in size at this stage so don’t wait for that to happen, although it will begin to grow (you can see that in the before and after images below). While it rests, you’ll grate the butter for the next step (more on that below).
3. Roll out the dough
Once rested, roll the dough out into a large rectangle. It’ll be rough at this stage and that’s just fine.
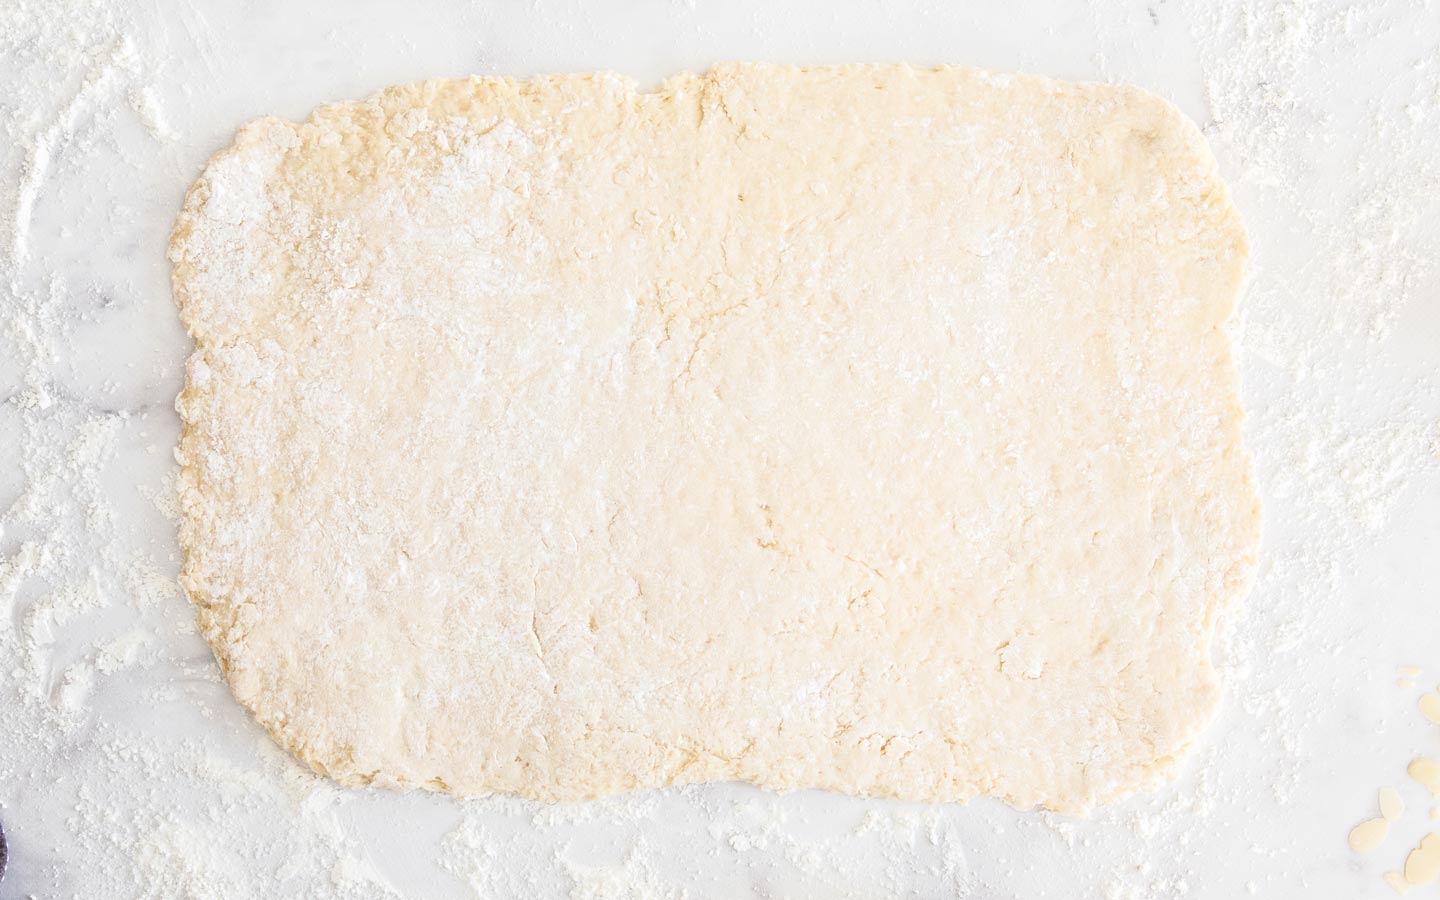
4. Add the butter
Here’s where that grated butter comes in. Much like croissant dough, the classic method for laminating the Danish dough (which is the process of creating layers of butter between layers of dough) is to make a thick block of butter that is cold but not too cold and fold it into the dough and roll it out. That’s “too hard basket” for my style of baking so I grate mine but keep it cold until required. Grating the butter makes it much easier to add to the dough, and much easier to roll the dough out.
Add it over two thirds of the pastry, leaving one third clear.
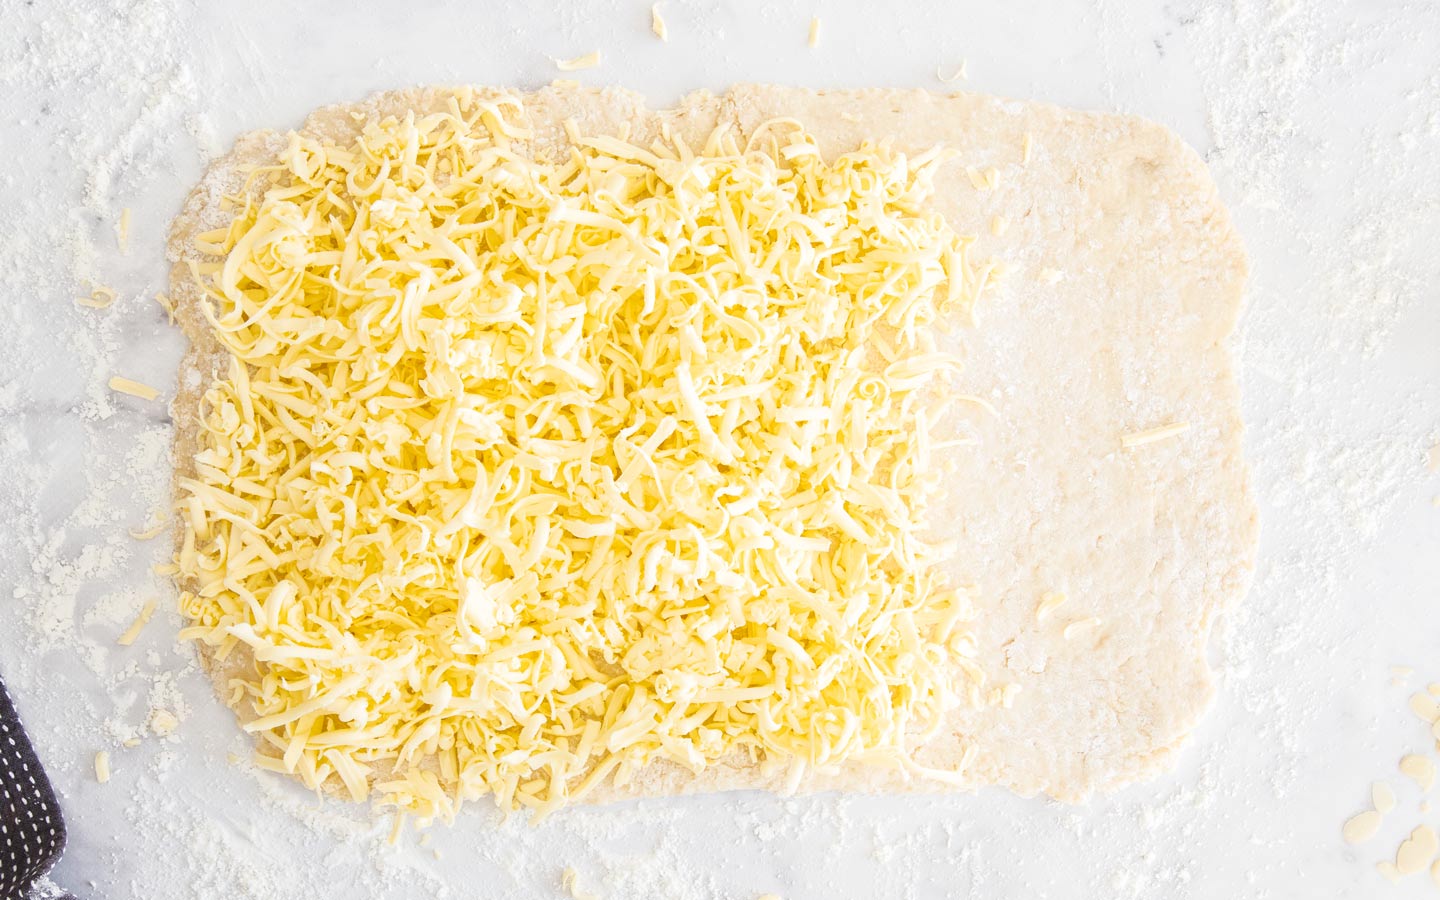
5. Fold the dough
Now you simply fold the dough over the butter to encase it. Start with folding the clear pastry side over the middle, then fold the other butter-topped-side over the top of that. You immediately have 3 layers of dough and two layers of butter.
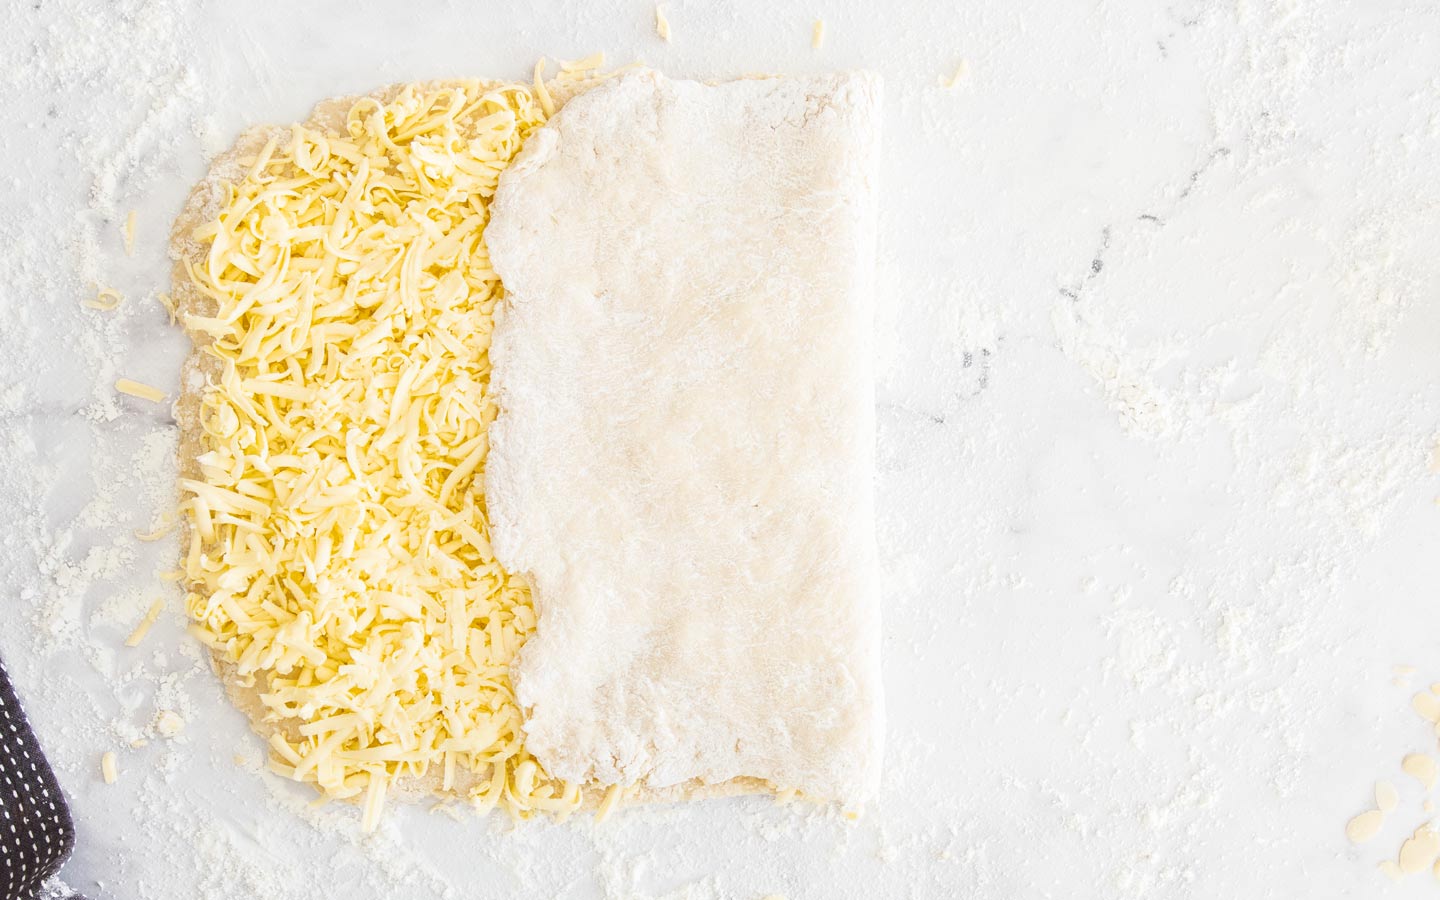
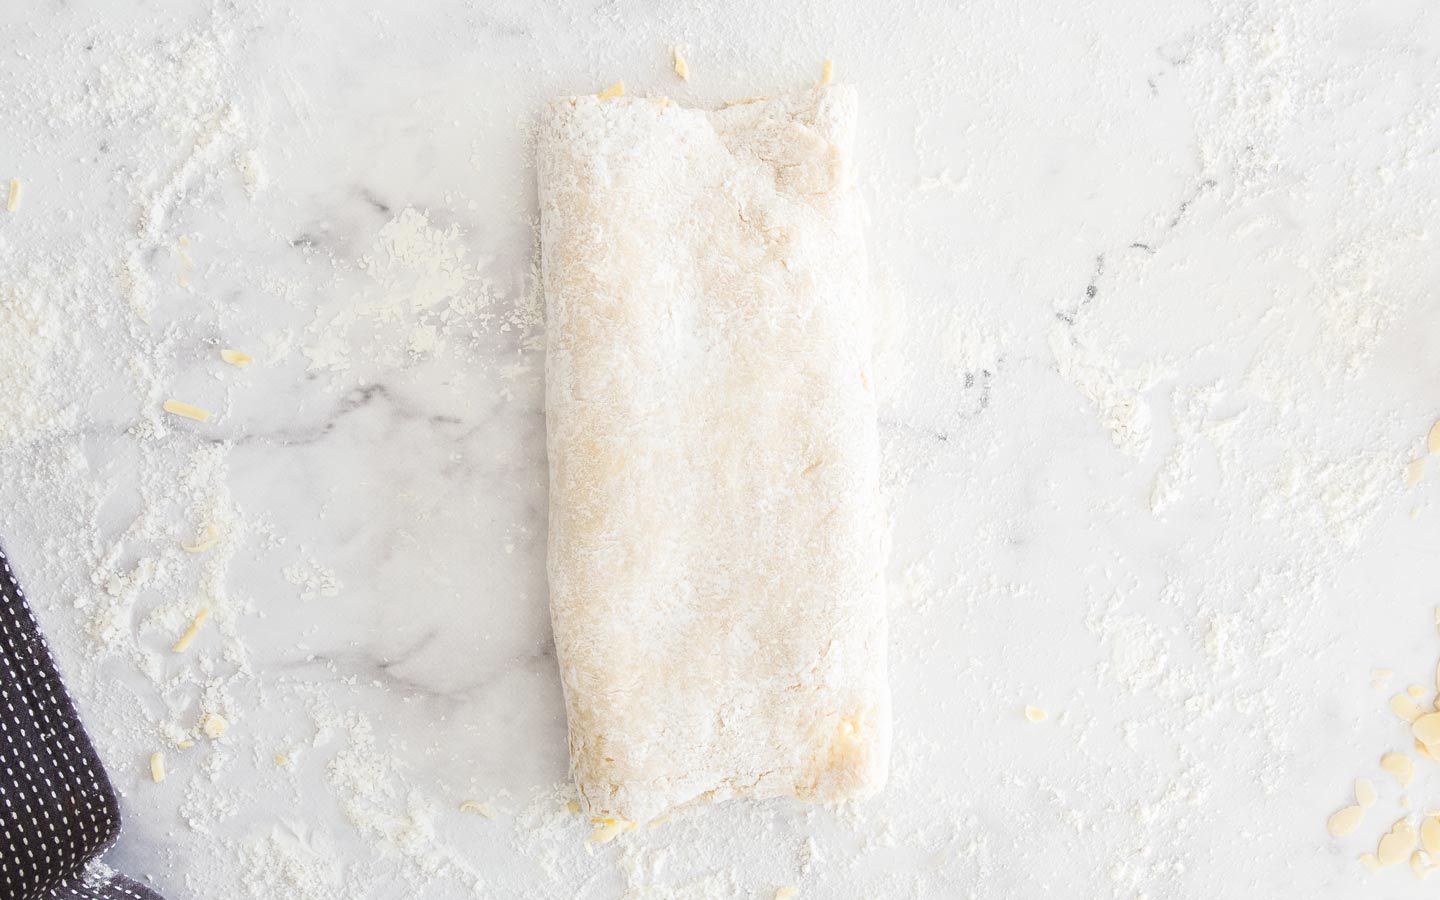
6. The roll and folds
Now, you’re going to roll and fold the dough 4 times. By the end of it, you’ll have 243 layers in your dough. And this step is where my recipe takes another shortcut at no detriment to the pastry. Grating that butter makes it easier to do all your rolling in one go, where the traditional method would require you to chill between every roll. If you move quickly, the butter won’t melt before your finished so go ahead and do them all.
From that last image, you turn the dough 90° and roll it out into a large rectangle again. Fold it the exact same way again (one side over the centre, then the other side over that. This time without adding butter since it’s all in there already. Turn it 90° and roll a second time, then fold a second time. Turn it 90° again and do a third roll and third fold then a fourth. By the end of that process it will be looking much more smooth. On the 4th roll and fold, the dough will be much tighter and springier. You can continue to work it or let it rest for 15 minutes before doing that last one.
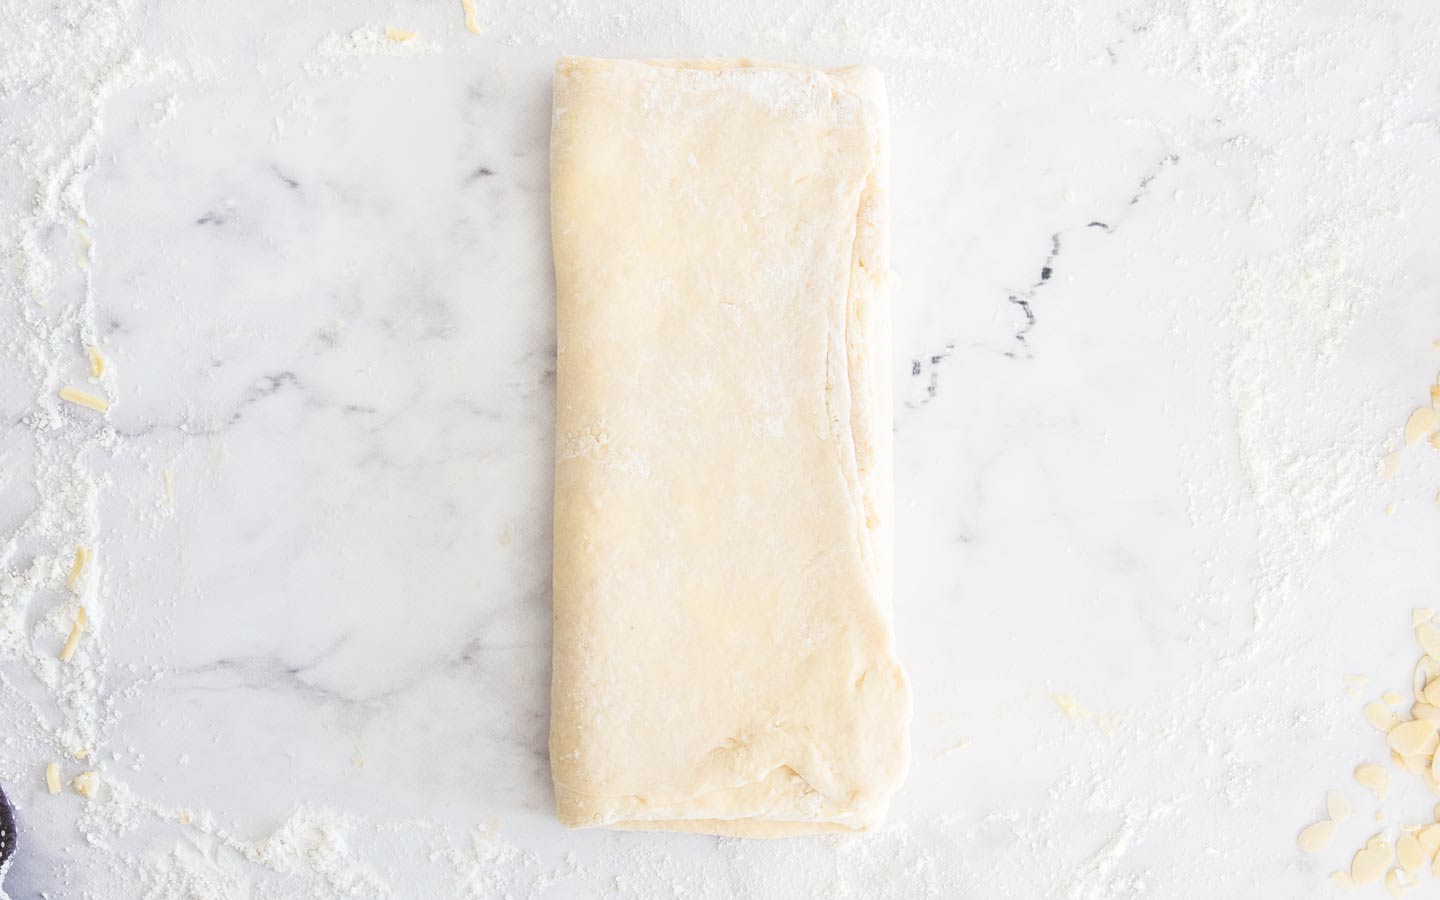
It has now taken about 40-45 minutes (including the 20 minute resting time) to get to this point. The traditional dough would have taken about 1.5-2 hours.
7. Chill the dough
You need to chill the dough in the refrigerator at this point for a minimum of 4 hours or up to 24 (I’ve even used it after 36 hours before). The 24 hours seems to give the most perfect result.
Cut the dough in half into two squares and just marvel in those layers.
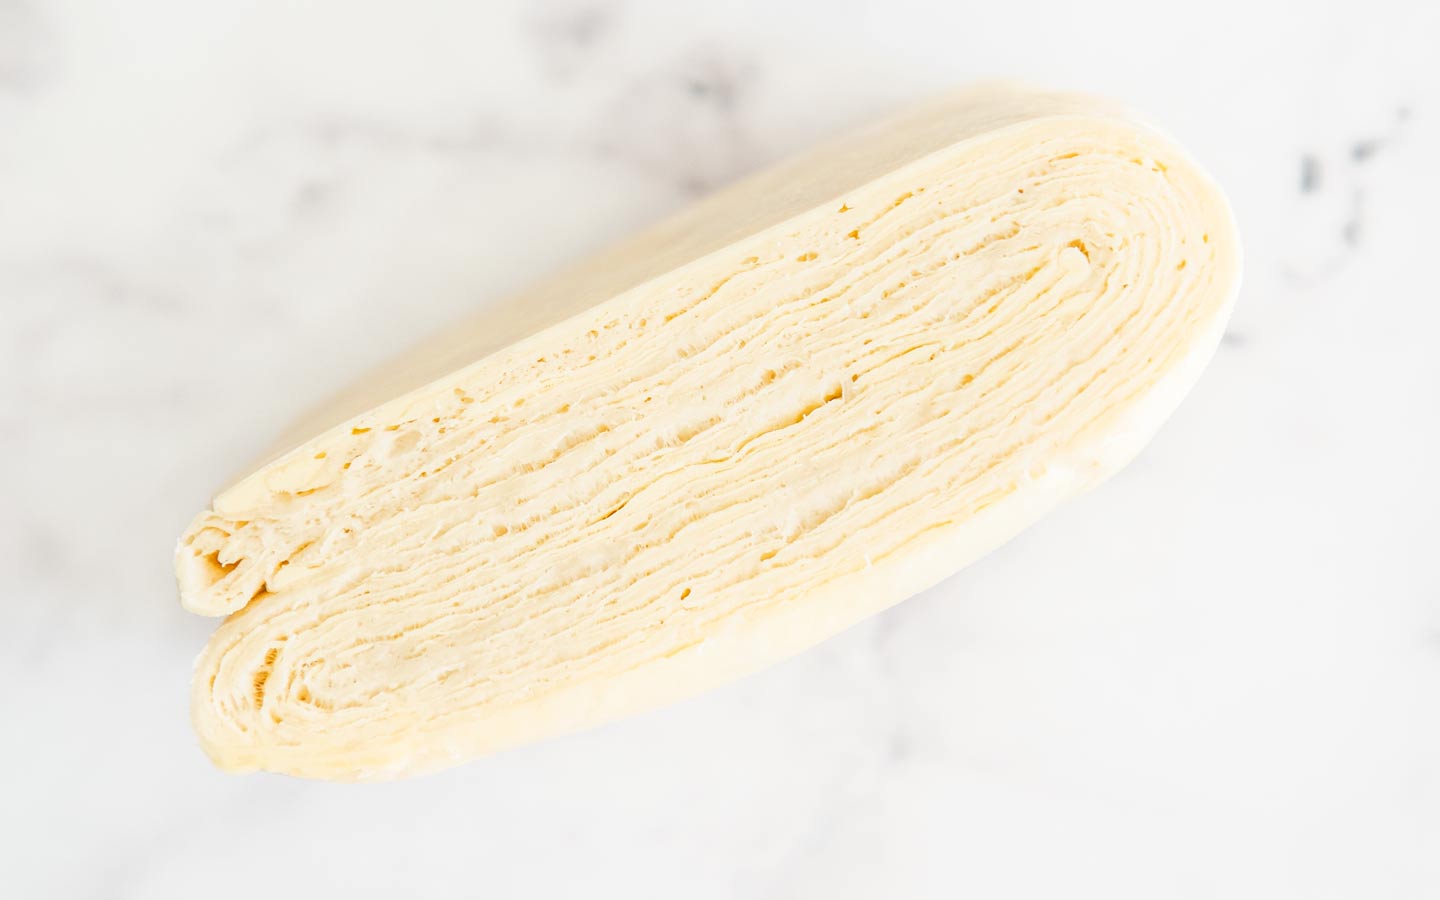
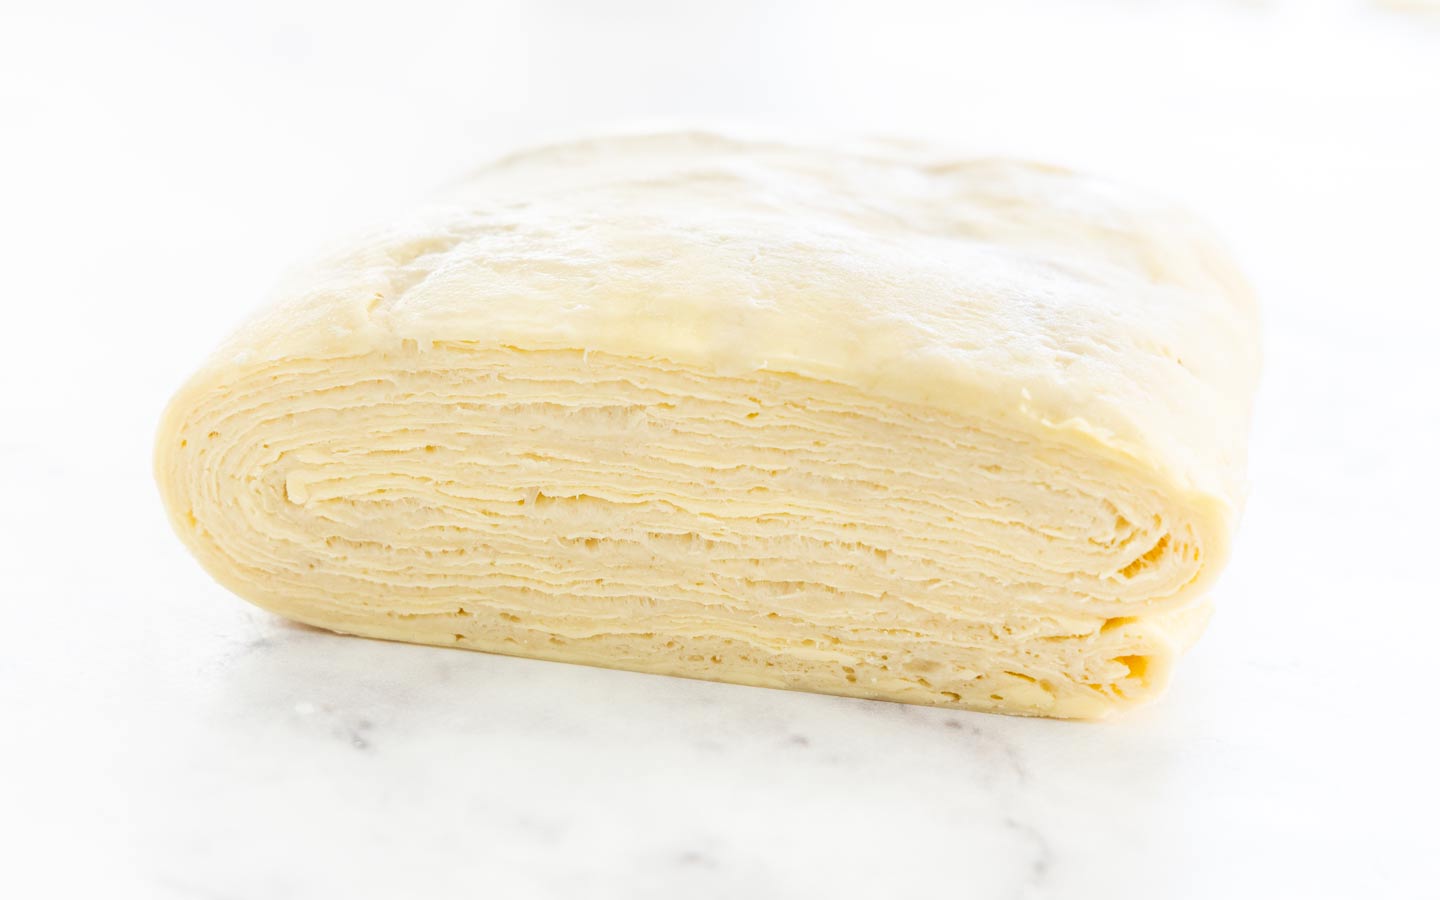
8. Make the marzipan filling (remonce)
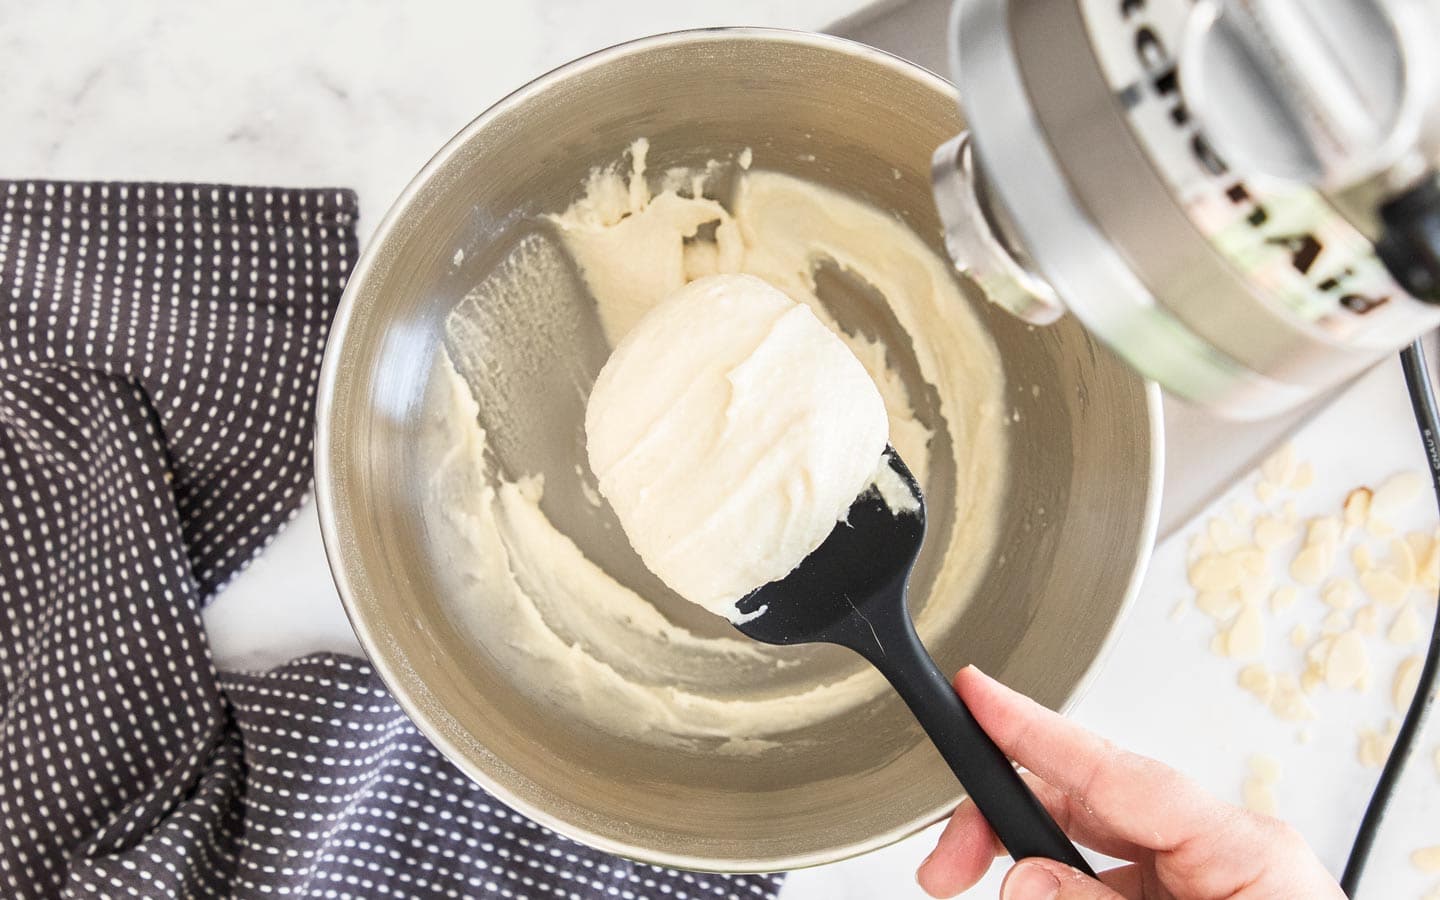
While the dough is resting, you can get ahead and make the filling. Simply mix marzipan and icing sugar in a mixer until it forms large crumbs. Now, add the egg white and beat it on low speed until smooth. Transfer the mixture to a piping bag and chill until required. Technically, remonce is a Danish filling of butter, marzipan and sugar however in my testing, the butter would just come out. I use an egg white in it’s place and it imitates the sticky remonce perfectly.
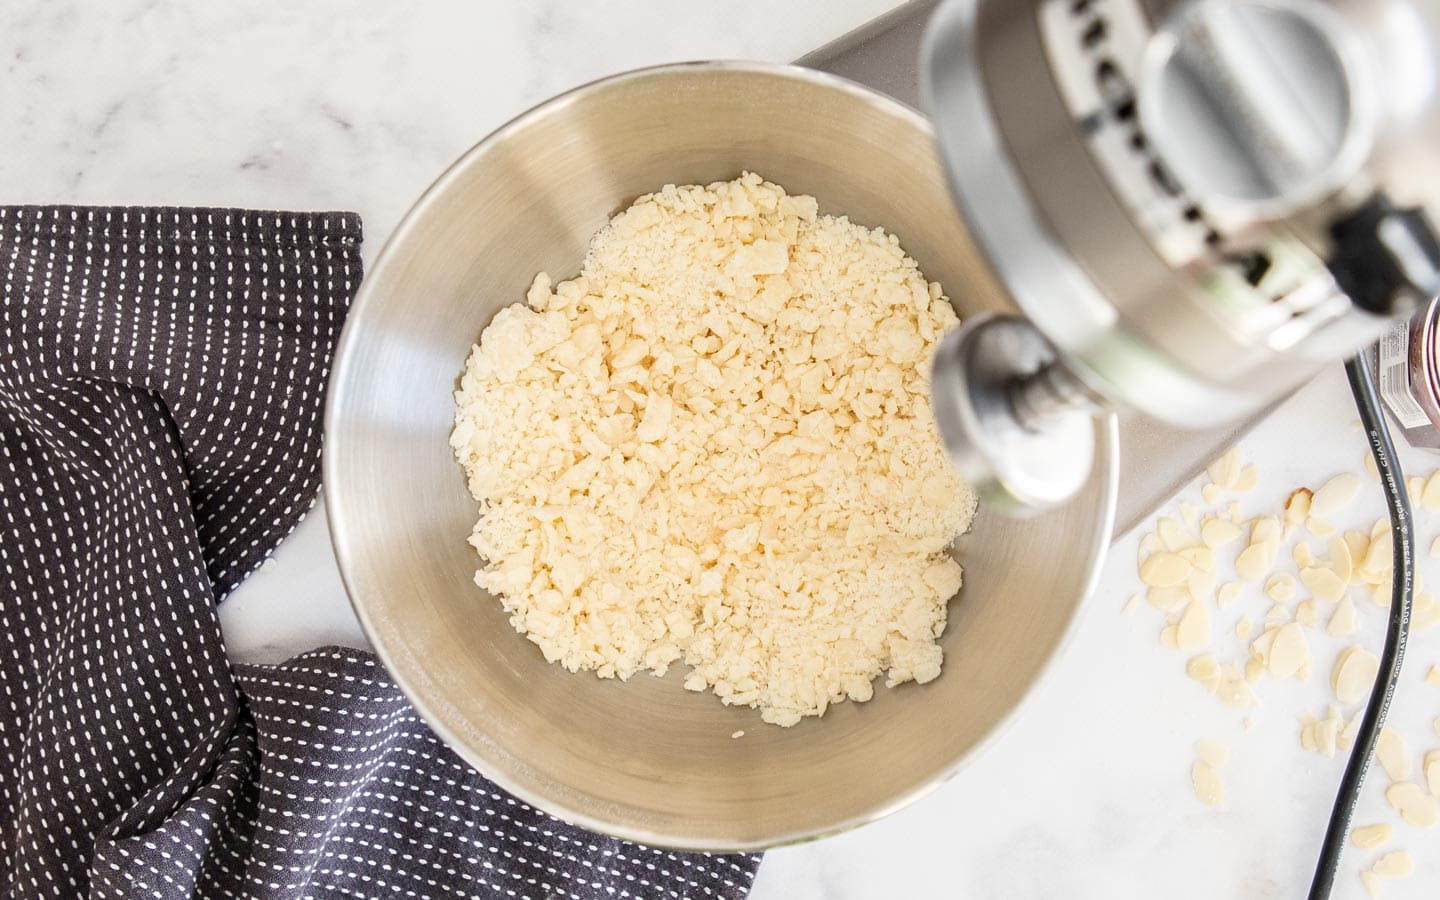
9. Roll and trim the dough
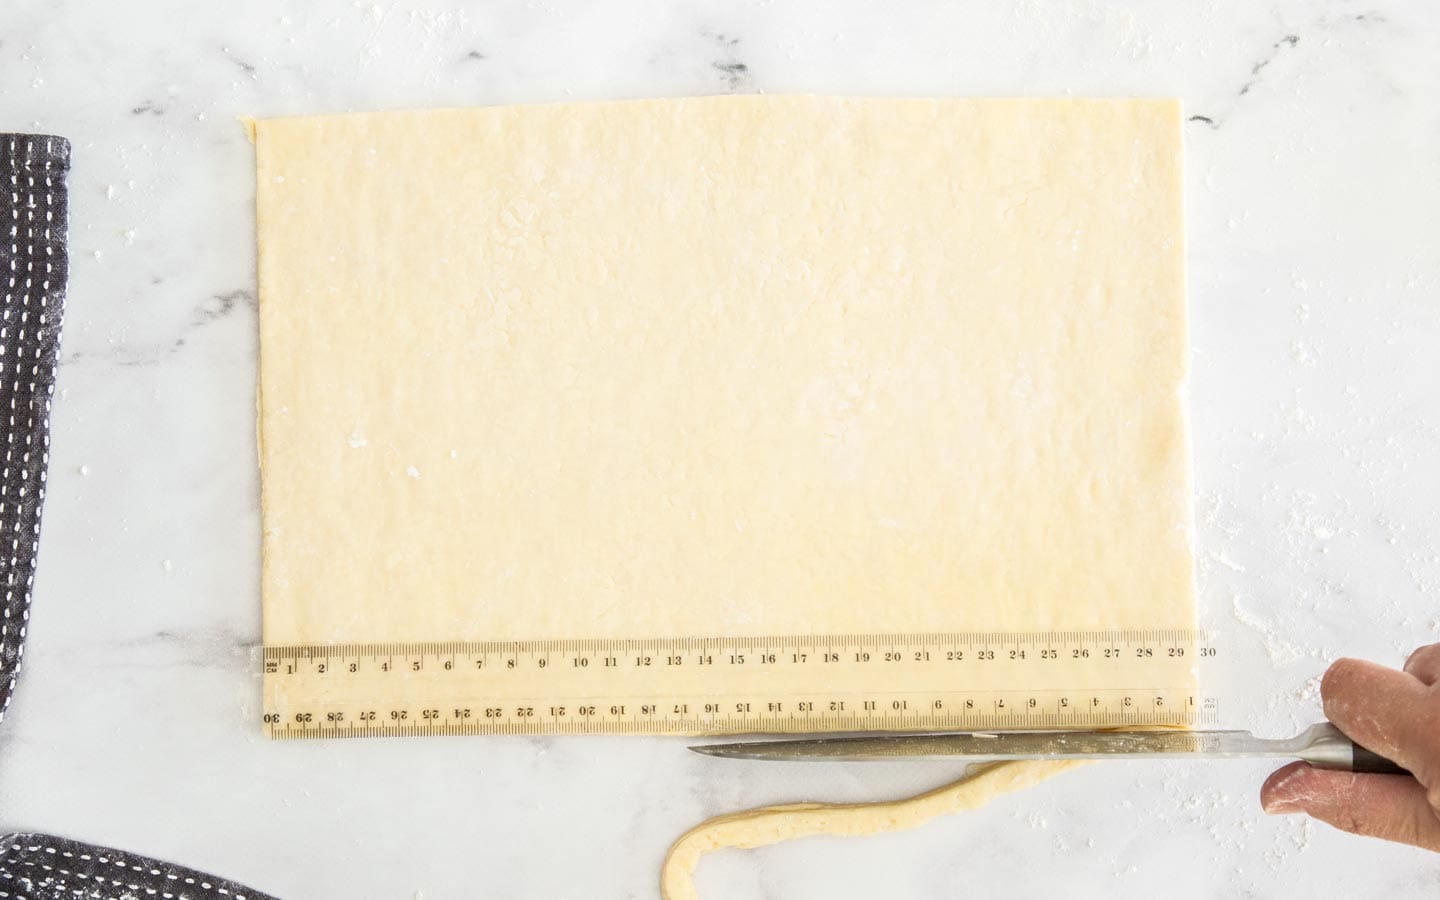
Now, it’s had a nice rest in the fridge, the dough should be looking quite puffy and we can turn it into spandauer. Roll half the dough out to a rectangle about 5-6mm thick (⅕-¼ inch thick). Trim off the uneven edges so that you have a neat rectangle about 20x30cm (8×12 inch).
10. Cut it into squares
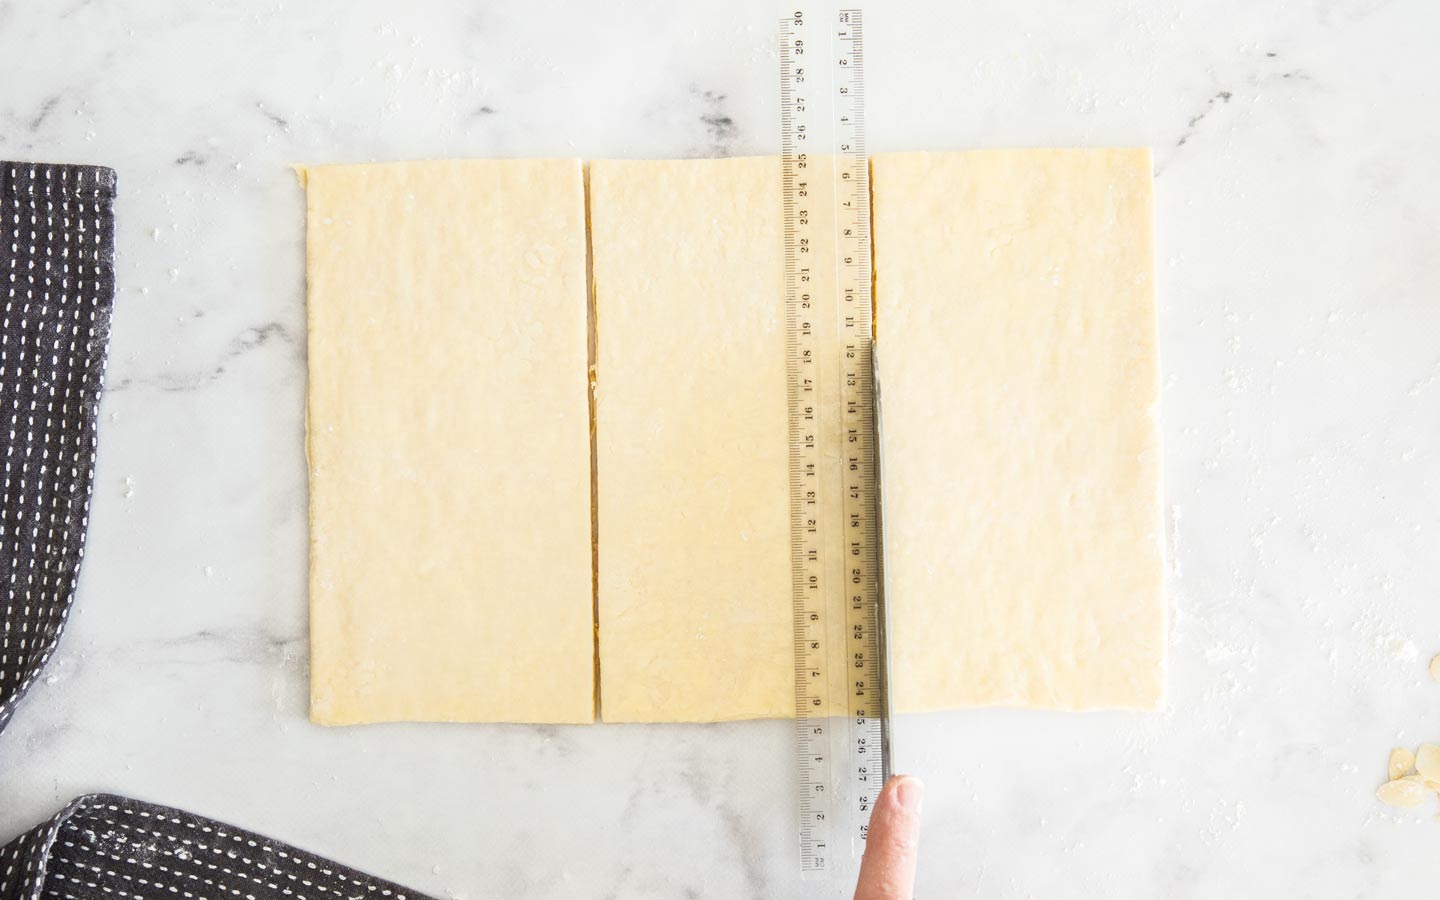
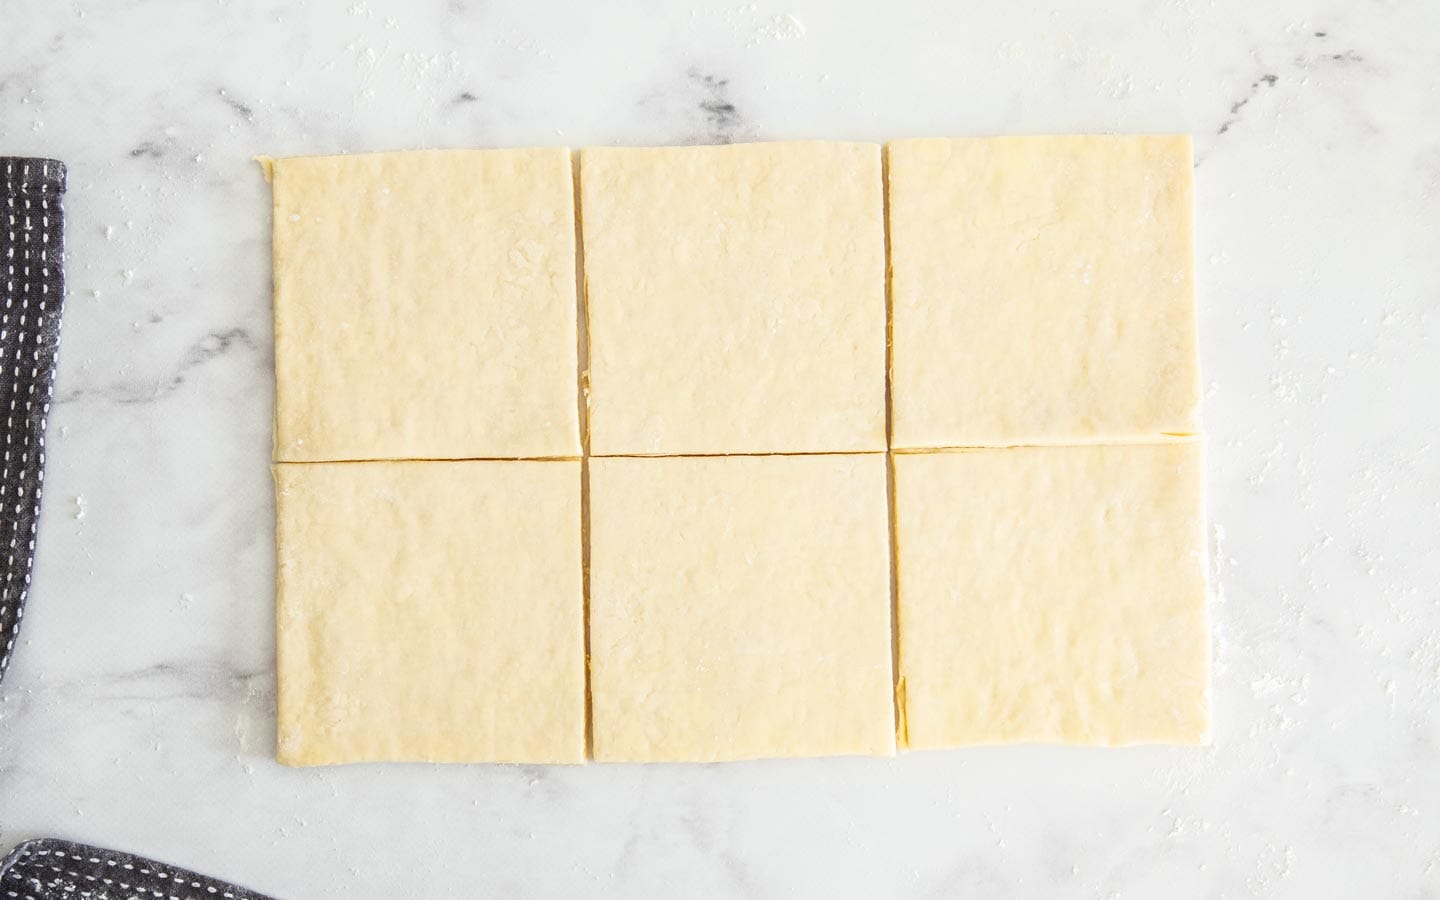
Now cut the rectangle into 6 even squares. A ruler is so helpful to get your spandauer pastries evenly sized.
11. Pipe the marzipan
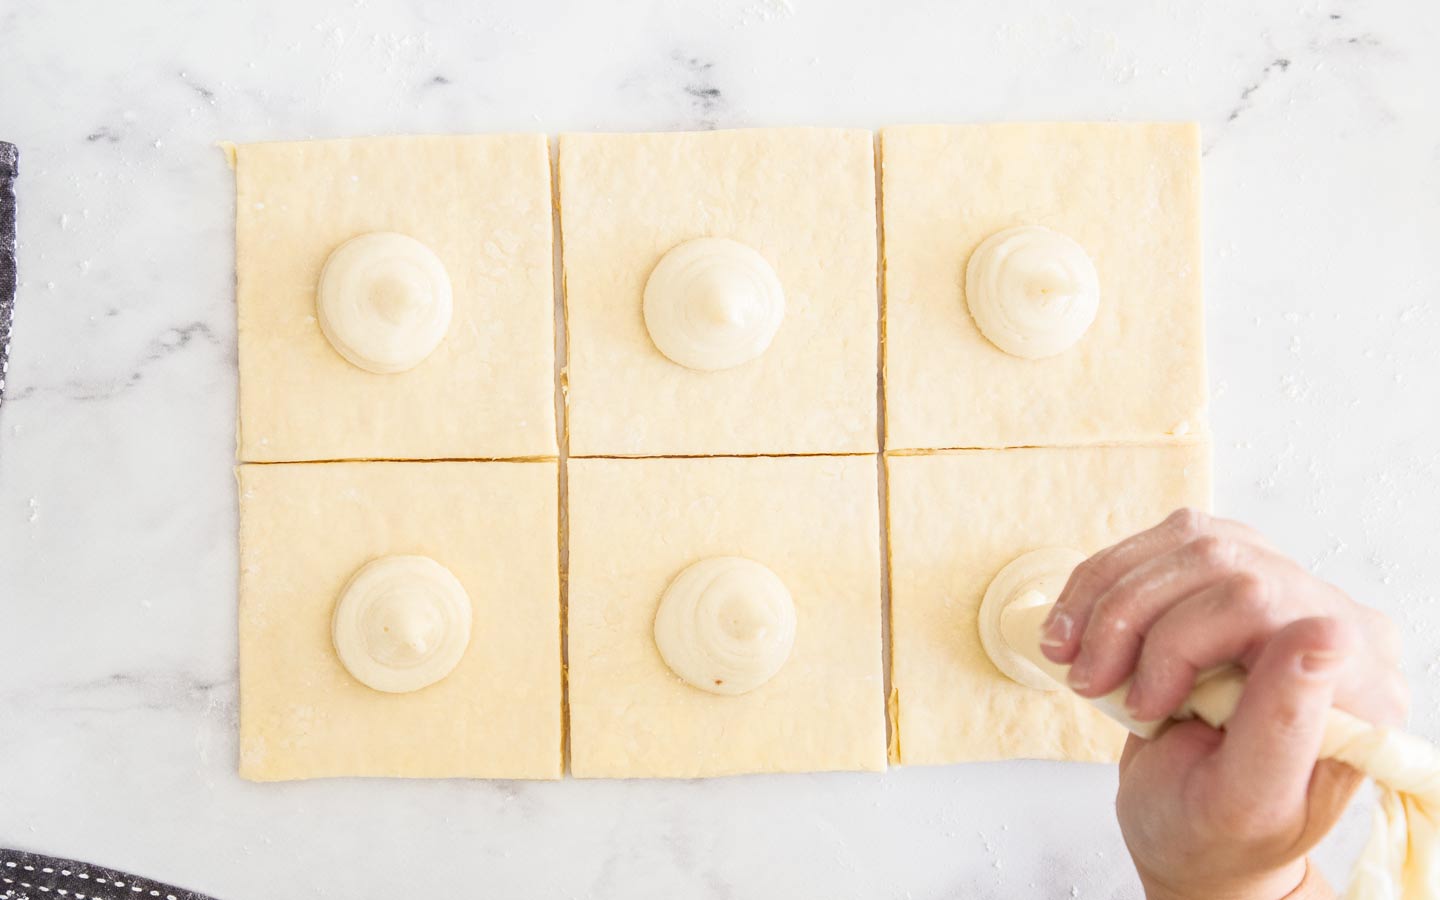
Pipe the marzipan filling in little dollops about tablespoon-sized onto the centre of each of the 6 squares.
12. Fold the spandauer
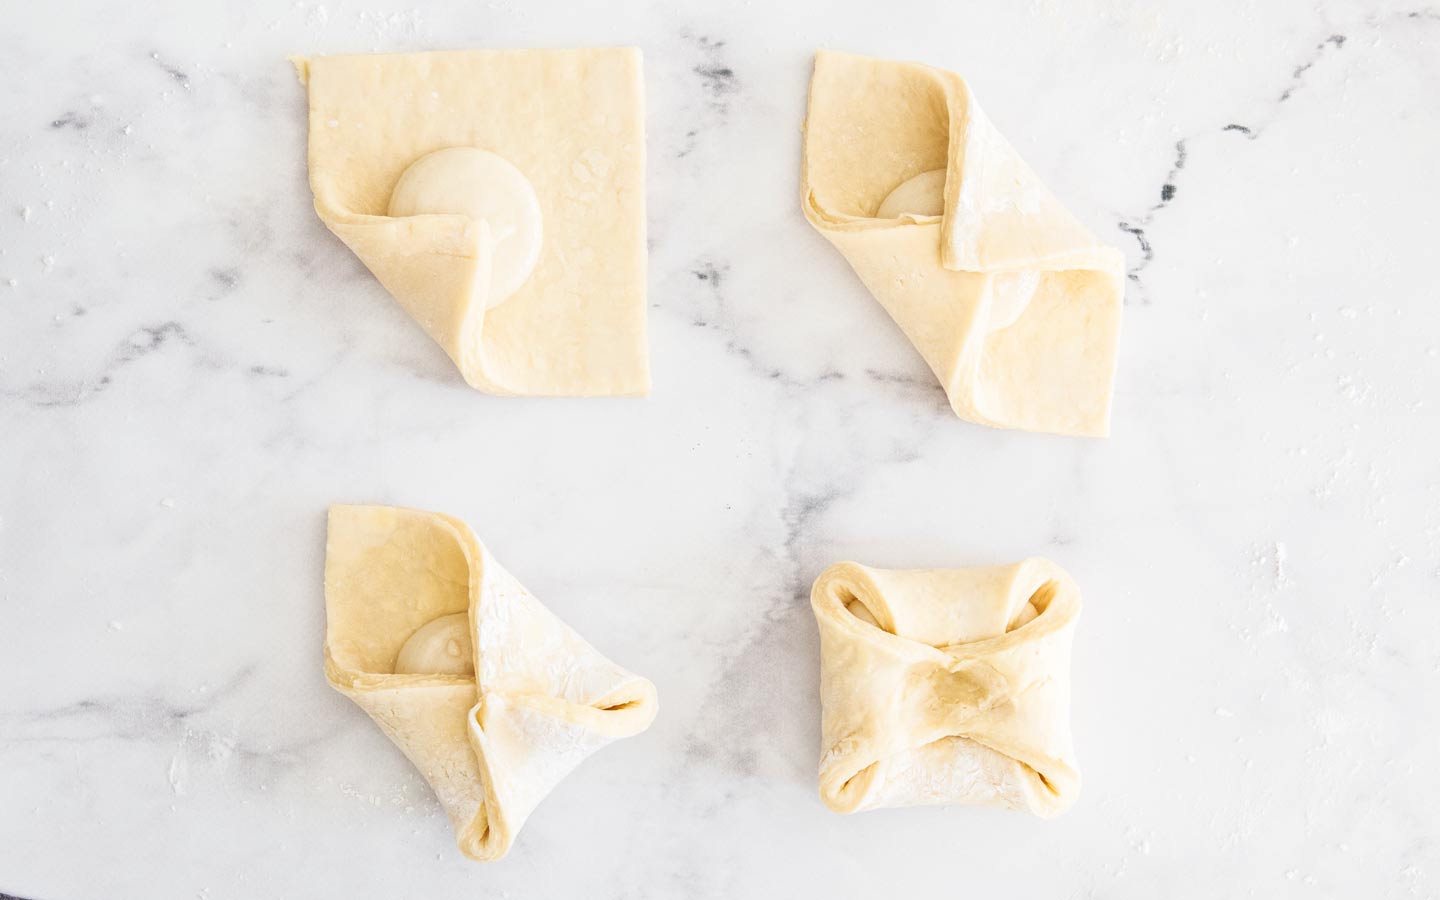
The classic folding method for Spandauer is to fold the corners right into the centre, one on top of the other, right over that filling. Start by dotting 3 of the corners with water (this will help them to stick). Fold the dry corner in the very centre, then fold the opposite corner right over the top of it. Now fold in the last two corners right on top again and press them down to seal the joins.
13. Rest and rise
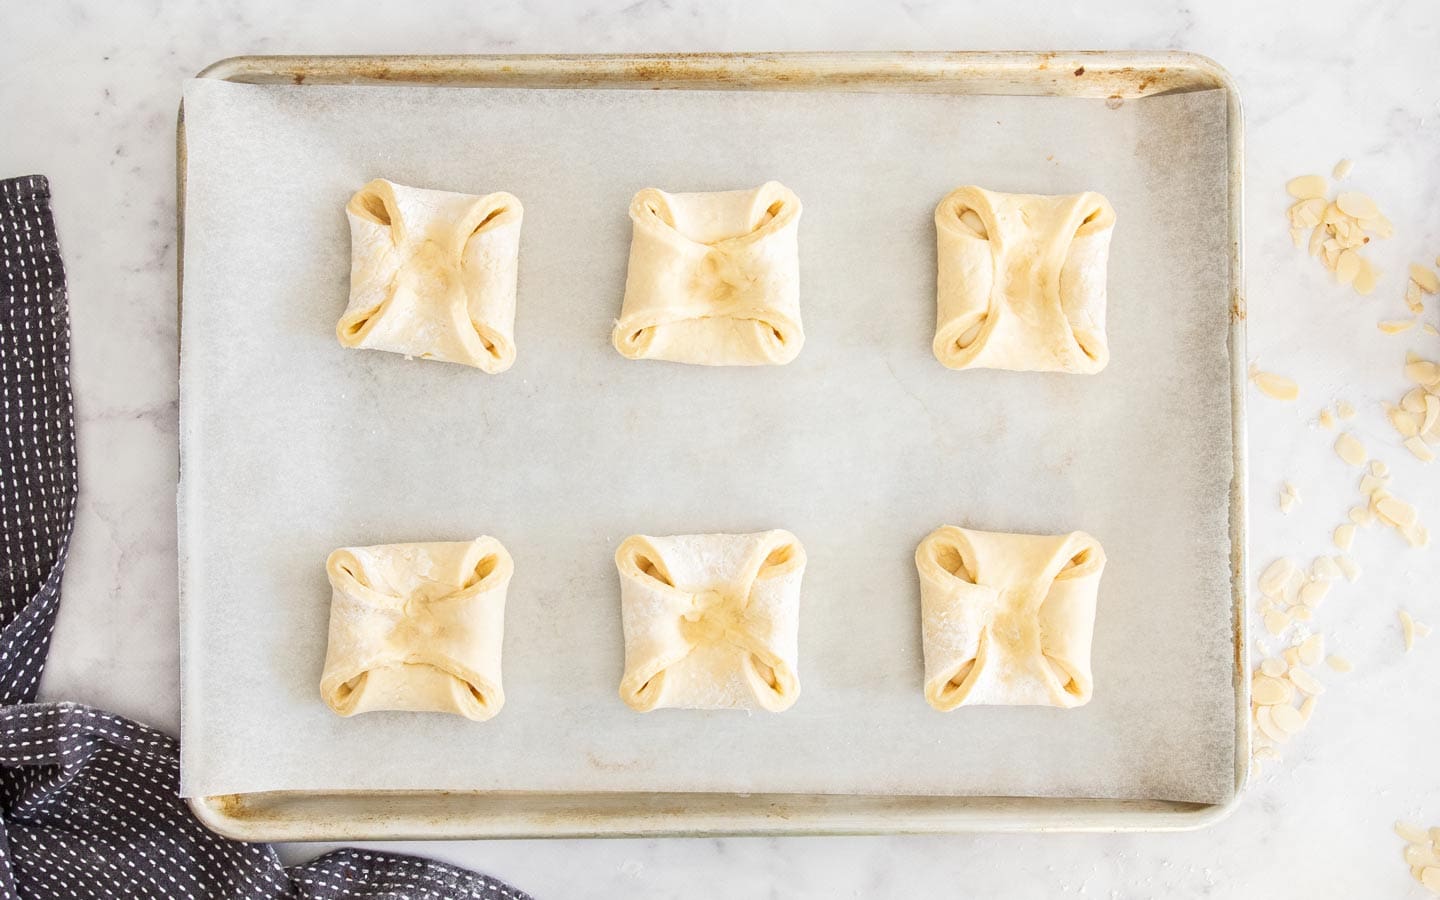
Now, rest the Danishes for 30-45 minutes in a not-too-warm spot. On the outskirts of the kitchen is normally fine. You don’t want these to rise in a warm place like a normal bread dough because all the butter will melt but the cooler the spot is, the longer they’ll take to rise. So somewhere in between is good.
14. Fill and bake
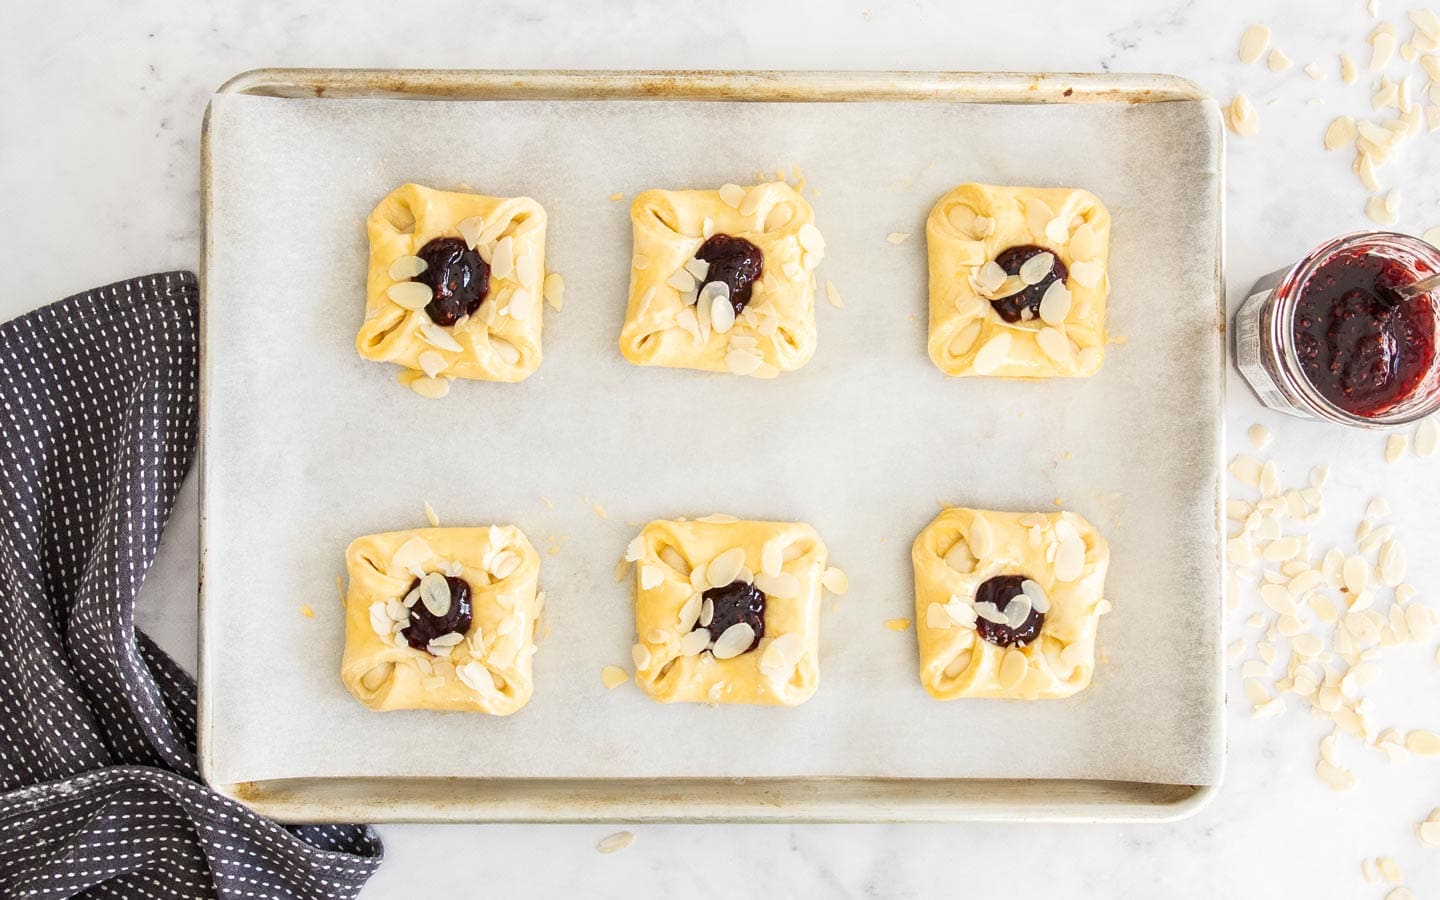
Beat an egg yolk and a little milk for the egg wash, then brush the beaten egg mixture over the tops of each pastry. Press down in the middle of each pastry to make a deep indent for the jam. Once the jam is added (about 2 teaspoons per Danish), scatter over the flaked almonds and bake until golden brown.
Storage
Like most home-baked breads and pastries, these Spandauer are best served fresh. They’ll keep well in an airtight container at room temperature for 2-3 days but they will stale a bit more each day. You can freshen them up by zapping them in the microwave for 12-15 seconds but be careful you don’t heat them too much or the jam will be like molten lava.
FAQs
There is no direct translation for spandauer to English. Spandauer pastries are named after the Berlin borough of Spandau.
While they’re a Danish pastry, spandauer were actually created by bakers from Vienna, Austria.
The Danes call Danishes wienerbrød which translates to Viennese bread in English.
The Swedish Kanelbullar would be the closest match being a type of cinnamon roll but shaped like a Danish. For the dough itself, croissant dough is similar but doesn’t usually contain eggs.

Lots of steps, maybe, in total it’s about 1 hour of hands on time over two days. I promise, though, if you stick to the exact steps in this recipe you’ll be creating gorgeous Danishes at home and you don’t need to stick to this filling either. Use my other Danish recipes to come up with your own filling ideas.
- Cream cheese strawberry Danish – swap the strawberries for raspberries or blueberries.
- Lemon Danishes – try other fruit curds like passionfruit curd or orange curd.
- Custard Danish – swap out the jam for any flavours you like.
- Bear claw pastries
⭐⭐⭐⭐⭐
Did you try this spandauer recipe? Show it some love in the comments below.
Hungry for more? Subscribe to the newsletter for free recipes straight to your inbox. Also, follow along on Facebook, Pinterest and Instagram.

Ingredients
- 1 cup cold milk (250ml)
- 2 ½ teaspoons instant or active dry yeast notes 1
- 425 g plain flour (all purp flour) (3 ¼ cups / 15oz)
- ⅓ cup white granulated sugar (66g / 2.3oz)
- ½ teaspoon salt
- 1 large egg
- 283 g cold unsalted butter (1 ¼ cup/10oz)
MARZIPAN FILLING
- ⅓ cup icing sugar (powdered sugar) (35g)
- 200 g marzipan (7oz)
- 1 egg white save the yolk
TO FINISH
- egg yolk mixed with 1 teaspoon milk (the eggwash)
- ½ cup raspberry jam
- 2 tablespoons flaked almonds to scatter notes 1
- ½ cup icing sugar (powdered sugar) (65g)
- 2-3 teaspoons milk
For best results, always weigh ingredients where a weight is provided
Equipment
- Sharp knife and ruler
Instructions
- MAKE THE DANISH DOUGH:Prep the yeast (to make sure your yeast is working): Warm ½ cup of the milk in the microwave for about 25 seconds or in a small saucepan, just until warm to the touch (not hot) or about 40C/104F. Too hot and you'll kill the yeast, too cold and the yeast won't bloom.
- To the warm milk, add 1 tablespoon of the sugar and all the yeast and mix. Let it sit for 5-10 minutes to become frothy. If it doesn’t look puffy or frothy, the yeast is no good and you’ll need to start again with a new pack of yeast.
- Combine dough ingredients: To a medium bowl add the flour, remaining 1/4 cup of sugar and the salt. Give it whisk to combine.
- Whisk the remaining ½ cup milk and the egg into the yeast mixture until well combined, then pour it into the dry ingredients. Use a spoon or spatula to mix the ingredients together to a rough and sticky dough.
- Rest the dough: Cover with plastic wrap and let it rest for 30 minutes.
- While the dough rests, grate the butter on the large grate side of a box grater and place back in the fridge to stay cold. TIP: Make sure to handle the butter shreds carefully just with your fingertips so you don’t press it all back together.
- Turn the dough out onto a lightly floured surface and gently shape it into a rough rectangle shape. Re-dust the work top with flour if needed but be careful not to add too much flour as it will dry out the dough.
- Add the butter: Roll out to a large rectangle roughly 25x35cm (10x14inches). Scatter the butter over two thirds of the dough starting on a short side and working towards the middle. It will look like a lot, just press it down a little so it holds together. Now fold in thirds, first the end with no butter over the middle, then the opposite end over the top.
- Roll and folds: Roll the Danish dough out to a large rectangle again sprinkling over a little flour to stop it sticking to the rolling pin or worktop if needed. Fold, letter style again.
- Repeat the roll and fold 3 more times. Each time you fold it, brush off any excess flour from the folded section. The last time, the dough will be getting quite tight and tough to roll out. If it’s too tight, just let it sit there for 5-15 minutes to give it a chance to relax and come back to it.
- Chill the Danish dough: Place the dough onto a plate and cover completely but loosely with plastic wrap (this will allow it to rise a little while it chills). Place into the fridge for 4 or up to 24 hours.
- MAKE THE MARZIPAN FILLING:Break the marzipan into small pieces and place into microwave safe bowl. Warm in the microwave for 15 seconds to soften slightly.
- Add the marzipan and sugar to the bowl of a stand mixer with paddle attachment or into a large bowl if using a handheld electric mixer. Beat on low-medium speed until it’s combined but looks like big crumbs – about 2 minutes.
- Add the egg white and beat on low until fully combined and smooth (about 2 minutes).Transfer to a piping bag with roughly a ½ inch opening.
- ASSEMBLE THE SPANDAUER:Preheat the oven to 200C (180C fan forced) / 395F. Line a large baking sheet with baking paper.
- Cut the dough into two squares, leaving one in the fridge for later. Roll the first dough square out to just over 20x30cm (8×12 inch). Trim the edges square then cut into 6 equal squares, each about 10x10cm (4×4 inch). Transfer them to the baking sheet.
- Pipe roughly a tablespoon of marzipan filling into the centre of each. Dab 3 of the pastry corners with water. Without pressing down yet, fold the dry corner right over the centre of the marzipan first, then fold in the other 3 corners all one of top of the other. Now press down well to seal them together in the centre. It’s important to enclose the marzipan as much as possible but a little peeking out at the corners is fine.
- You can repeat the last 2 steps with the other piece of Danish dough or you can freeze it for another time.
- Let the Danishes rest for 30-45 minutes until they look puffy and when you lightly press your finger to the dough, it bounces back fairly quickly.
- Brush exces flour off of the pastries then brush all over with egg wash, then press down in the centre to make a big divot for the jam. Add 2 teaspoons of jam to each then scatter with flaked almonds.
- Bake for 18-20 minutes until golden brown. Let them cool a little before eating as the jam and marzipan will be piping hot.
- Once cool, mix together the icing sugar and milk drizzle over the top of the Danishes.
- Please take a moment to leave a comment & rating. It's appreciated and so helpful.
Notes
- Tablespoons: I use a standard Australian 20ml tablespoon (equal to 4 teaspoons). Check yours before measuring.
- This is my own recipe but the raspberry marzipan combo and shaping method inspired by Destination Flavour Scandinavia | SBS Food.
- Nutrition details are approximate only – scroll below the recipe to find the full nutritional information.
This post may contain affiliate links that earn me a small commission for my referral, at no extra cost to you. Thank you for supporting Sugar Salt Magic.


