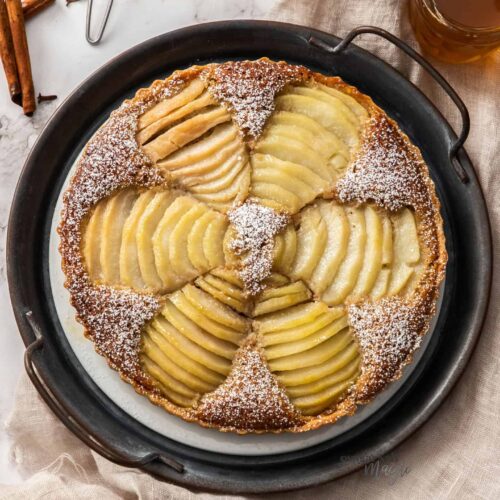

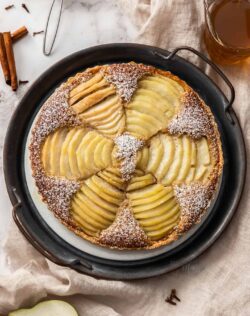
It looks super fancy, like you bought it from a French patisserie but this pear almond tart is all homemade and easier than you may think. Layers of poached pears and frangipane in a homemade tart crust. These flavours will make you feel cosy in winter and posh all year round.
- All made from scratch
- A lightly spiced flavour
- Cosy, warming flavours
- It looks extravagant
- Bonus spiced pear syrup
Here in Australia, we’ve just hit the cooler months and it’s the perfect time for these warming flavours and pears are at their best. For all my readers in the Northern Hemisphere, I recommend you keep this pear tart recipe top of mind for Fall and Thanksgiving – or just make it now, it’s so good any time, really.
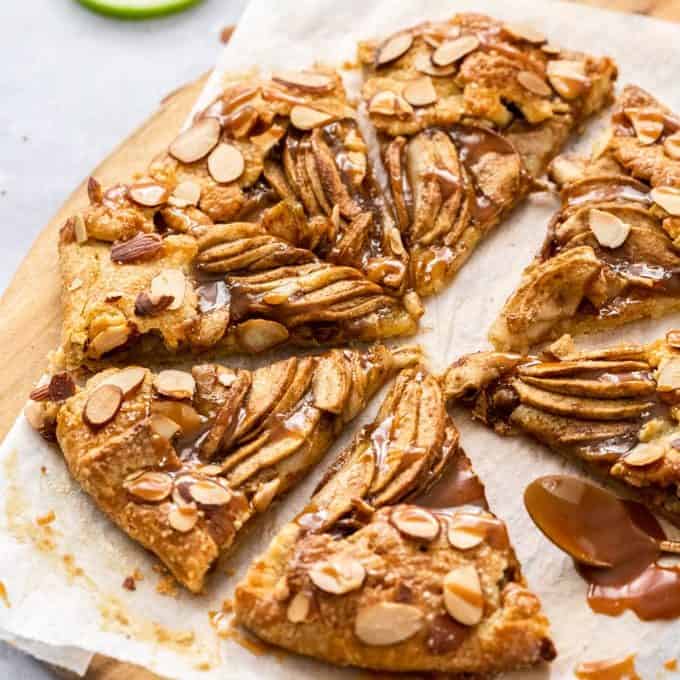
Do you love frangipane? Try this apple frangipane tart or this baklava tart. You could also try this super simple bakewell tart.

Never Miss a Recipe!
Get the latest recipes straight to your inbox!
Three homemade layers
- The homemade tart crust: This pastry is my regular shortcrust pastry (slightly adapted) and it really is easy to make. It does take time, I won’t lie, as you need to keep in mind chilling times, but you can make this pastry 2-3 days in advance (even longer if you want to freeze it).
- The frangipane: Slightly adapted from recipes like my baklava tart and strawberry almond tart, frangipane is one of the simplest tart fillings to make. It’s a simple mix of butter, sugar, eggs, flour and almond meal and this one has a little ground cloves too.
- The poached pears: These pears are soft, juicy and infused with wonderful warming flavours of clove and cinnamon. There is a bonus to poaching the pears and that’s the wonderful pear syrup you’re left with afterward. Use it as a cordial, in cocktails or over ice cream. I use a little on top of each slice of pear tart too.
Ingredients
There really aren’t a lot of ingredients to this pear tart, just 11 in fact. Most of these ingredients are self explanatory but here’s a little more information on a few of them.

Detailed quantities and instructions in the recipe card below.
- Spices: This tart has cinnamon and cloves. The cinnamon is in the form of sticks and the cloves are in two forms – whole and ground.
- Pears: The Packham pear is my favourite to use but Bosc also work well. Both these pears hold their shape well.
- Almond meal / Almond flour: Almond meal is very finely ground almonds. It’s used often in flourless cakes and gives a wonderful moist texture when baked.
How to make pear frangipane tart
Different to a flaky pastry, that you would pulse together in a food processor, this pate sucree crust is more like a cookie texture and comes together like a cookie would in a stand mixer or with an electric mixer.

Detailed quantities and instructions in the recipe card below.
- Make the pastry: Start by beating together butter and sugar, then add the egg (photo 1) and beat to combine. Add the flour (photo 2) and beat through until combined and beginning to clump together (photo 3).
- Make the tart shell: Shape the dough into a smooth dish and roll it out immediately (photo 4) on a lightly floured surface then lay it into your tart tin (photo 5). Press it down into the corners gently with your fingertips and leave the edges standing up (photo 6). Chill the tart shell for at least 2 hours.

- Par-bake the tart shell: After the pastry has chilled, dock the centre (prick all over with a fork), then run a knife flat along the edge all the way round to cut away the excess pastry. Line the shell with baking paper, the fill with pie weights (or rice) (photo 7). Par-bake the shell.
- For the poached pears: Peel and remove the cores from the pears (photo 8) then place them in some water with spices (photo 9) and simmer until tender. Drain on paper towel, then keep the syrup simmering until thickened.
- For the frangipane filling: Beat together sugar and butter until creamy, then add eggs (photo 10) and vanilla. Now beat in the flour, almond flour and ground cloves and spread the mixture into the tart shell (photo 11). Slice the pears and lay them on top (photo 12) then bake.
The spiced pear syrup
This pear syrup is just lovely. The pears and spices are infused into the syrup, then removed and the resulting syrup is rich in flavour and smells so comforting. Winter flavours at their best.
Even though the tart is already extremely flavourful and very moist in texture, I pour a little of the syrup over the slices of pear almond tart when serving. You could save the whole lot though and use it in cocktails, as cordial or for just pouring over ice cream or pancakes.

Pro tips and tricks
- Don’t overwork the pastry: Handle the pastry gently and quickly as overworking it can lead to it shrinking.
- Don’t skip the chilling time: This allows the pastry to relax (so that it isn’t elastic and reduces the amount of shrinkage) and it also keeps that butter cold. This helps to prevent he pastry from shrinking.
- Don’t skip blind baking: Blind baking may seem like an extra step but it’s well worth it. Without it, the bottom of the tart won’t be nice and crisp.
- Use a melon baller to remove the cores: This makes the job so easy and less dangerous and messy than trying to cut them out with a knife.
- Make sure to drain the pears: You want the pears to be dry when you add them to the tart or you’ll end up with liquid in your tart and it could turn out soggy.
- Cool the shell slightly: Before adding the frangipane filling, give the tart shell 5 minutes to cool a little, otherwise the butter in the frangipane will immediately melt when you try to spread it in. I normally leave making the frangipane until the tart shell has come out of the oven.
Time-saving tips for pear tart recipe
It may seem like there are many steps to this recipe but I promise none are difficult. While it’s all do-able in one morning, I know you have other things to do as well so here some tips to save time.
- 2-3 days ahead: Make the pastry dough ahead of time, anywhere up to the point where it’s in the tin, shaped, trimmed and docked (docking = pricking with a fork). If you freeze it, you can do it 2 months ahead (defrost in the fridge overnight).
- 1 day before: Poach the pears and reduce the syrup. Place them in separate air-tight containers in the fridge overnight. You can also bake the tart case today, if you’d like.
- On the day: All that’s left to do is blind-bake the tart shell (if you didn’t do it yesterday), and make the frangipane filling which takes all of 5 minutes.
Storage
The finished tart should be stored in the refrigerator for up to 3 days, wrapped well in plastic wrap. Bring it to room temperature before serving.

If you try this pear almond tart, make sure to come back and leave a rating and comment below. I love hearing from you.
Hungry for more? Subscribe to the newsletter for free recipes straight to your inbox. Also, follow along on Facebook, Pinterest and Instagram.
Ingredients
FOR THE PASTRY
- 100 g unsalted butter, softened (7 tablespoons / 3.5 oz)
- 40 g icing sugar (powdered sugar / confectioners' sugar) (⅓ cup / 1.4oz)
- 1 large egg, room temperature
- 225 g 225 g plain flour (all purpose flour) (1 ¾ cups / 8oz) (notes 2)
FOR THE FRANGIPANE FILLING
- ½ cup white granulated sugar (100g / 3.5oz)
- 113 g unsalted butter, softened (½ cup / 1 stick)
- 2 large eggs
- 1 teaspoon vanilla extract
- 2 tablespoons plain (all-purp) flour (notes 1)
- 95 g almond meal (ground almonds / almond flour) (1 cup / 3oz)
- ½ teaspoon ground cloves
FOR THE PEARS
- 3 ripe pears (Packham, Bosc or Anjou)
- 3 ½ cups water
- ¾ cup white granulated sugar
- 2 cinnamon sticks
- 6 whole cloves
- 2 teaspoons vanilla extract
For best results, always weigh ingredients where a weight is provided
Equipment
- 9 inch fluted tart tin with removable bottom
- Pie weights / baking beans / rice
- Melon baller
Instructions
- FOR THE PASTRY:In the bowl of a stand mixer with paddle attachment, add the butter and icing sugar. Beat on medium until fully combined and smooth (1 – 2 minutes).
- Add the egg and beat on low until smooth. Add the flour and beat just until large clumps are forming.
- Turn the dough out and pull it together into a smooth ball with your hands (making sure not to handle it too much) then press it out into a 1 inch thick disk.
- Place it onto a lightly floured work surface and dust the top with just a little flour too. Gently and gradually roll the pastry out, turning it often, to about 4-5mm thick or about 11 inches in diameter.
- Place the rolling pin in the middle of the dough and fold one side of the pastry over the top. Lift the rolling pin so the pastry is hanging over it, and lightly dust off any excess flour from underneath. Carefully lay it into a 9 inch round tart pan with removeable base.
- Press the dough down in to the corners all the way round, then press it into the scalloped sides. Leave the overhang standing upright and place the tart pan into the fridge to chill for a minimum of 2 hours or overnight. If your freezer has space you can place it in there.
- You can start preparing the poached pears now.
- PAR BAKE THE TART SHELL:Preheat the oven to 180C (160C fan) / 350F.
- Use a fork to prick the pastry base all over. Use a small sharp knife to trim off the excess pastry.
- Line the tart shell with a sheet of baking paper and fill with pie weights or rice. Fill it quite full and making sure it’s pressed up tight against the edges.
- Bake for 15 minutes then carefully remove the paper and pie weights and bake a further 5 minutes.
- FOR THE POACHED PEARS: Peel and halve the pears. Carefully cut out the core (a melon baller makes this easy). Make sure to remove the stems too.
- Place the water, sugar, cinnamon sticks, cloves and vanilla into a large saucepan over medium heat stirring until the sugar dissolves. Bring to a simmer. Add the pears and poach at a simmer for 7-10 minutes or until just tender when you poke them with a fork.
- Remove the pears, drain them on paper towel.
- Continue simmering the poaching liquid for another 15-20 minutes until you have around 1 cup or less left. Strain into a jug and set aside to cool.
- FOR THE FRANGIPANE FILLING:Once the tart shell has finished blind-baking.
- In a medium bowl with an electric beater, beat together the sugar and butter until light and fluffy. Add the eggs and vanilla and beat well. Finally, mix in the flour, almond meal and ground cloves.
- Carefully spread the mixture over the base of the tart shell.
- Slice the pears into thin slices and holding them together, arrange over the top of the frangipane, points to the center of filling. Brush just a little of the thickened syrup just over the pears.
- Bake for 60-70 minutes, turning the tray half way through, until golden and springy on top. If you notice any liquid pooling around the pears, soak it up with a paper towel. A little is fine.
- Cool tart in the tin to room temperature before serving.
- Please take a moment to leave a comment & rating. It's appreciated and so helpful.
Notes
- Tablespoons: I use a standard Australian 20ml tablespoon (= 4 teaspoons)
- For best results, you should always weigh ingredients like flour and sugar. Kitchen scales are relatively cheap but if you can’t weigh the ingredients, use the spoon and level method (don’t scoop).
- Baking time: All ovens vary, test for doneness 3-5 minutes before for the pastry blind bake and 5-10 minutes before for the end.
- Pear Varieties: Packham pears, anjou pears or bosc pears will all work well.
- Start the poached pears while the pastry is resting, so they drain and cool in time.
More Information
These links will take you up to the post – just scroll down to get back to the recipe card.MORE PIES AND TARTS RECIPES!
This post may contain affiliate links that earn me a small commission for my referral, at no extra cost to you. Thank you for supporting Sugar Salt Magic.
4 Comments on “Pear Almond Tart”
Simple , elegant and yum. Almonds and pears…a lovely combination.
Thank you Marie.
So happy you love it, Pamela
These tart looks and sounds splendid – beautiful and inviting combination of textures and flavours. Even though these cozy aromas, as you mentioned, are associated with fall, I wouldn’t mind a huge slice right now (Well, our first summer day feels like autumn hehe)
It absolutely works all year round. Thanks Ben