Calling all Kit Kat lovers! You’ll want to make a batch of these Kit Kat brownies ASAP. The ultimate brownie but taken to a whole new level, filled and topped with Kit Kat bars. All in one bowl too!
Try these Ferrero Rocher brownies and these chocolate ganache brownies too.

Why you’ll love it
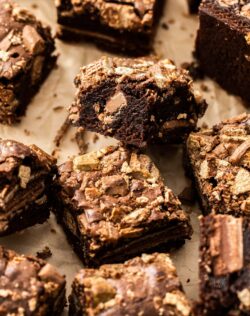
What’s not to love?! We’ve got super thick brownies, rich chocolate flavour and loads of Kit Kat bars (aka more chocolate plus some crisp wafer).
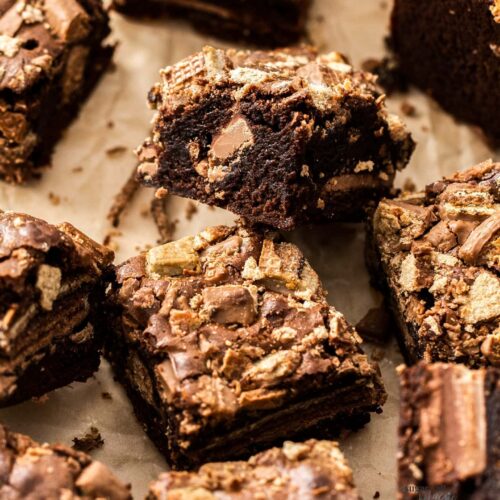
- Texture: With an adaptation of my favourite brownie recipe as the base, you get a fudgy, moist, dense yet tender, melt-in-the-mouth brownie. That is interlaced with the crisp wafer from inside the Kit Kats so, if you’re a texture lover, you’ll love these.
- Flavour: Intensely chocolatey brownie and Kit Kat. You get both in every single bite.
- Ease: Incredibly easy to make, so even beginner bakers or kids will love making these. All you need is one ONE BOWL and no fancy equipment.
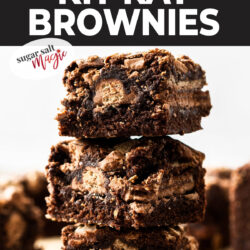
Kit Kat brownies are unapologetically rich and completely irresistible. This recipe yields about 16 brownies from an 8 inch baking tin.
Ingredients you’ll need

Detailed quantities and instructions in the recipe card below.
- Fat: We’re using a combination of both unsalted butter and oil. Butter adds flavour while oil adds moisture and tenderness. Both make these rich and soft.
- Chocolate: I use dark chocolate (50% cocoa solids / semi-sweet chocolate) in the brownie batter itself. It adds to the fudgy texture and intense chocolate flavour.
- Sugar: Two types of sugar – white sugar for straight up sweetness and brown sugar for it’s caramel edge and moisture.
- Eggs: Use large eggs. They add structure and richness.
- Flour: Just regular plain flour or all-purpose flour is all you need and not too much so the brownies don’t become dry.
- Cocoa powder: I use dutched process cocoa powder for it’s colour and less bitter flavour but you can certainly use regular unsweetened cocoa powder as well.
- Salt: Just a little salt to balance out all that sweetness and it intensifies the chocolate flavour too.
- Pure vanilla extract: You won’t taste outright vanilla in these but it does add balance and I don’t recommend leaving it out. Use pure vanilla extra as opposed to essence – the latter is synthetic.
- Kit Kat bars: I use the large bars which always seem to have a higher chocolate ratio than the smaller 4 stick packs but any will work. You’ll need 2 large blocks or roughly 20 sticks in total. I normally put about 14 or up to 16 sticks inside and the rest are crumbled over the top.
Use ANY Kit Kat flavour you like. The caramel one is delicious or you could turn this minty using the mint version. For the ones in these photos, I used a combination of original milk chocolate Kit Kats and Cookies and Cream Kit Kats.
Tools you’ll need
How to make Kit Kat brownies
You’re going to love how quick and easy these are. Anyone can make them with absolutely no fuss.

Detailed quantities and instructions in the recipe card below.
- Melt the chocolate and butter together in a large bowl. I use the microwave for this – 2-3x 30 second increments, stirring well between each so you don’t overheat the mixture.
- Whisk in everything else in starting with the eggs and vanilla (photo 1). Next the sugars (photo 2), then finally the dry ingredients (photo 3).
- Layer it up in an 8 inch square baking pan starting with half the brownie batter followed by 14-16 Kit Kat sticks (photo 5). Add the rest of the batter then crumble over the remaining Kit Kat (photo 6).
- Bake the brownies in a preheated oven for 30-36 minutes until the top is flaky and starting to crack and a toothpick comes out looking sticky (not wet).
Tips and tricks
- Baking time: The baking time is important depending on the brownie texture you’re after. Baking for 30 minutes will give you fudgy, slightly underbaked brownies that some like, while around the 35-36 minute mark you’ll have brownies that are still dense and fudgy but cooked through.
- Don’t overbake: The brownies are done when you pull out a toothpick and it looks sticky, fudgy or a few sticky crumbs but it should no longer look like wet batter. Brownies carry-over bake in the tin – being so dense it takes them a while to cool – so it’s better to underbake than overbake.
- Use a mix of Kit Kat flavours: Pick 2-3 complementary flavours and have some fun with these.

Truly you could call these candy bar brownies, since you can add a number of candy bars to this and they’ll work a treat. Try Twix bars or chopped up Snickers or Mars Bar.
Storage
Store these brownies in an airtight container at room temperature for 3-4 days or in the fridge for 5-6. Kit Kat brownies can be frozen too for up to 2 months. They’re best frozen already portioned but also in an airtight container.

More recipes you’ll love
- Fudgy marshmallow brownies
- Biscoff brownies
- Brownie blondies
- Chocolate caramel brownies
- Chocolate brownie pie
- KitKat Truffles
- Chocolate peanut butter brownies
IF YOU TRY THIS Kit Kat brownie recipe, please take a moment to leave a rating and comment below. I love hearing from you, and it helps other readers too!
Never Miss a Recipe!
Get the latest recipes straight to your inbox.
Video
Ingredients
- 85 g unsalted butter (3oz / ¾ stick)
- ¼ cup veg oil (60ml)
- 100 g dark chocolate (50% cocoa solids) (3.5oz)
- 95 g plain (all-purp) flour (¾ cup / 3.4oz)
- 40 g unsweetened cocoa powder (⅓ cup)
- ½ teaspoon table salt
- ½ cup granulated sugar (100g / 3.5oz)
- ½ cup light brown sugar, packed (100g / 3.5oz)
- 3 large eggs, room temp
- 2 teaspoons pure vanilla extract
- 2 large Kit Kat blocks (or 20 individual sticks)
For best results, always weigh ingredients where a weight is provided
Equipment
- Large mixing bowl
Instructions
- Preheat your oven to 180C / 350F / 160C fan forced. Line an 8×8 inch square baking pan with baking paper
- In a large microwave safe bowl, melt together the chocolate and butter in the microwave in 30 second increments, stirring well between each until just melted.
- Add the eggs, sugars and vanilla and whisk well to combine.
- Sift in the flour, cocoa and salt in a medium bowl and mix well until there are no lumps left.
- Pour half the batter into your prepared pan and level it out. Place 14-16 sticks of Kit Kat side by side, with small gaps between, until covered then cover with remaining batter making sure to drizzle it all over so that it’s easy to level out again.
- Crumble up the remaining Kit Kats by hand and scatter them over the top.
- Bake for 30-36 minutes until a toothpick comes out with some sticky crumbs attached but not wet batter – make sure to miss the Kit Kats (you should be able to tell when you’ve just hit a Kit Kat or chocolate).
- Cool in the tin for around 15-20 minutes before removing to cool further.
- Can be served warm and gooey, or let them cool completely for the chocolate to re-set.
- Please take a moment to rate this recipe. I and other readers appreciate it and it helps me create more recipes.
Notes
- All ovens vary – always test for doneness 3-5 minutes before the recipe suggests
- For best results, you should always weigh ingredients like flour and cocoa. Kitchen scales are relatively cheap but if you can’t weigh the ingredients, use the spoon and level method (don’t scoop).
- The brownies are done when you pull out a toothpick and it looks sticky, fudgy or a few sticky crumbs but it should no longer look like wet batter.
- Brownies carry-over bake in the tin – being so dense it takes them a while to cool – so it’s better to underbake than overbake.
- Get creative and use a mix of different Kit Kat flavours that compliment each other.
This post may contain affiliate links that earn me a small commission for my referral, at no extra cost to you. Thank you for supporting Sugar Salt Magic.

