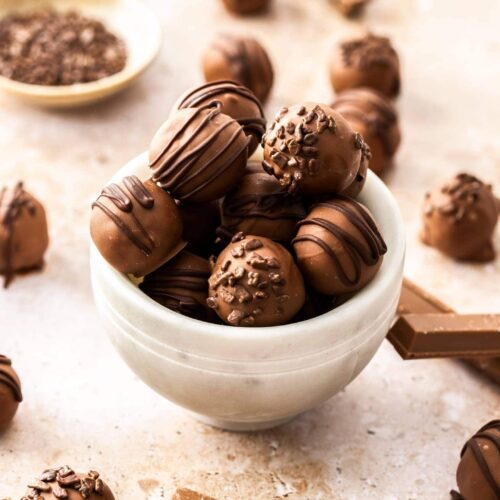
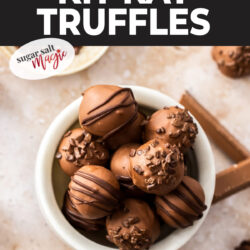
Another recipe for the KitKat lovers among us – KitKat truffles are so easy to make and elegant little morsels to give away or after dinner too.
Try these hazelnut praline truffles and my biscoff truffles too.

Why you’ll love them
These KitKat truffles aren’t a soft gooey truffle. Since Kit Kats are filled with crisp wafer, there is a certain amount of that texture in these truffles. They’re pulled together into a mixture that can be rolled into balls using just a little sweetened condensed milk.
These truffles have the rich indulgent taste of Kit Kat bars. The truffle balls then have a milk chocolate coating (though you could certainly use dark).
They’re so easy make, no baking required, only need 3 ingredients and they’re fun to put together too. Even the kids can get involved since they’re so simple.
Ingredients you’ll need

Detailed quantities and instructions in the recipe card below.
- Kit Kat bars: I used regular milk chocolate Kit Kats for these but use whichever flavour you like.
- Sweetened condensed milk: Since I didn’t want to over-sweeten an already sweet candy bar, I use just enough to pull these into balls. The condensed milk sticks everything together.
- Chocolate: For coating the truffles, you can use milk chocolate like I have here or any other type of chocolate you choose. Ruby chocolate would be lovely for Valentines day or Mothers day and dark chocolate is elegant and balances the sweetness a little.
Tools you’ll need
- A food processor
- A large mixing bowl
- A small high sided bowl (for dipping in chocolate)
- A baking sheet
How to make Kit Kat truffles
Just 4 easy steps and you’ll have a lovely batch of these easy truffles to share around.

Detailed quantities and instructions in the recipe card below.
- Blend the Kit Kats in a food processor until quite fine.
- Mix: In a large mixing bowl, combine the Kit Kat crumbs (photo 1) and the sweetened condensed milk until it starts forming a mixture that clumps (photo 2).
- Roll: Roll them into balls (photo 3), pressing firmly, until smooth.
- Dip: Dip the balls into melted chocolate (photo 4) and set them on a baking tray (photo 5) in the fridge to set.
Tips and tricks
- Rolling: When rolling, the heat of your hands and pressing firmly will help to press them together into a firm ball. You could add a little more condensed milk if you like but they will be stickier and sweeter.
- Get creative: Try different flavoured Kit Kats to get a batch of different flavoured truffles.
- Add a little cream (1-2 tablespoons) to make the filling softer without making it sweeter.

Storage
Kit Kat truffles will keep well in the refrigerator, in an airtight container for up to 2 weeks.
So quick and so simple, these truffles truly are the perfect delicious treat to cure your sweet cravings.
More recipes you’ll love
- Toffee pecan chocolate truffles
- Strawberry white chocolate truffles
- Malteser tray bake (no bake)
- Malteser rocky road
- Kit Kat brownies
- Biscoff truffles
- Coconut balls

IF YOU TRY THIS KitKat truffles recipe, please take a moment to leave a rating and comment below. I love hearing from you, and it helps other readers too!
Never Miss a Recipe!
Get the latest recipes straight to your inbox.

Ingredients
- 340 g Kit Kat chocolate bars (12oz)
- ⅓ cup sweetened condensed milk (80ml)
- Pinch of salt, optional
- 200 g milk chocolate for coating (7oz)
For best results, always weigh ingredients where a weight is provided
Equipment
- Large mixing bowl
- Small high sided bowl
Instructions
- Line a large baking sheet with baking paper.
- In a food processor, blitz the Kit Kats to rough crumbs.
- Pour the Kit Kat crumbs into a large mixing bowl and add the sweetened condensed milk.
- Roll into tablespoon sized balls, place on the baking tray and set aside.
- Using a high sided bowl, melt the milk chocolate in the microwave, in 30 second increments, mixing really well between each (don’t overheat the chocolate).
- Drop each ball into the melted chocolate and use a fork to flip it over and coat well.
- Lift out with a fork, let the excess drip off, then place back onto the prepared tray.
- Decorate even more if you like with sprinkles and a contrasting chocolate drizzle.
- Chill for an hour or two until set.
- Please take a moment to leave a rating and comment. I love hearing from you, and it helps other readers too!
This post may contain affiliate links that earn me a small commission for my referral, at no extra cost to you. Thank you for supporting Sugar Salt Magic.

