
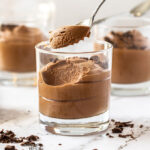
Luscious, creamy and oh so good, this simple chocolate mousse is the only recipe you’ll ever need.
I use a slight adaptation of this mousse in my Chocolate Mousse Tart which is wonderful if you feel like a nice crunchy crust with this dessert. Also, used in my chocolate mud mousse cake, you can see how versatile it is.

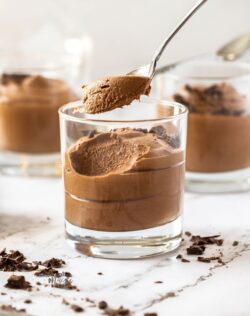
The second reason is that I realised readers are skipping my mousse cake recipe, thinking it’s not the mousse in a dish they’re after. Well, I promise you it is and to prove it, here it is in pretty little glasses perfect for serving up during the week (aka it’s incredibly easy to make) or for entertaining friends on the weekend (aka it’s indulgent and ridiculously yum).
Ingredients
There’s just 4 ingredients in my eggless chocolate mousse and as you can tell from the title eggs are not one of them.

- Chocolate – I use 50% chocolate for this or semisweet will work. It’s important to use good quality chocolate since the flavour will be very obvious so use a good eating chocolate, not a baking chocolate.
- Icing (powdered) sugar – this adds a touch of sweetness and balances the flavours best. I urge you not to skip it as it does make a difference to the flavour and it’s only a little. You can absolutely swap it for something like monkfruit sweetener though.
- Butter – Not often used in chocolate mousse, the butter has two roles to play here. It doesn’t affect the flavour much but it adds to the creaminess and also assists the way it sets.
- Cream – Full fat cream (35%) so that it whips up nice and fluffy
While many know the classic French version of mousse to have eggs in it, it doesn’t actually have to have eggs for it to be mousse. I prefer not to eat uncooked eggs, so I leave them out altogether and use plenty of whipped cream to get the perfect airy and soft texture that we all know mousse to have.
If you’re looking for another make ahead dessert perfect for entertaining – try these Chocolate Fondants.
How to make it – step by step
Making this simple chocolate mousse is a 2 part process – the ganache and adding in the cream.

- The ganache is an easy case of melting together chocolate, sugar, butter and a little of the cream in a saucepan (image 1) over the lowest of low heat.
- When it’s 90% melted it, remove it from the stove, continue stirring until it’s fully melted then pour it into a glass bowl (image 2) to cool to room temperature.
- Once the ganache is cool, whip up some cold cream to firm peaks (images 3&4) (don’t overwhip -see tips below).

- Mix a dollop of the whipped cream (images 5&6) into the ganache to lighten it a little.
- Add half the remaining whipped cream and use a folding action to fold the ganache and cream together until there are just a few streaks left.
- Add the remaining cream and repeat the folding process until there are no streaks left (image 7).
- Pipe it into glasses (image 8).
Be gentle when folding in cream. The more air you can keep in the mousse, the fluffier and lighter the end result

Tips and Tricks
- Don’t add hot ganache to the cream or it won’t whip. Be patient and wait the 45 minutes or so for it to cool to room temp.
- The cream must be cold to whip properly.
- Be careful not to overwhip the cream. Beat it just until it hits firm peak stage. If you take it too far, it will have a grainy texture, or worse, start separating.
- Make sure fold in the cream. Folding means gently scooping from the bottom of the bowl, lifting and folding it over the top of itself. This method of mixing ensures that the air you’ve lovingly whipped into the cream doesn’t all get knocked out.
You can watch the method of folding in cream in both my Raspberry Mousse and Chocolate Mud Mousse Cake videos and you can see this mousse being made in the latter.
How to fix overwhipped cream
Ok, it happens. Sometimes you’ve whipped the cream trying to get big fluffy, voluminous peaks only to end up with it starting to look grainy. As long as you stop at this point, you can save it. Add a dash more cream to the overwhipped cream and mix it in gently with a wire whisk. It should come back to the firm peaks you’re after.
Do you know what happens if you keep on whipping that overwhipped cream? First, it will start separating and looking awful but eventually it’ll turn into …… butter! Yep, that’s right. If you’ve ever wanted to make butter from scratch, beat some cream until it magically appears.
How to store it
One of the great things about mousse – aside from being delicious and quick to make – is that you can make it ahead of time. Store it in the fridge for 3-4 days covered with plastic wrap.
Click here to PIN this recipe for later!

Want more mousse recipes? Try these
- Lemon Curd Mousse
- Chocolate Mousse Mud Cake [+ Video]
- Strawberry Mousse Tart
- Easy Raspberry Mousse [+ Video]
- Homemade Chocolate Milk
- 3 Ingredient Oreo Mousse
- Coffee mousse
Ingredients
- 2 ½ cups whipping cream (divided)
- 200 g dark (50%) chocolate (7oz)
- 57 g unsalted butter (2oz / 1/2 stick / 1/4 cup)
- 2 tablespoons icing (powdered) sugar (notes)
For best results, always weigh ingredients where a weight is provided
Instructions
- Pour 1/2 cup cream into a small saucepan and the remaining cream into a glass bowl and place in the fridge.
- Heat the 1/2 cup of cream, chocolate, butter and sugar over very low heat and stir until it's all about 90% melted. Remove from heat and keep stirring until it's a smooth ganache.
- Pour it straight into a glass bowl and let it cool to room temperature.
- Once the ganache has cooled, beat the remaining 2 cups cream to firm peaks. .
- Using a spatula, stir about 1/2 cup of the whipped cream straight through the ganache to lighten it.
- Now gently fold in half of the remaining whipped cream until there are just a few streaks left. Follow that with the remaining whipped cream, just carefully folding until it's all mixed in.
Notes
- Make sure to use very low heat to melt everything together and stop when it's 90% done so you don't burn or overheat the chocolate.
- Make sure to fold so you don't knock the air out of the whipped cream.
- Can be made a couple of days ahead and should be stored in the fridge covered with plastic wrap. Will last 3-4 days.
This post may contain affiliate links that earn me a small commission for my referral, at no extra cost to you. Thank you for supporting Sugar Salt Magic.
4 Comments on “Eggless Easy Chocolate Mousse”
Looks great! Could I sub in a good quality white chocolate instead of dark?
Hi Sam. Dark chocolate has a firmer setting texture than white chocolate so it wouldn’t set as firmly. It’s also less sweet. I’d leave out the sugar entirely and serve in individual glasses like this post so you don’t need to worry about it holding such a firm shape.
Have made this recipe multiple times and it is always a winner. The mousse is by far the nicest mousse I have ever made.
So happy you love it as much as we do, Amanda.