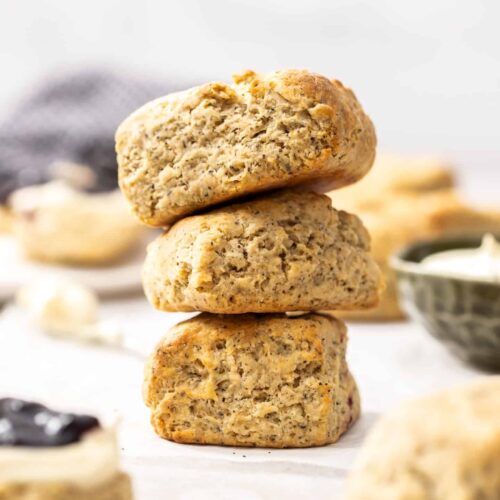

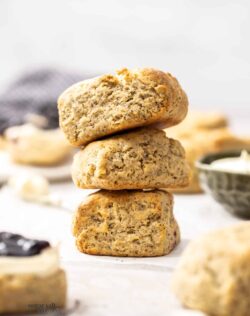
I’ve been so excited to post this recipe because I think these earl grey scones are the best scones ever! They’re flaky, light and buttery, as good scones should be, with a subtle earl grey flavour and fragrance and so easy to make.
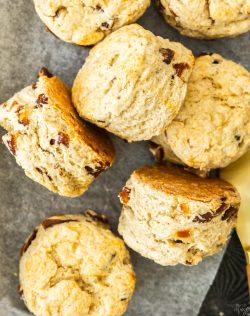
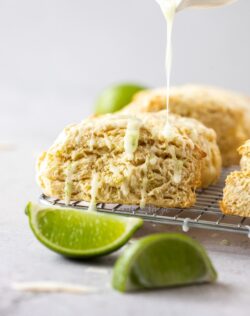
Do you love scones? Try these blog favourite recipes too – White Chocolate Cranberry Scones and Lime Coconut Scones.

Never Miss a Recipe!
Get the latest recipes straight to your inbox.
Why you’ll love them
With a subtle earl grey flavour and fragrance but strong enough to make these scones stand out from the rest, you’re going to love earl grey scones. Pinky promise!
- Just 10 minutes to make
- Only 7 ingredients
- Perfect soft centre and crisp exterior
- Light and flaky
- A simple throw together when friends drop around
- Perfect simple afternoon tea treat
Crack them open while they’re still hot and smell the buttery, tea infused aroma. Top with some double thick or clotted cream and a dollop of your favourite jam for the perfect indulgent, yet light, tea-time treat.
What are scones?
Scones are a small, lightly sweetened, baked tea-time treat. They have a soft centre with a crisp outside and a slightly flaky texture. Scones (pronounced ‘skon’) are served with cream and preserves, normally with tea.
Where did scones originate? The vague answer is the UK. Scotland, Ireland and Great Britain each seem to have some claim to them but thanks to whoever it was, they are now enjoyed the world over.
These earl grey scones have the classic buttery flavour of a British scone, with the delightfully uplifting scent and flavour of earl grey tea.
Ingredients for earl grey scones

Detailed quantities and directions in the recipe card at the bottom of the post.
- Earl grey tea: A black tea blended with bergamot, earl grey tea has an unmistakable citrus aroma. Simple tea bags or fine loose leaf tea will work perfectly for this recipe.
- Flour: Just plain (all-purpose) flour is all you need.
- Icing (powdered) sugar: As there is very little mixing involved, icing sugar ensures the sugar is evenly spread throughout the scone and there is no crunchy sugar to worry about. You could use superfine if you prefer, though cut it down to ¼ cup.
- Baking powder: This gives the scones lift.
- Butter: Unsalted butter is used cold and cut into the flour.
- Milk: Use full-fat milk for best results.
- Salt: I use just a touch of salt to intensify flavours.
How to make earl grey scones
With scones, it’s important to keep particular ingredients (butter and milk) cold. Just remember that rule and the process is very simple.

See the recipe card below for the full recipe details.
- Steep the tea: Steep 2 earl grey tea bags in boiling water (photo 1).
- Dry ingredients: Combine flour, sugar, baking powder, salt and tea leaves in a medium mixing bowl (photo 2).
- Cut in the butter: Add grated butter and use a pastry cutter (or very, very lightly use your fingertips) to cut the butter into the dough (photo 3). You should end up with pieces of butter around the size of a lentil.
- Make the dough: Add the milk and steeped tea to the dry ingredients (photo 4) and mix to a wet shaggy dough (photo 5).

- Shape the dough: Turn the dough out onto a very lightly floured surface and shape into a rectangle about 1 ½ inches high (photo 6). Cut the dough into 8 squares (photo 7).
- Bake: Brush the tops of the scones with milk (photo 8), then bake for 20 minutes.
Tips and tricks
- Keep the milk and butter cold: In scones, the butter is not blended in, but instead cut in so that small pieces remain. These pieces of butter melt and release steam as they bake which creates pockets of air, giving you the flaky texture.
- How to cut in butter: The easiest way to cut in butter is to use a pastry cutter. Growing up I’d watch my mum cut in using a knife which she does so easily but I couldn’t do it to save my life. You can use your fingertips remembering we want small bits of butter left, so don’t melt it with your fingers.
- How to cut the dough: Use a sharp knife, dipped first in flour. This ensures, you don’t push all the layers together, so they stay tall and puff up in the oven.
- Don’t add too much flour: It’s a sticky dough so when you turn it out onto your surface, don’t be tempted to add too much flour or you may end up with dry scones.
- Keep the dough tall: When you shape it and after you cut the scones, make sure they’re around the 1 ½ inches tall – this will ensure tall scones once they’re baked.
How to eat scones
Did you know there is a scone eating etiquette? Well, there is and here’s how to look like a true s-conisseur.
- They must be eaten warm. Scones are always eaten fresh out of the oven while they’re still warm.
- Break the scone in half. No knives please, if a scone is made correctly, you can crack them straight through the centre.
- Cream and jam or jam and cream? This is quite a point of debate between the Cornish and Devonshire people with the Cornish suggesting it should be jam first, and Devons saying it should be cream first. I say, eat it how you like it most. My natural inclination has always been cream first.
- Do not eat them sandwich style. Each half of a scone is eaten as a separate delicious treat, never sandwiched together.
- Eat them with your hands. Never use cutlery to eat your scone, just pick it up with your hands and take a good bite.
I always find the history and tradition around recipes fascinating but, they’re your scones, so eat them as you enjoy them.

The best ways to enjoy them
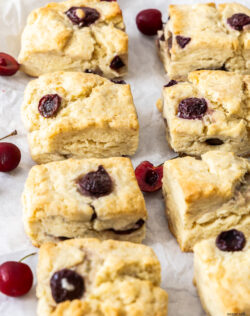
These earl grey scones are lovely with the traditional double-thick cream or clotted cream and preserves like the blueberry jam I’ve used here. There are some other flavours that would be delightful too.
- Just spread them with butter, straight from the oven (I love them like this)
- The bergamot in earl grey tea matches well with a lemon curd or orange curd
- Make a fruit compote, like blueberry or blackberry would be perfect
- That tea flavour goes beautifully with honey too
Make sure to serve them with a pot of tea on the side.
How to store scones
All scones, including these earl grey scones, are best eaten straight from the oven – they’re never as good the next day. If you do have leftovers, give them a 10 second blitz in the microwave to warm and fluff them up again.
If you want to make them ahead of time, you can make the dough and shape them, then place them in the fridge overnight. You can bake them from cold.

More recipes you’ll love
You’ll love these easy scone recipes too.

If you try this earl grey scones recipe,
show it some love with a ⭐⭐⭐⭐⭐ rating below. Thank you!
Hungry for more?
- Subscribe via Email, Facebook, Pinterest and Instagram.
- Add Sugar Salt Magic as a Google Preferred Source.
Video
Ingredients
- ¼ cup boiling water
- 4 earl grey teabags (notes 6)
- 325 g plain (all purp) flour (2 ½ cups / 11.4oz)
- 45 g icing (powdered) sugar (⅓ cup / 1.2oz)
- 3 ½ teaspoons baking powder
- ¼ teaspoon salt
- 75 g unsalted butter, cold and grated (3 oz / ¾ stick)
- ¾ cup cold milk (plus 2 teaspoons extra)
For best results, always weigh ingredients where a weight is provided
Equipment
Instructions
- Steep two of the teabags in the boiling water for 5 minutes. Squeeze them out well then discard the teabags, and allow the tea to cool completely.
- Preheat oven to 200C / 400F / 180C fan forced. Line a large baking tray with baking paper.
- In a large bowl, use a whisk to combine the flour, icing sugar, baking powder, salt and the tea leaves from the final two teabags.
- Add the cold grated butter and using either your fingertips or pastry cutter, gently blend the butter into the flour until only small pieces remain, the size of lentils.
- Add the tea liquid and milk and stir with a spoon to sticky dough.
- Turn the dough out onto a very lightly floured surface. Shape it into a rectangle about 1 ½ inches high and twice as long as it is wide,
- Use a sharp knife, dipped in flour, to cut the dough into 8 tall squares.
- Transfer to the prepared baking tray and brush the reserved milk over the tops.
- Bake for 20 minutes until turning golden on top. Cool for 5 minutes then serve warm.
Notes
- Make sure the butter and milk remain cold right up until adding them in.
- The butter should not be entirely blended in. Make sure there are small lentil-sized pieces still.
- The height of the scone dough is important.
- If it’s very warm in your kitchen, chill the dough for a few 10 minutes before shaping.
- Make sure to squeeze all the liquid out of the steeped teabags.
- The tea flavour in these scones is subtle. If you like a stronger flavour, add a third teabag worth of tea leaves into the dry mix.
More recipes you’ll love
You’ll love these easy scone recipes too.


This post may contain affiliate links that earn me a small commission for my referral, at no extra cost to you. Thank you for supporting Sugar Salt Magic.


14 Comments on “Earl Grey Scones”
I just made these, and my family loved them! I’m not a fan of very sweet scones, so these were perfect with jam. I’ve made a lot of different scone recipes, and I appreciated how simple these were—no need to chill or freeze the scones before baking, no need to use frozen butter. I also loved that the recipe called for plain milk, rather than cream or buttermilk. They will now be my go-to recipe for a weekend treat. Thank you!
I’m so happy you love them, Pam. I truly appreciate you dropping back to review.
Very good scone’s recipe , not sweet at all though but with a teaspoon of strawberry jam it does the job. It smells so good and very flaky.
Next time I will try to add some maple syrup to have a bit of sugar.
Thank you.
So happy you like them, Vicky. Scones aren’t generally very sweet, since adding jam to them gives the sweetness.
Very quick and easy to prepare the dough (took me like 20 mins). I brushed cream on top instead of milk and used loose earl grey tea (2g ~ 1 tea bag). I also made lemon glaze since they’re not sweet enough for me. Thank you for the recipe! ❤️
*Can I increase the amount of icing sugar?
Hi Quyên. So happy you love them. I wouldn’t increase the icing sugar as it may start to dry them out – icing sugar or powdered sugar is often a combination of sugar and cornflour/cornstarch so while it’s fine in a bake in the tested amount it doesn’t always work when increased. You could add a tablespoon of caster sugar or white granulated sugar though.
AMAZING!!! Super delicious I added dried fruit, switched milk for buttermilk and used the extra tea leaves! They came out fluffy and delicious! My whole family loved them with jam and some cream! 🌷💗 they’re the perfect sweetness for adding jam and having with an afternoon tea!
I’m so happy you love them, Hannah. Love your little tweaks too 🙂
I made these for a church afternoon tea and they were great as it was something a bit different but the flavour was great. Thanks Marie
So happy you loved them, Kim. Thanks so much.
I have just started making my own scones at home. My daughter said that the Earl Gray are the best she has ever eaten and wants me to make them. Do you have a recipe for the clotted cream? Or tell me where to buy it.
Hello Betty. I’m sorry, I don’t have a recipe for clotted cream though if you google, there are some around. I’m not sure where you live but clotted cream is available in Australia at specialty / continental delis.
These scones look fantastic Marie! I love Earl Grey infused recipes, so this one is right up my alley. And you know what? Earl grey and lavender are one of the most delicious combinations, so I might be adding a touch of lavender, too!
Thanks so much Ben