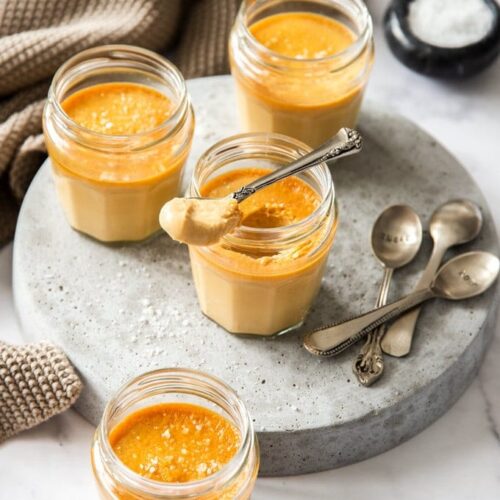

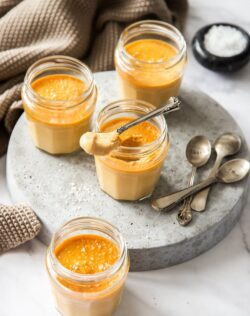
I can’t get enough of salted caramel and these Salted Caramel Pots De Crème are close to the best thing I’ve ever made. I’m not even joking. They’re so good, they inspired this lovely caramel creme brulee tart.
 Let me tell you all about them.
- Just 5 ingredients (and one is water)
- Creamy, silky-smooth custard that slides over your tongue
- Rich salted caramel flavour (easily) made from scratch.
- Can be made ahead – up to 2 days in advance
- Comforting in winter but also perfect in summer since they’re served cold.
- Perfect for a crowd or just a few
Let me clarify that last point. This recipe makes just 4 serves but you can easily increase the quantities and make a larger batch to suit a crowd of people. Since they sit in your fridge until you’re ready to serve, you can make them well in advance.
What is pots de crème?
Pots De Crème is a French dessert made from sugar, cream and egg yolks and literally translates to pots of cream. The ingredients are turned into a custard and then baked at a low-ish temperature until set.

Crème Brulee vs pots de crème
Pots de crème is essentially a crème brulee without the crispy sugar topping and they are both baked custards made from cream, sugar and egg yolks.
Pots de crème usually have a combination of milk and cream as opposed to all cream in a crème brulee. I make both the same way as I prefer the creamier flavour as opposed to an increase eggy flavour due to pot de crème normally requiring more egg yolks to set.
While pots de crème are technically baked, I recently made a no bake version in these Easy Dark Chocolate Pots which is delicious. This Salted Caramel version is definitely my favourite though and came about after I made Salted Caramel Crème Brulee for the Oh Sweet Basil blog.
You too, can turn this caramel pot de crème recipe into a caramel crème brulee recipe by simply adding sugar at the end and torching it to a crispy toffee coating.
Tips for Homemade Caramel
Nothing beats real homemade caramel. No shop-bought caramel I’ve ever purchased has even come close to what you can create with just a little sugar, butter and cream right on your own stove top. While you could substitute it in this recipe, I beg you not to and to make it yourself. It’s incredibly simple and you don’t even need a thermometer. There are a few golden rules with caramel though.
- Use a stainless steel saucepan – I’ve never had luck with non-stick pans so I don’t recommend it, however, I know people that do use non-stick without an issue.
- Make sure your pan is spotlessly clean – any trace of fat or anything that isn’t sugar or water inside your pan, can cause the caramel to crystallise. It’s easy to get perfectly clean. Rinse it, then rub a cut lemon around the inside, rinse again, then add your ingredients and start. No need to dry the pan out.
- Just swirl the sugar and water, don’t stir, and swirl it quite often.
- Make sure all the sugar has dissolved before the caramel starts to bubble.

How to make pot de crème
- For this caramel version, start by making the caramel (see tips above). Just add water and sugar to a saucepan and heat over low heat, swirling the pan every so often so the sugar dissolves.
- Now let it come to a bubble and let it cook swirling from time to time to make sure the caramel is cooking evenly.
- Once it turns amber in colour, add some warmed cream. The caramel will likely sieze up since the cream is much cooler than the cream but just stir it and after 5-6 minutes the caramel will dissolve back into the cream.
- Now beat some egg yolks until they’re nice and pale then dribble the hot cream in slowly stirring with a whisk to make sure the yolks don’t scramble. This is called ‘tempering’ the eggs.
- Skim any froth off the top and you can also strain it if you’re worried there are lumps.
- Mix in the salt, then pour them into small jars or ramekins.
- Place them in a flat bottomed dish or pan with high side and add hot (not boiling) water to half way up the ramekins.
- Bake anywhere from 40 – 65 minutes – the time will depend on the style of ramekin you use.
- Let them chill for 3-4 hours before serving.
There is roughly 20 minutes of effort involved in making these delicious little custard pots. That’s it.
How do I know when pot de crème is ready?
It’s all about the wiggle. They will wiggle like jelly (jello) but not be liquidy in the centre. If they’re still liquidy, keep cooking until they have that jelly wiggle.
All ovens are different, the size or thickness of the ramekins, how hot the custard was before you put it in the oven are all things that can affect baking time. I generally cook them for 45 minutes, then check every 5 minutes thereafter.
Pot de crème or crème brulee will continue to cook once they are taken out of their water bath, so transfer them to the fridge to chill. As soon as they are cool enough, cover them with plastic wrap.
Click here to Pin this recipe for later!

These cute little pots of luscious custard are divine. I asked my mum if she’d like to try one and she practically inhaled it as did I. It’s just impossible to stop once you start. With just 4 serves and minimal effort they’re the perfect family dessert treat but also easily scalable to make for entertaining.
More recipes you’ll love
Ingredients
- 2 cups thickened (or heavy) cream
- 4 egg yolks, from large eggs
- ½ cup caster (superfine) sugar
- ¼ cup water
- ½ teaspoon salt (optional)
- Flaked sea salt for topping
For best results, always weigh ingredients where a weight is provided
Instructions
- Preheat the oven to 160C / 320F / 140C fan forced. Place 4 ramekins (notes) in a flat bottomed baking tray with high sides.
- Warm the cream in the microwave for 30 seconds and set aside - just so it's not cold.
- Place the sugar and water in a heavy based stainless steel saucepan over low heat (notes). Heat, swirling from time to time until all the sugar is dissolved in the caramel.
- Let it come to a bubble then continue to cook, swirling every so often until it turns amber in colour.
- Carefully pour in the cream so that it doesn't splash, and stir with a spatula. Keep stirring over low heat until the caramel melts back into the cream so you have a smooth caramel cream. Remove from heat and set aside.
- In a medium bowl, whisk the egg yolks until very pale.
- Slowly pour the hot cream mixture into the egg yolks while gently stirring with a whisk at the same time. Make sure to pour slowly so the sudden heat doesn't scramble the eggs.
- Add the salt and stir it through.
- Strain the mixture into a pouring jug then pour evenly into the ramekins.
- Now pour hot (not boiling) water into the baking dish, around the outside of the ramekins to halfway up their sides.
- Bake for 45 minutes or until the centres look just set (notes).
- Very carefully lift the ramekins out of the baking dish and set aside to cool for 15 minutes before covering with plastic wrap and placing in the fridge to chill for 3-4 hours.
Notes
- Caster / superfine sugar (not powdered) is best as it will dissolve quicker. If you can only use regular white granulated sugar, just keep the heat a little lower so that it is mostly dissolved before it starts to bubble.
- All ovens are different, the size or thickness of the ramekins, how hot the custard was before you put it in the oven are all things that can affect baking time. I generally cook them for 45 minutes, then check every 5 minutes thereafter.
- You'll know they are done, when you give them a gentle shake and they have a slight wobble in the centre but not like there is liquid under the surface - think jelly.
- Pots de creme can be made up to 2 days in advance. If adding a sugar topping to turn them into a salted caramel creme brulee, leave that until just before serving.
SHOP THIS POST

![]()
![]()

![]()

![]()

This post may contain affiliate links that earn me a small commission for my referral, at no extra cost to you. Thank you for supporting Sugar Salt Magic.
8 Comments on “Salted Caramel Pots De Creme”
Planning to make this for a dinner next week. May I use pre-homemade caramel sauce? If so, about how much? Thx!!!
Hi Nadine. It should work fine. I haven’t actually measured the caramel after making it for this but I’d estimate you’re aiming for somewhere between 1/3 and 1/2 a cup.
Can you help me out. I used a glass pot and sugar water crystallized and never turned amber. So started over and mixture never turned amber but added cream before it could crystallize and finished recipe off. So bought a stainless pan and even though cleaned it mixture crystallized again. Started over and mixture turned the tiniest of color, but definitely not an amber color, so added cream because I could tell it was going to crystallize again. Yes I did the lemon thing. Again finished off the recipe. Taste was like a creme brûlée, delicious but not caramel. Are the measurements correct-2 parts sugar to 1 water? Nothing else before adding the cream? And I did use regular sugar but cooked on low – only swirling until all sugar dissolved. Then turned heat up a little. Any help would be greatly appreciated! Thanks
PS- we thought 1/4 t salt was a good amount the second time as first time used 1/2 and was too much for our tastes. Used pink not kosher but recipe didn’t state a particular salt to be used.
Hi Kathy, caramel can be finicky, so here’s some tips that may help.
1. A single grain of sugar can cause the syrup to crystallise. Don’t let the syrup come to a bubble until it’s completely dissolved and clear.
2. When you cleaned with lemon, did you rinse it out. There’s no need to dry it out but just rinse away any lemon remnants.
3. Sometimes the sugar may stick to the sides of the pan and turn into crystals. You can wipe this down with a wet pastry brush so long as you haven’t used that brush for butter or oil previously. If it’s the only brush you have, give it a really good scrub in vinegar and rinse first.
4. Don’t change the heat. Heat changes can cause crystallisation. Caramel can take a little time, so just need to be patient with it.
5. Definitely don’t add the cream until it’s the right colour or you may end up wasting it. Once it turns amber it’s generally past the point of crystallisation.
6. If you see the syrup begin to crystallise, while it’s still clear, you can take it off the heat, add a tablespoon of water and give it a really good swirl until all the sugar / crystals have dissolved then continue on. I’ve had success with this a number of times in the past.
7. if it happens a second time, you can actually pour the syrup into a whole new pan, making sure the crystals stay behind.
8. If none of this works, it could be down to humidity or ambient heat in your kitchen.
Once you get the hang of making caramel, it’s well worth it.
Would love to hear if these tricks work for you.
Due to religious restrictions I don’t eat egg. Could I substitute a corn starch mixture here or something else? Thanks for your ideas.
Hello, I’ve not made these without eggs and they are a main ingredient. I’m not sure how you would get the same flavour and result without eggs
I seriously need to make this. I mentally bookmarked your caramel post and wanted to try making it but time is not on my side, plus lately cream has been a scarce ingredient. But it looks soooo creamy!
When you do get a chance, I’m sure you’ll love them.