My dad always used to drink Horlicks or Malted Milk on a cold winter evening. I’m also a lover of drinking it but then I discovered I could bake with it too and these Chocolate Malted Cookies were born. Chocolate and malt are great friends and while the malt is subtle in these cookies, combined with chocolate, this is such an amazing cookie flavour.

This malty baking obsession started with my White Chocolate Malted Milk Blondies and now it’s cookie-bakin’-time.
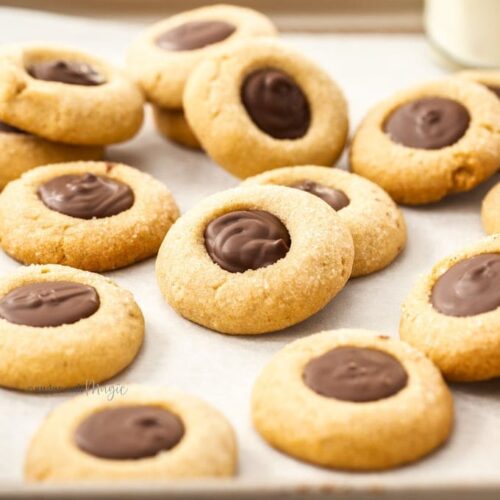
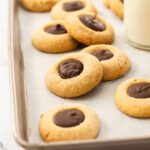
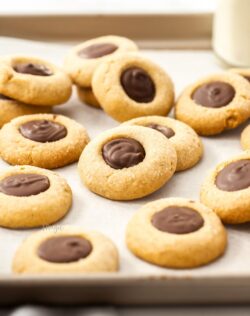
Crisp edges, give way to a soft centre and a thumbprint filled with chocolate and a little extra something that you can’t quite put your finger on but you know it tastes good – that’s the malted milk my friends.

Ingredients in malt cookies
In addition to the butter and flour and a few other usual suspects, there are two other must have ingredients for these cookies.
- Malted milk powder – I’ve tried these with Nestle Malted Milk Powder and Horlicks and both work.
- Brown sugar – it must be brown sugar for these for that added caramel touch and a slight chewiness.
- Chocolate – I like a mixture of milk and dark chocolate for the centre of these babies.
Adding the chocolate
There are numerous ways you could add the chocolate to these cookies and they don’t need to be made thumbprint style;
- Thumbprint, using a spoon or squeeze bottle – make sure to scrape the bottom of the spoon on the edge of the bowl before tipping it onto the cookies, so you don’t get stray drizzles all over. If using a squeeze bottle beware, if the hole in the bottle isn’t big enough it can explode as you squeeze it. Make sure the hole is a good size and squeeze gently.
- Drizzle or dip – you don’t need to make the thumbprint. Just roll balls of cookie dough and bake them, then drizzle over chocolate or dip them once they cool
- Chocolate chips – add 1 cup of chocolate chips to the dough.
- Kisses – add a Hersheys kiss to the top like my Caramel Peanut Butter Thumbprint Cookies
There you go, pick your favourite method.

Important tips and notes
- This malted cookie dough is quite a stiff, dry-ish dough so I find a stand mixer the easiest option. Don’t be tempted to add any extra liquid or your cookies will spread too much.
- To make the thumbrpint, press your thumb directly downwards and not on an angle so you have a deep dent but high sides. This will help them to not spread so much.
- When you roll them in sugar, you only need to roll one side – the thumbprint side.
- Cracks are fine but the best way to get smooth edges is to roll the balls until very smooth, then thumbprint each as soon as you’ve placed it on the baking tray (as opposed to rolling all the balls and then thumbprinting them all).
- The thumbprint centres will puff a little when the cookies bake, so as soon as you take them out of the oven, use a rounded spoon or something similar to re-form that thumbprint. It will set as they cool.

Now, I’m off to munch on some Chocolate Malted Cookies and a nice cup of steaming malted milk.
More Malt and Cookie Recipes You’ll Love
Ingredients
- 260 g plain (all purp) flour, sifted (2 cups)
- 50 g malted milk powder (½ cup)
- ¼ teaspoon salt
- 170 g unsalted butter, softened (¾ cup / 6oz / 1 ½ sticks)
- 136 g light brown sugar (⅔ cup)
- 1 egg yolk
- 1 teaspoon vanilla extract
- 1 tablespoon granulated white sugar
- 200 g mix of milk & dark chocolate
For best results, always weigh ingredients where a weight is provided
Equipment
Instructions
- Preheat the oven to 180C / 350F / 160C fan forced. Line two large baking trays with baking paper.
- In a medium bowl, whisk together the flour, malted milk powder and salt until well combined.
- Using a stand mixer with paddle attachment, beat the butter, brown sugar, egg yolk and vanilla until well combined and smooth. Scrape down the sides once or twice during.
- Add half the dry ingredients and beat on low until just starting to clump.
- Scrape down the sides and add the remaining dry ingredients. Beat until it starts forming large clumps.
- Roll small balls of dough (about 1 tablespoon) and dip one side of each into granulated sugar. Place them on the baking trays, sugar side up, and press your thumb directly downwards in the middles to form a deep dent with high sides.
- Bake for 12-14 minutes or until starting to turn golden brown on the edges. As soon as you remove them from the oven use a rounded spoon to reset the dents. Transfer to a wire rack after 5 minutes to cool completely.
- Once cookies have cooled, melt the chocolate in the microwave in 30 second increments, stirring between each until fully melted. Fill the indents with chocolate and allow to set before serving.
Notes
- When baking, it's always best to weigh out your ingredients and you can get kitchen scales very cheaply so I recommend doing that. However, if you can't use the spoon and level method instead. Spoon the ingredient into the appropriate cup measure (don't scoop) and level off with the back of a knife.
- This is quite a stiff, dry-ish dough so I find a stand mixer the easiest option. Don't be tempted to add any extra liquid or your cookies will spread too much.
- To limit cracks, roll the balls until very smooth, then thumbprint each as soon as you've placed it on the baking tray (as opposed to rolling all the balls and then thumbprinting them all).

This post may contain affiliate links that earn me a small commission for my referral, at no extra cost to you. Thank you for supporting Sugar Salt Magic.
8 Comments on “Chocolate Malted Cookies”
If I do not put in the malt powder, will it still turn out correct?
No, the malt powder is a large portion of the dry ingredients. You could instead try this cookie recipe but use chocolate in the middle instead of lemon.
Forgot to rate in my previous comment. Definitely a 5 star.
Thanks Helen
Delicious biscuits. Followed the recipe exactly and they turned out beautifully – a good size and very fancy looking with the little peaked tops on the chocolate filling. Much easier than I expected. A lovely way to use malt besides as a topping for ice cream. Keen to try the white chocolate malted milk blondies and some of the other recipes containing malt. Thank you Marie.
Thanks so much Helen. I’m so so happy you loved them 🙂
Respect ! From what I can see your temperatures are high and we expect northern, cold winds over here. It is not easy to make such a beauty when the heat is on. Also, I am just about to leave to work while you, I guess, are (almost) ready for bed time stories. Isn’t it wonderful to be able to communicate this way ! God Bless the internet 🙂 🙂 Thank you for another one added to my Christmas list ! Enjoy the rest of the day !
Yes, it’s very hot here right now. I’m glad you like these 🙂