
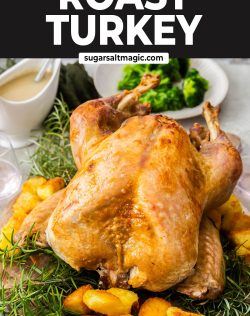
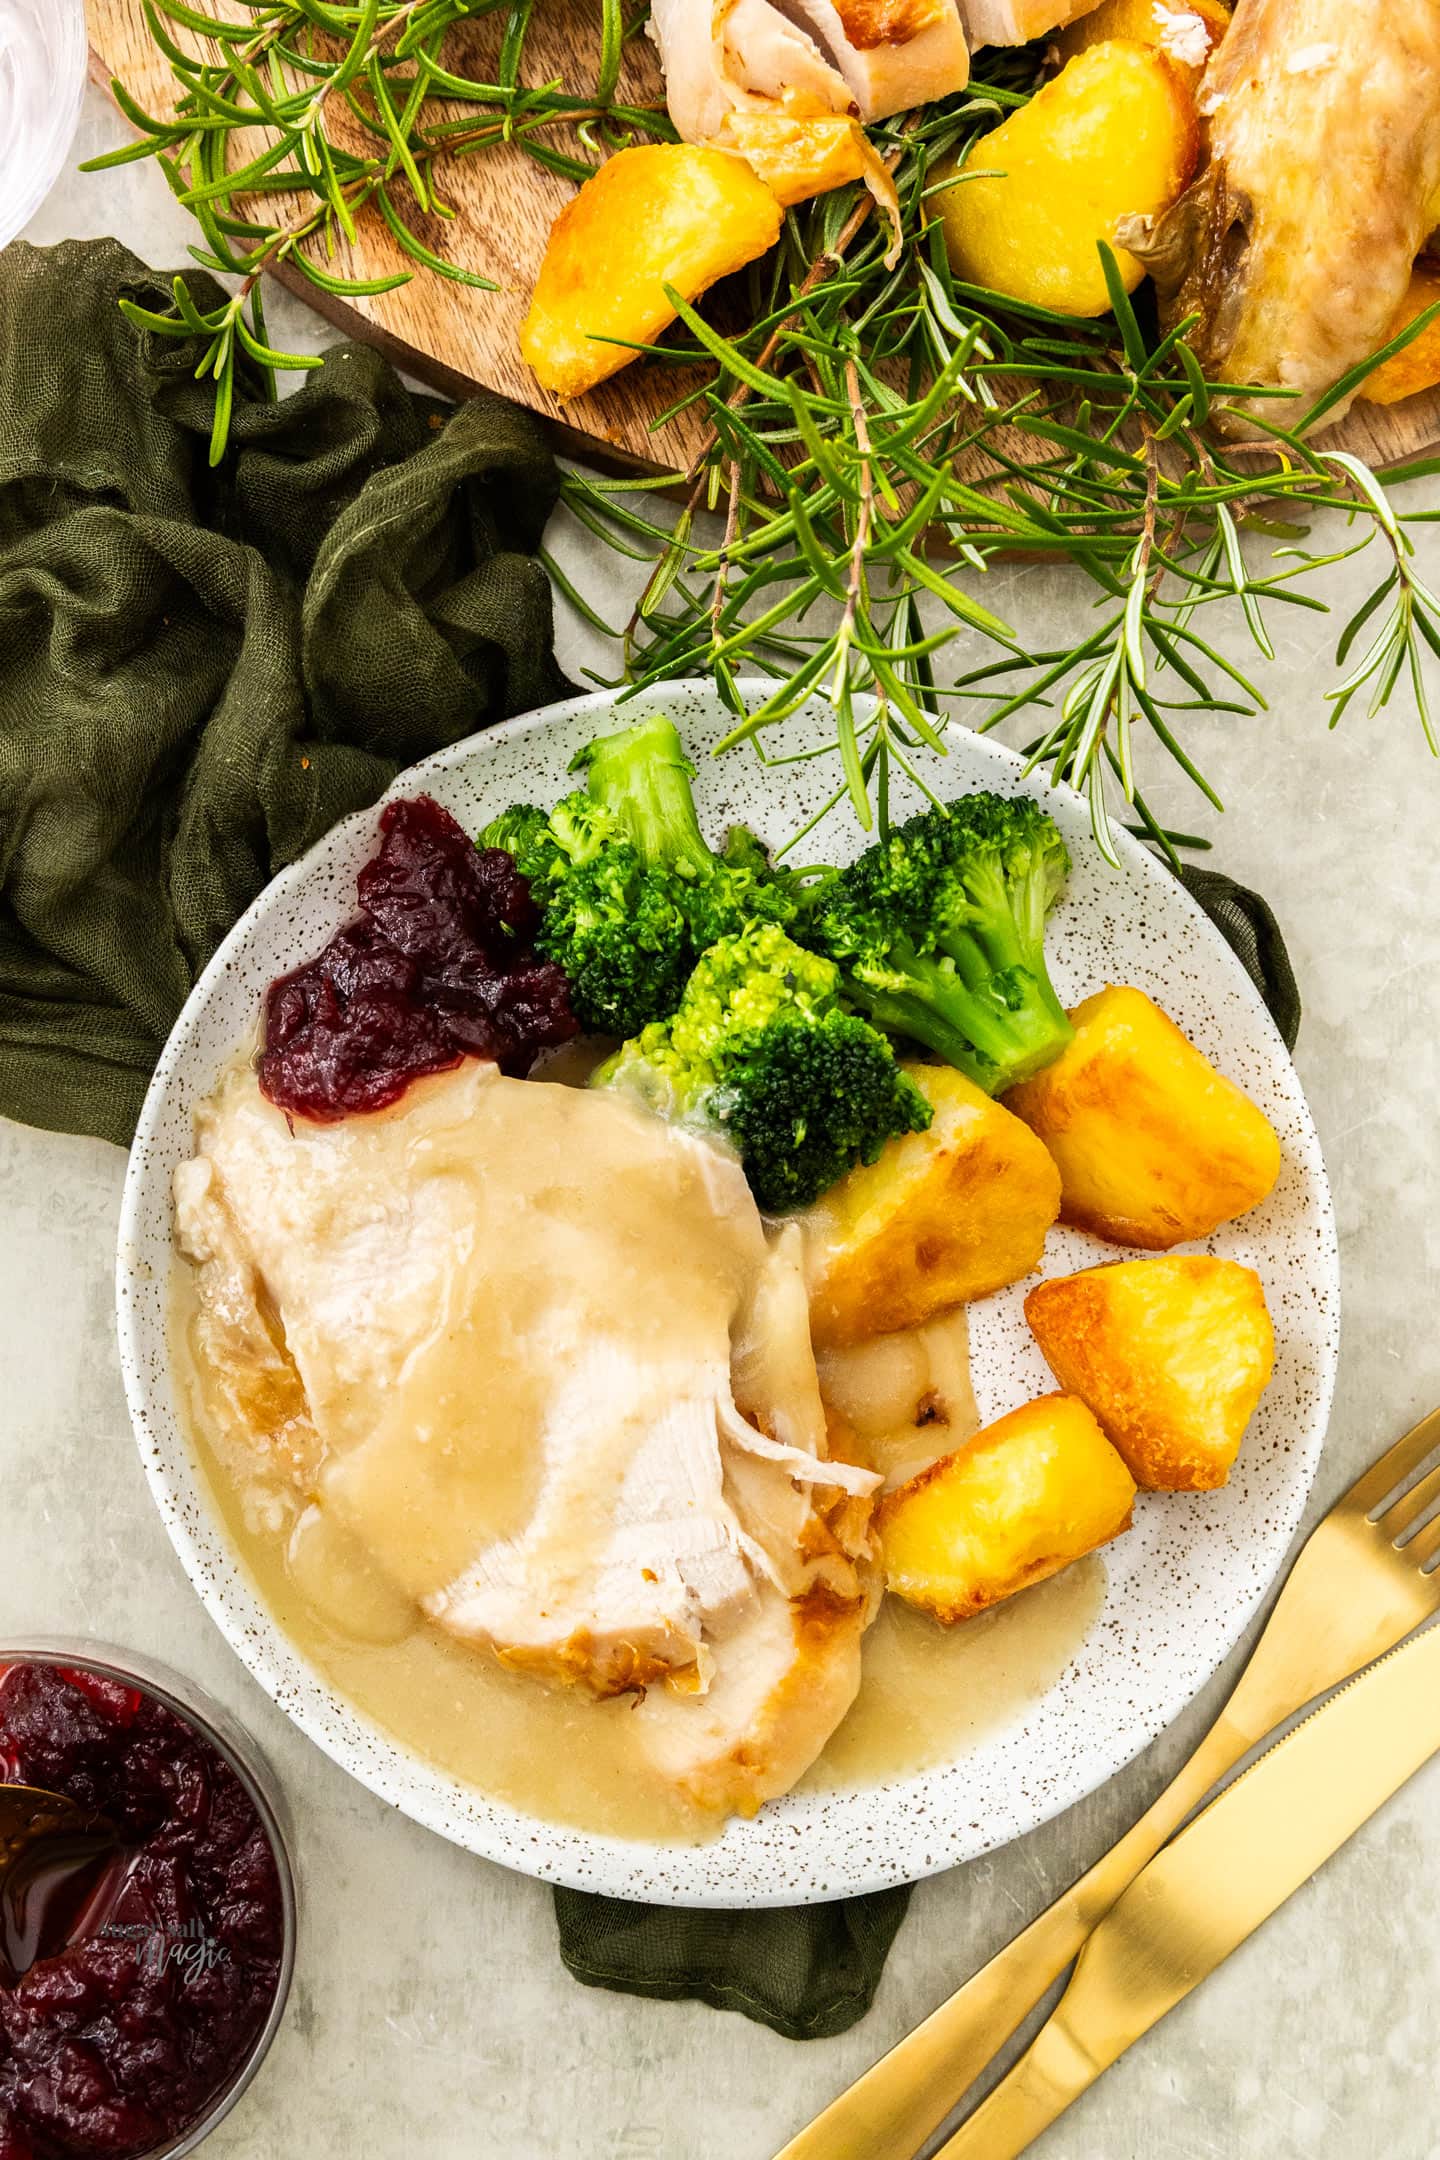
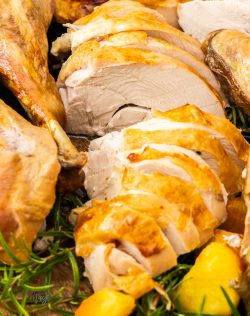
This perfectly moist and delicious whole roasted turkey is dry brined with salt, infused with the aroma of herbs and comes out of the oven juicy and golden. Dry brine takes all the hassle out and results in an even tastier turkey.
❤️ Why you’ll love it
- Perfectly moist and juicy thanks to an easy dry brine
- Crisp, golden skin with plenty of flavour
- No wet brine required – less hassle, less fridge space needed
- Simple, stress-free method with reliable results
- Perfect for the holidays and celebrations like Christmas and Thanksgiving dinner
Never Miss a Recipe!
Get the latest recipes straight to your inbox.
Why brine?
I love a good brine and, for smaller cuts of meat, I always use a wet brine (like this pork chop brine). Brining, wet or dry, allows seasoning to reach deep down into the meat by drawing out liquid, adjusting the cell structure of the protein, then drawing that liquid and seasoning back in again. However, when it comes to a turkey during the festive season, I don’t have room for a bucket of brine and turkey in my fridge.
For the perfect juicy roast turkey, dry brine is the answer. And fridge space is not the only reason.
- Perfectly moist turkey, that tastes like turkey. When you use a wet brine some of the moisture inside the meat is the water that was in the bucket drawn into the meat. This works fine on small cuts of meat like pork chops and chicken breast but for turkey it just makes the turkey less flavourful. A water brine must be a perfect balance of water to seasoning – too much of either and it’ll taste too much like water or too much like salt. With a dry brine, you’re adding just enough salt for the quantity of meat and no water. The moisture that is naturally in the meat is drawn to the surface as the protein structure changes, then is drawn back in again to season it perfectly throughout whilst redistributing the moisture.
- A wet brine requires far more salt than the meat needs because a wet brine is generally washed away, however the liquid drawn into the meat is super salty and, as the turkey roasts and releases some of that moisture into the pan, the pan drippings become far too salty to be used as any kind of sauce or gravy.
- No need to fully thaw that turkey before you start. A turkey takes a good 3-4 days to thaw in the fridge (or you can do it in half a day by sitting it in water and changing that water regularly). When you dry brine a turkey, it needs to sit in the fridge for 2 days anyway, so it doesn’t need to be fully thawed right through to the bone to get started.
- It cooks quicker! A brined turkey will cook in roughly 23-24 minutes per kg (2lb) compared to 30-35 minutes for a non-brined turkey. Keep in mind, many supermarket turkeys are already brined. You want to make sure you’re using a turkey that has not been brined so that it doesn’t become too salty.
You’ll need 48 hours to get the best results but you can get a decent result in 24 hours if needed.
All the flavour, without the fuss
- No hassle with buckets of brine and mess all over your kitchen,
- No need for mountains of butter slathered over the turkey or under the skin,
- No stuffing – it just turns out soggy and stops the turkey from cooking evenly,
- One roasting temperature, no messing with it part way through,
- Just a handful of ingredients and
- No basting required!
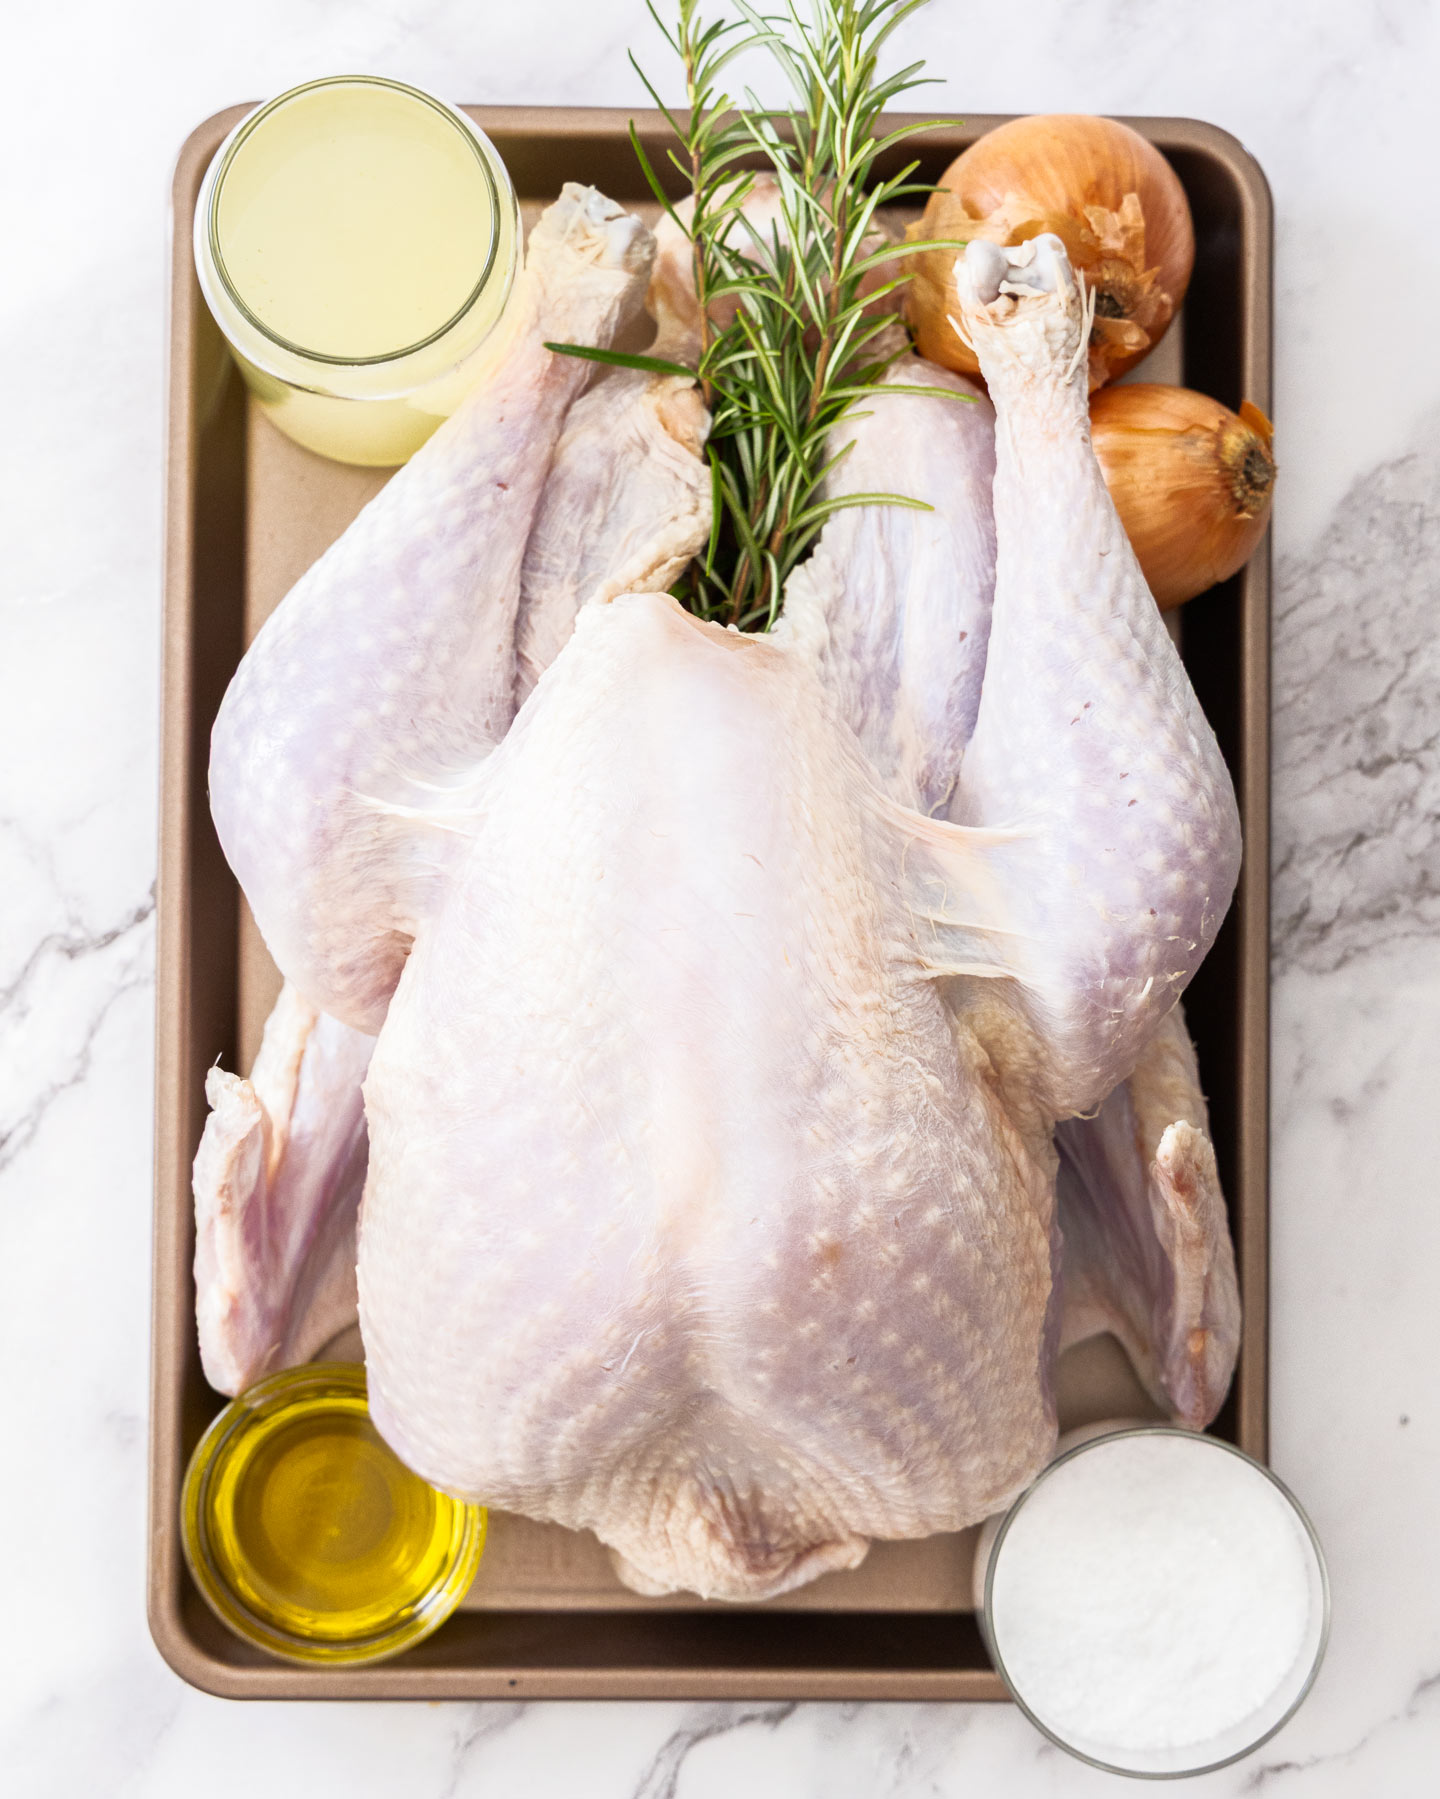
Ingredients
A good, juicy roast turkey doesn’t need much – not butter, not stuffing. Here are the ingredients you need to make it flavourful without the stress.
Jump to the recipe card for full ingredients and instructions.
- Turkey: You can use any size turkey you like and just stick to the rule of thumb when roasting a brined turkey of 23 minutes per kilo (2lb). I use a 5kg (11lb) one here.
- Herbs: A handful of herbs – either a selection or just one type, whatever you can get but I love rosemary, thyme and or sage.
- Salt: You’ll need cooking salt or kosher salt here for a perfectly seasoned moist roast turkey.
- Oil: Just a little oil helps the salt stick to the turkey and also helps to get that gorgeous golden brown skin.
- Chicken stock: This will help to gently steam the turkey in the first part of cooking.
- Onions: These simply add flavour through aroma penetrating the turkey and then in the gravy. You could even add a couple of garlic cloves if you like.
If you want to make the gravy (highly recommended) you’ll need some flour, a little more stock and some butter to make a super flavourful, perfectly seasoned gravy.
How to make juicy roast turkey
Jump to the recipe card for full ingredients and instructions.
1. Thawing a whole turkey
Starting with a rock-solid beast of a turkey, you’ll need to thaw it at least halfway before you start brining. There are two safe methods for thawing turkey.
- In the fridge about 24 hours for every 2 kg to thaw it in the fridge.
- In water – my preferred method and it’s quicker and easier. You’ll need to submerge the turkey, wrapped in a leak proof bag for a few hours, changing the water every 30 minutes. Once you can feel that the breasts are mostly thawed, you can proceed to brining. I discovered this method online years ago when I’d inadvertently left the turkey in the fridge until Christmas eve (it was also long before I’d discovered brining in any form so while the turkey was forgettable the thawing method was not).
Even if your turkey still feels solid and icy inside the cavity, that’s perfectly fine as it will finish thawing in the fridge gently as it dry brines!
2. Brine the turkey
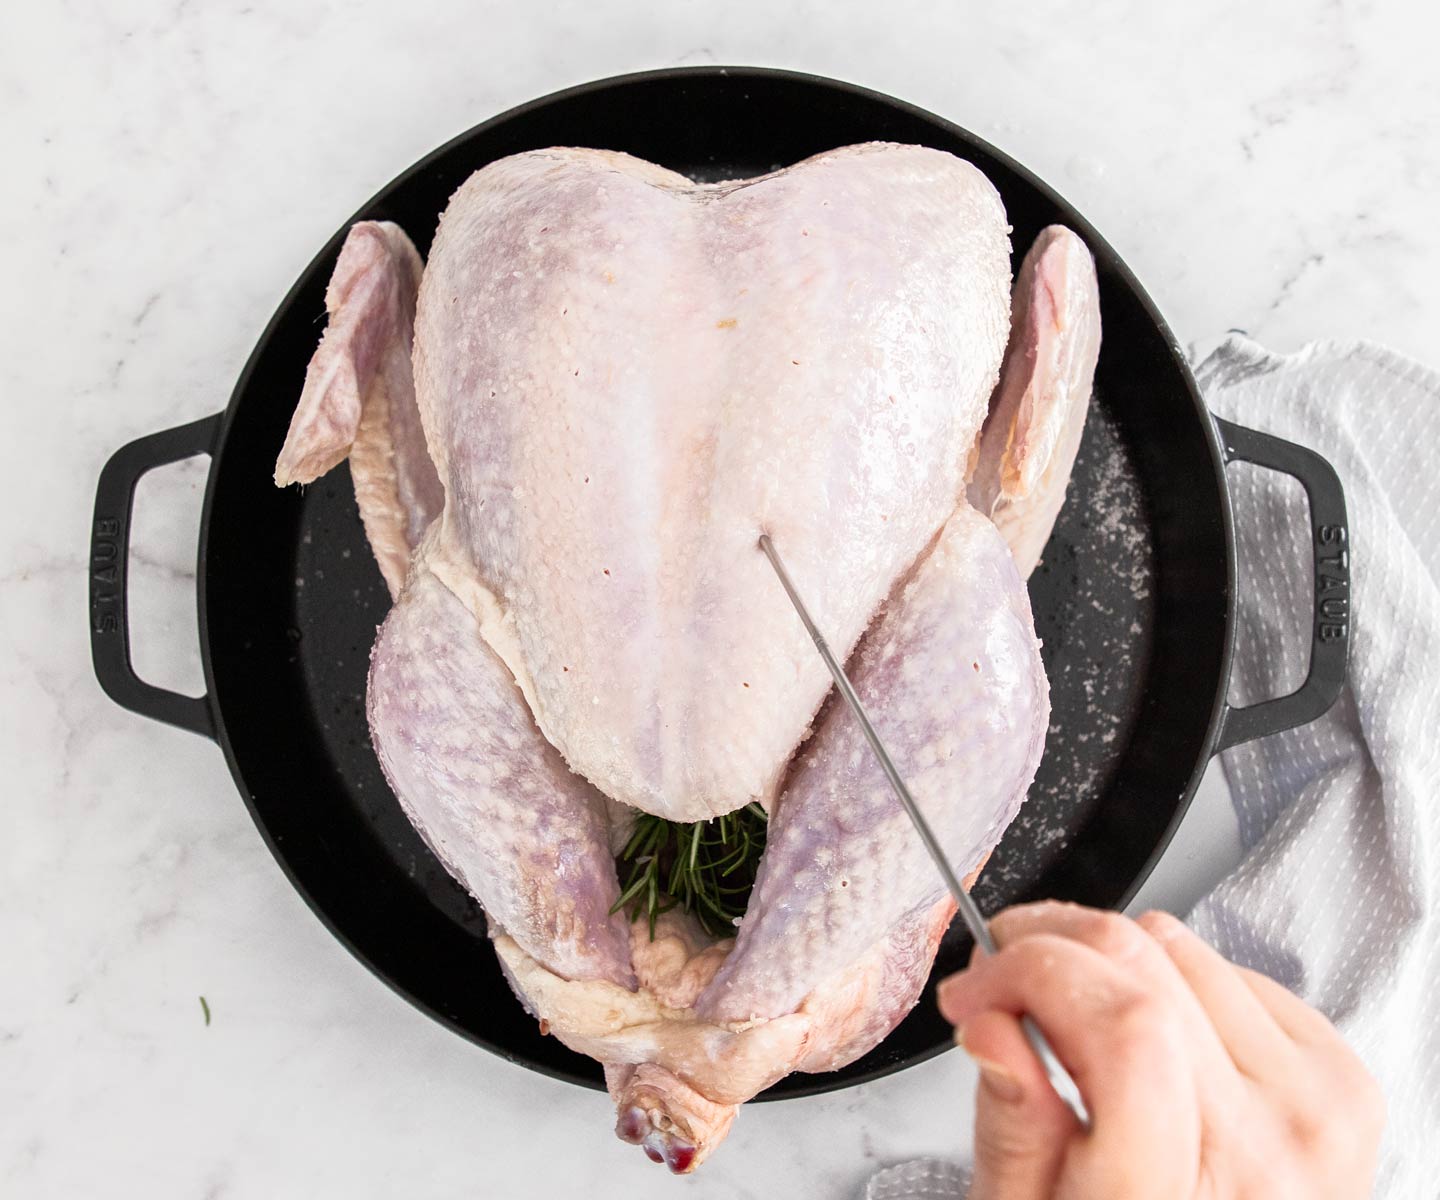
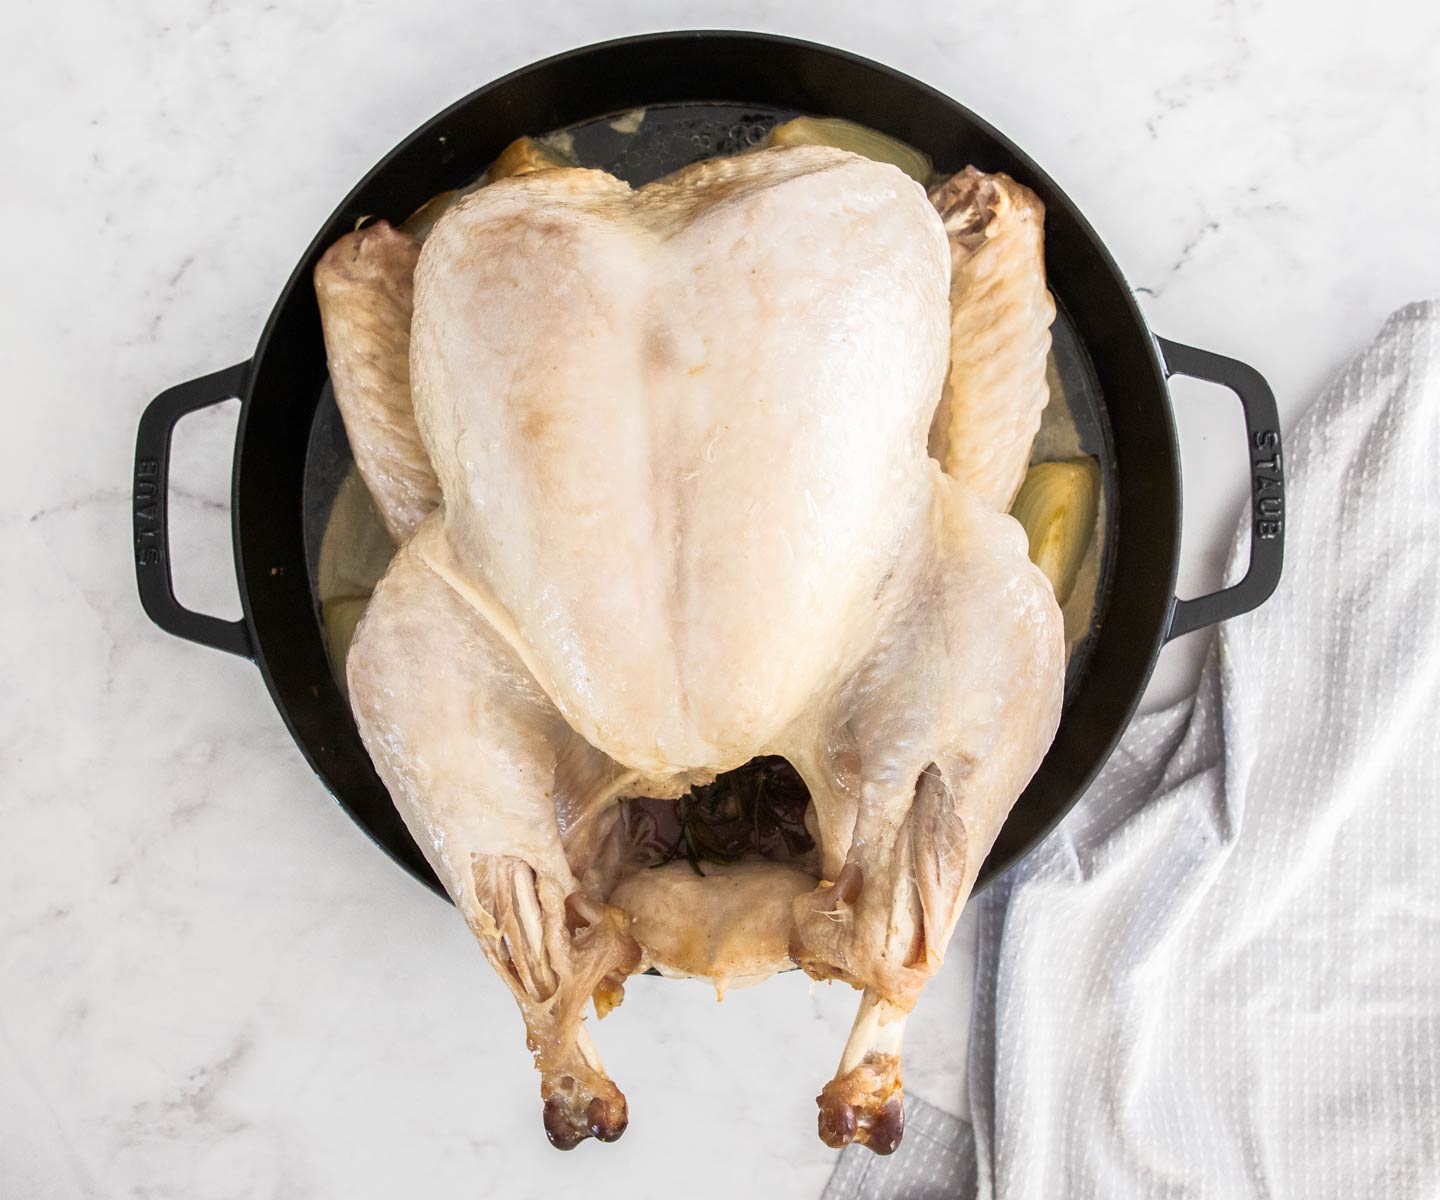
Rub a little oil all over the turkey (this helps the salt stick) then rub the salt all over. It sounds like a lot of salt but remember it’s a lot of meat to season. Tuck some herbs into the cavity and then use a skewer to poke holes all over the turkey. Finally, use a skewer to poke holes through the skin all over about 2 inches apart.
3. Chill for 48 hours
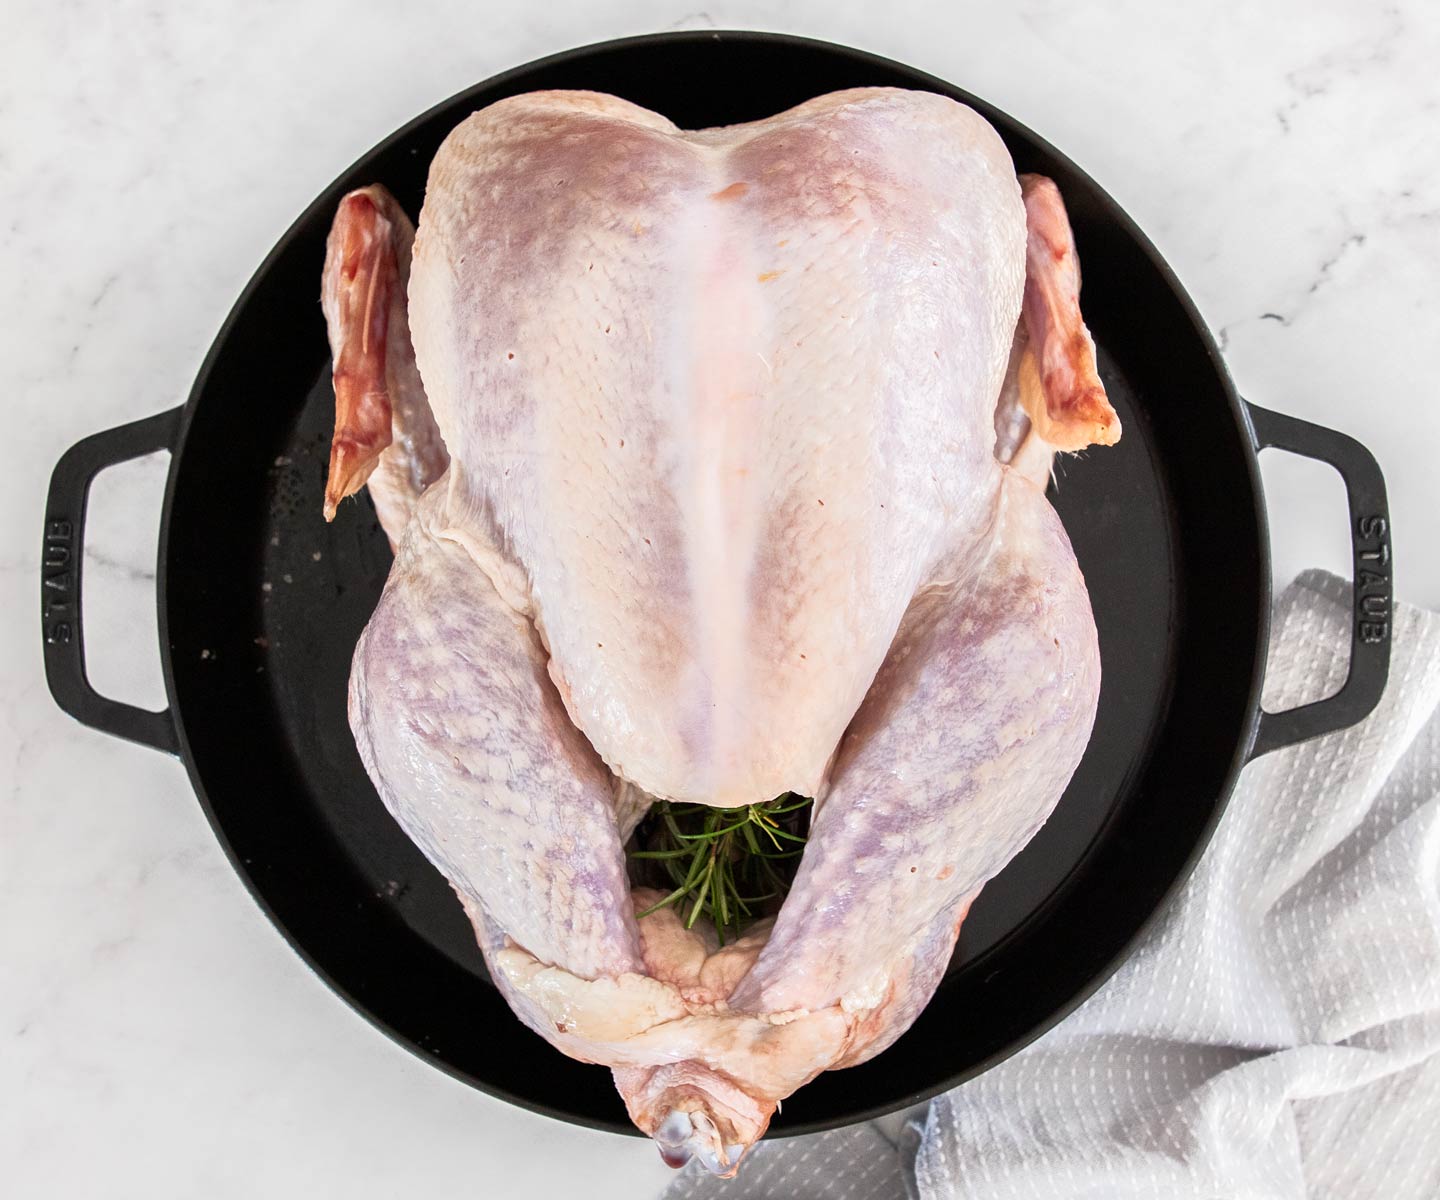
Place the turkey into a large casserole dish uncovered in the fridge for 48 hours. Turn it after 24 hours, then turn it back again after another 12 hours (for instance put it in the fridge on the morning of day 1, flip it on the morning of day 2, then flip it back again on the evening of day 2). This uses gravity to assist the juices to run through all the meat.
The skin will have dried out some and be tighter (this is good because it helps you get crisp skin).
4. Prepare to roast
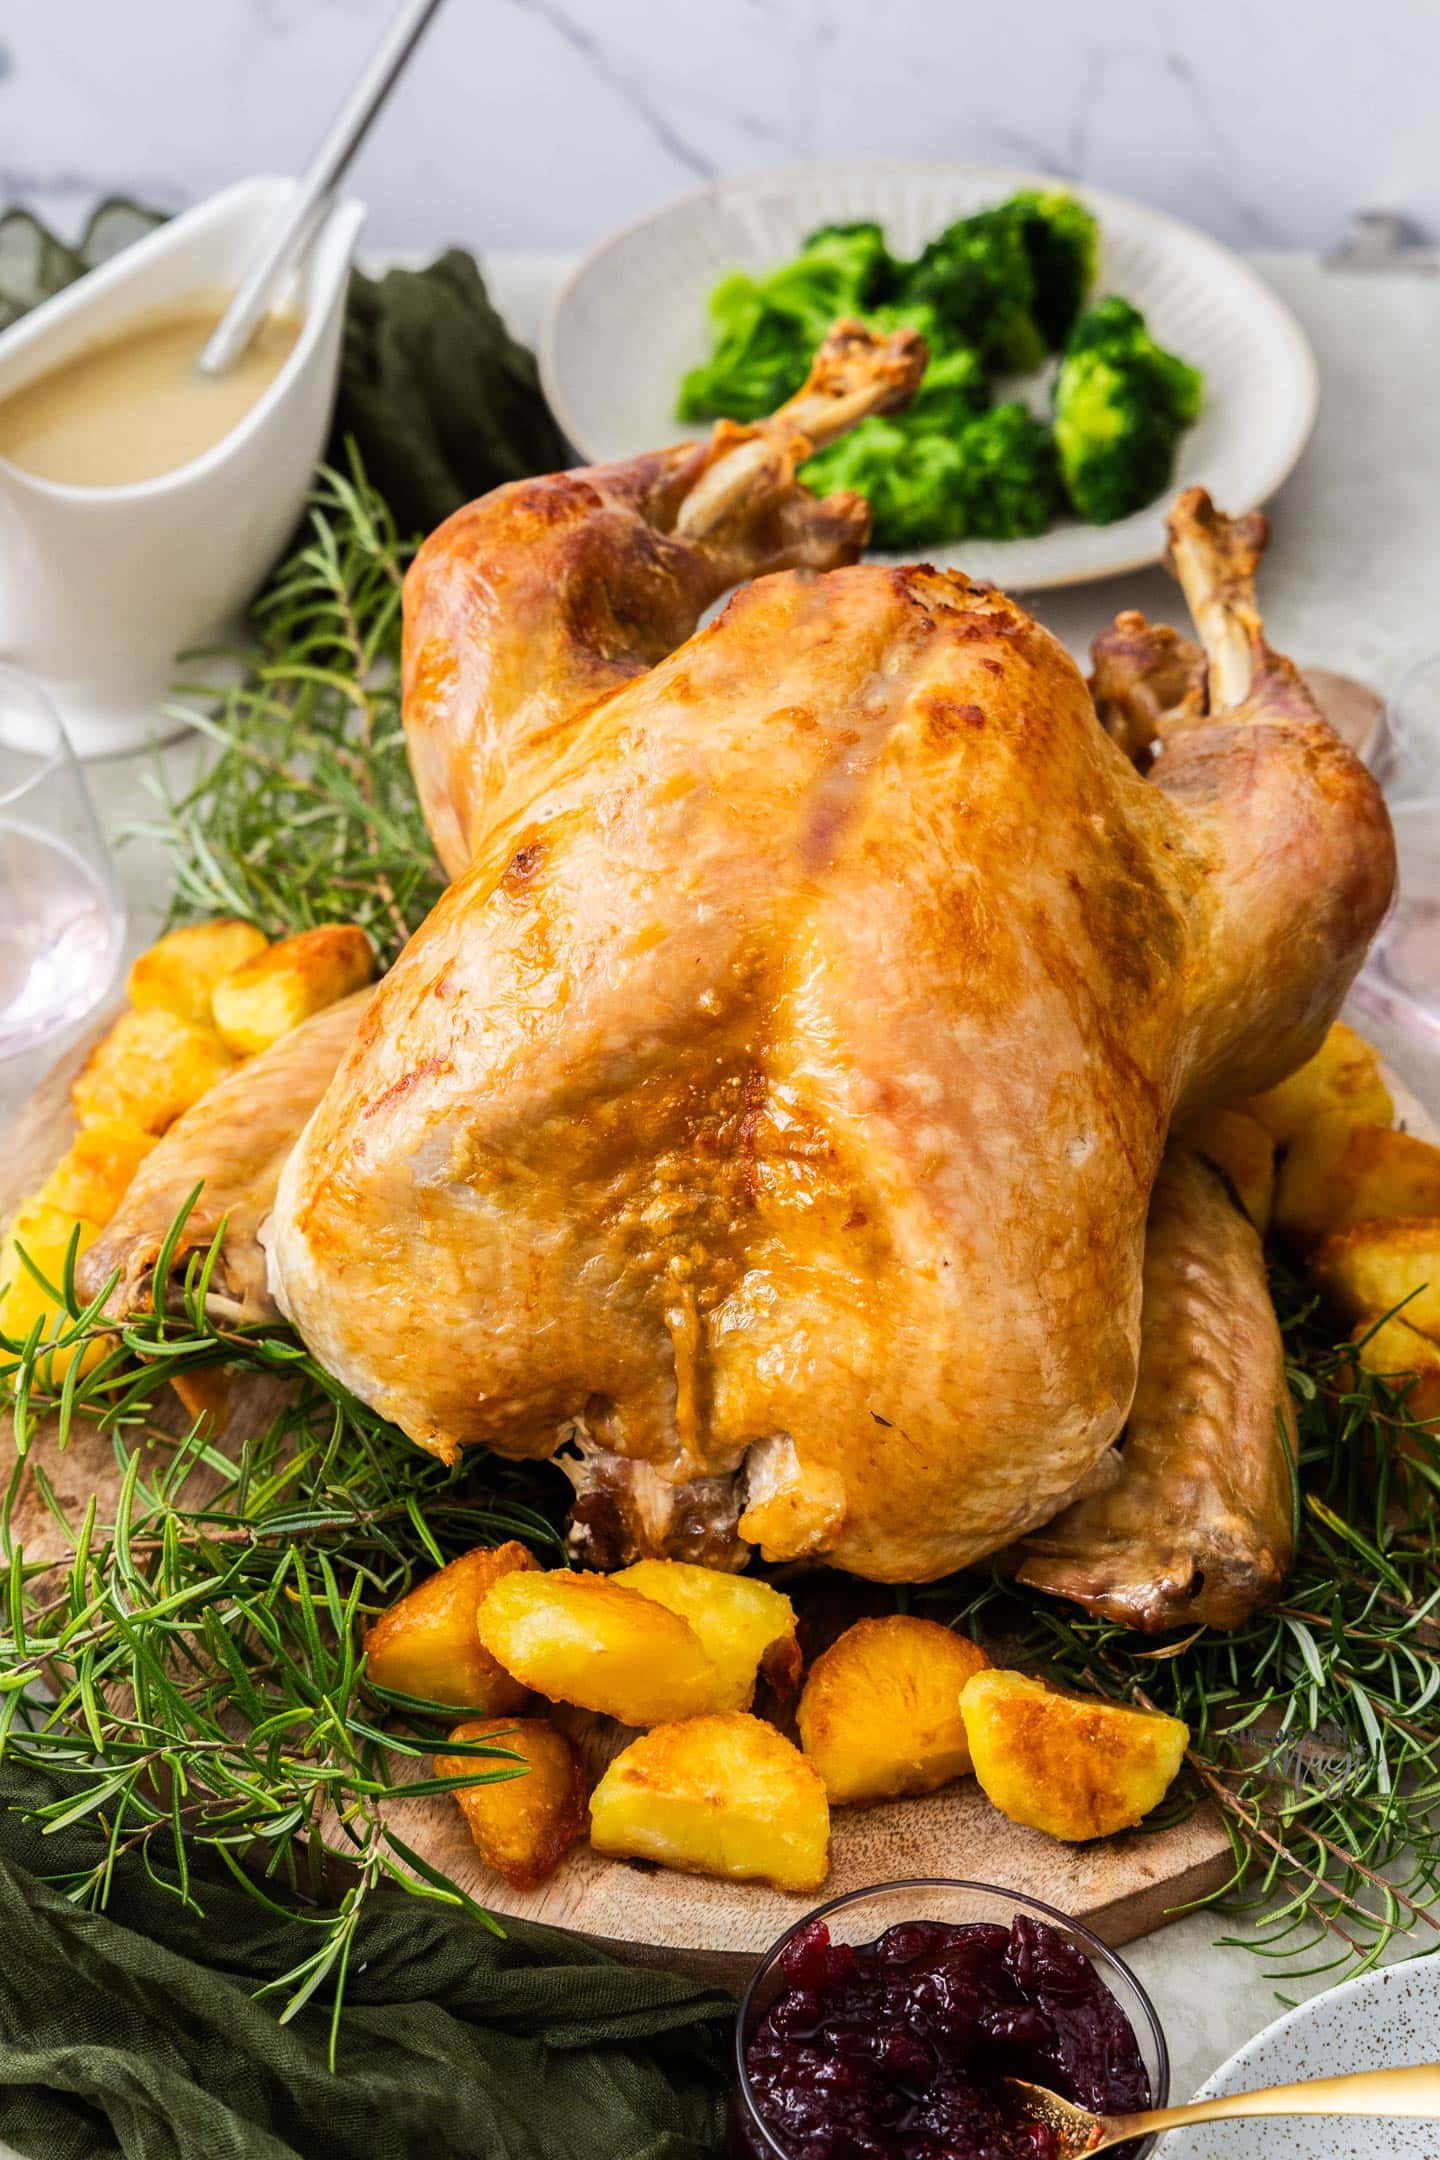
On roasting day, place the turkey breast side up onto a rack over a baking sheet or casserole dish. A pan bigger than the turkey is best so that it catches all the drippings but also make sure it’s a pan that fits in the oven with the turkey on top of it. The rack allows to sit up out of the liquid so you get lovely crispy skin. And, yes, I forgot to add the rack in these pictures but it does help the skin. Of course, you can see you still get a lovely turkey without the rack.
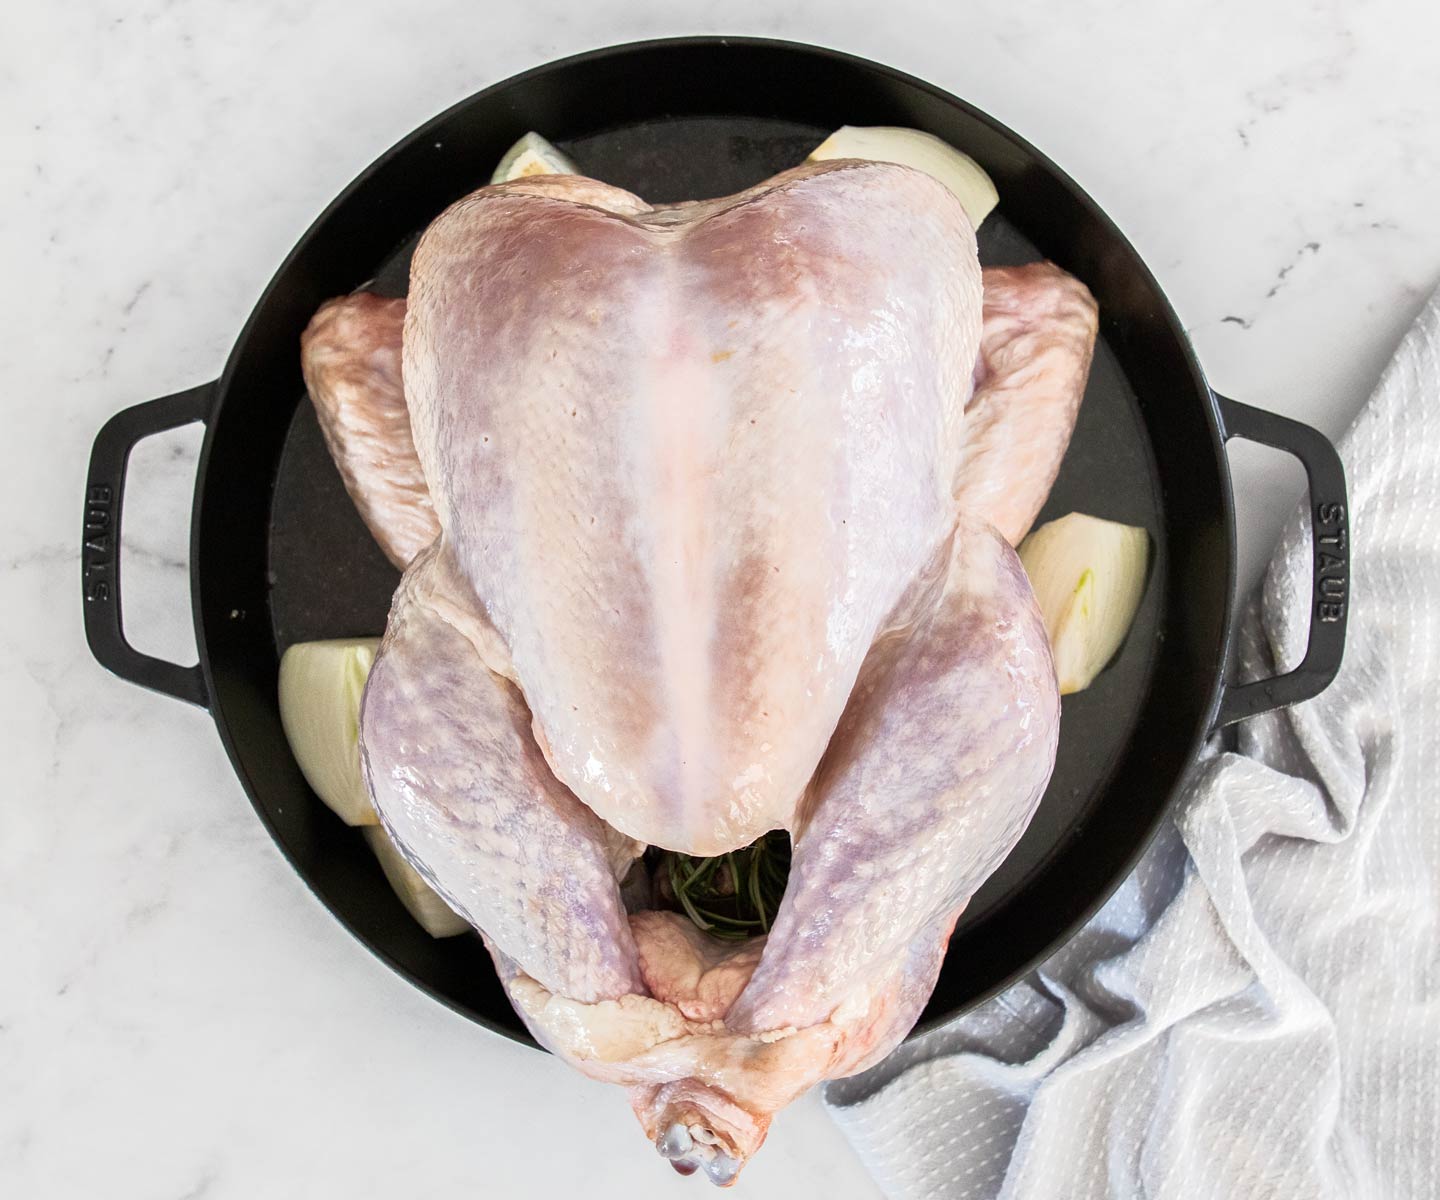
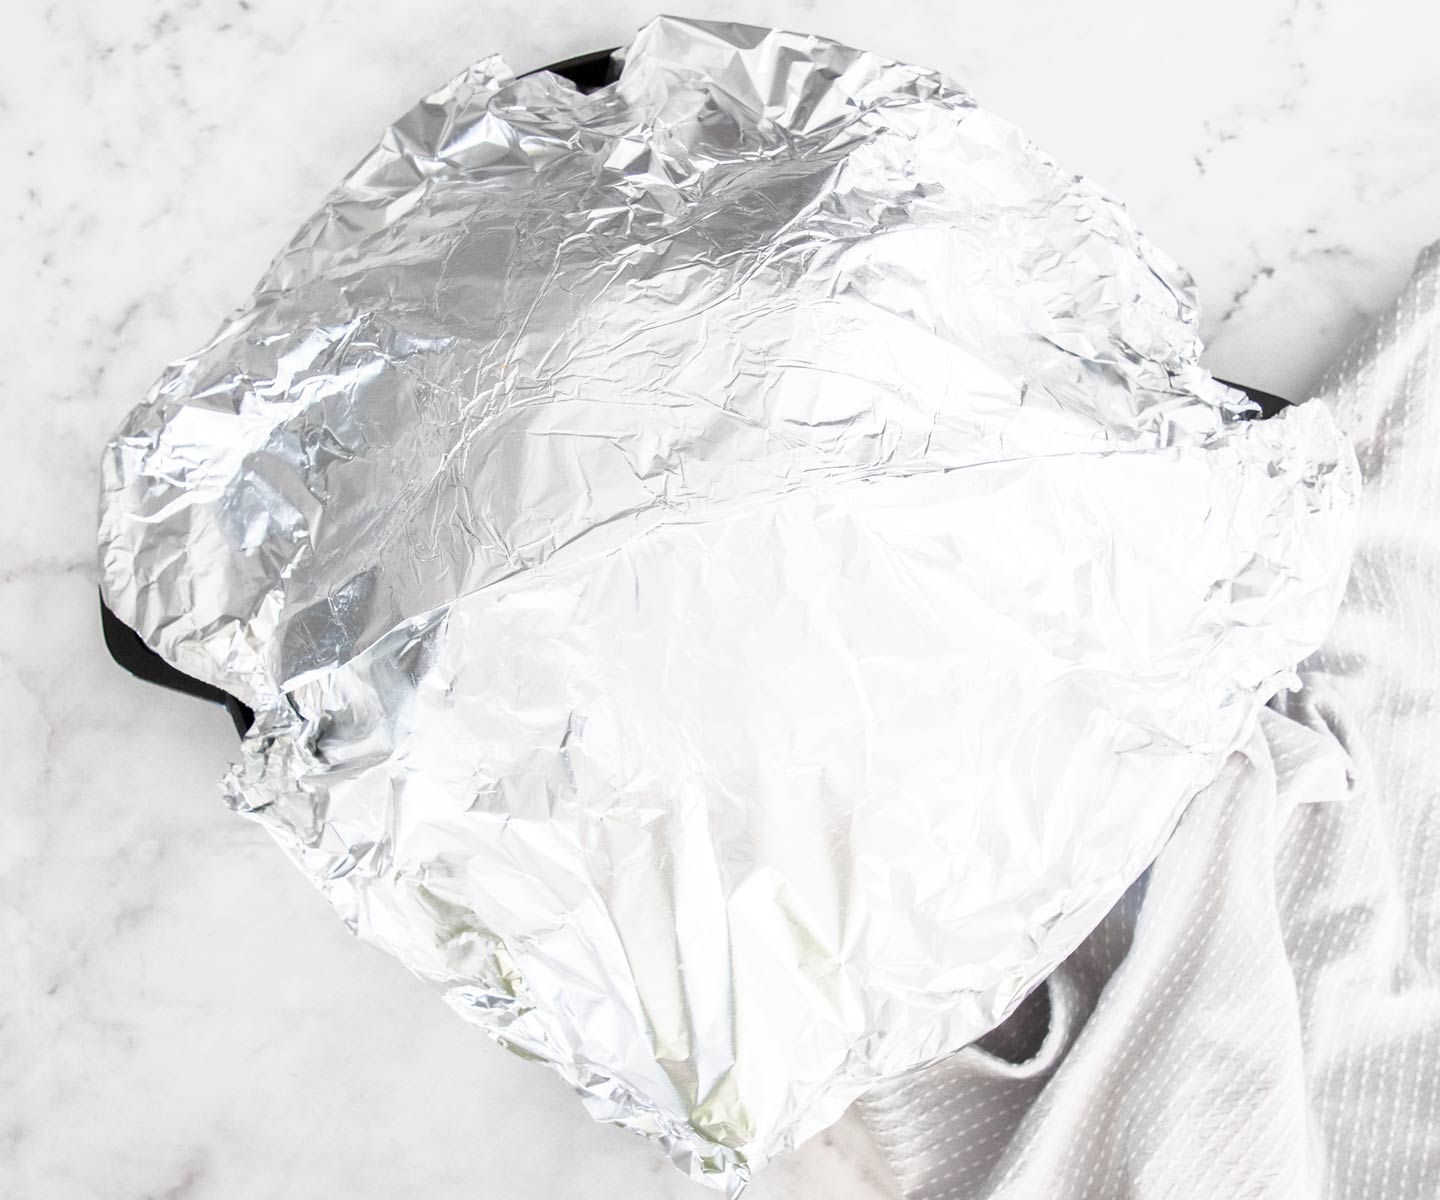
Cut up a couple of onions. Add a quarter piece to the cavity of the turkey and the rest around the outside. Pour two cups of stock around the base of the pan. Now, join 2 or 3 sheets of foil as needed and grease the underside with a little oil. Place it over the turkey and tightly seal it around the edges.
5. Roasting – part 1
Roast the turkey for about 23-24 minutes per 1 kg / 2lb removing the foil with 1 hour to go. That means if you have a 5kg turkey, you’ll roast it for a total of 1 hour and 55 minutes but remove the foil at the 55 minute mark.
So, with one hour left on your timer, remove the foil.
6. Roasting – part 2
Remember: total roasting time is 23min per kilo. So, for my 5kg turkey the calculation is 23 x 5 = 115 minutes (1 hour 55 minutes)
Whatever size turkey you have times the kg by 23 minutes or every 2lb by 23 minutes. This calculation is just a guide. Some turkeys will roast faster, your oven might run a little hotter or colder etc and that’s where the thermometer comes in. If you don’t have a digital thermometer, get one. You’ll poke it into the thickest part of the breast until you hit the bone, then draw it back a bit. You do this once you’ve remove the foil, then you roast the turkey for the final hour keeping an eye on that thermometer. You want it to get to about 70-72C (160-162F). The temperature will continue to rise even as it rests and should get to 74C (165F and the sweet spot) – 76C (169F).
I always test the temperature in a couple of places for both chickens and turkey. While most recipes suggest to poke a thermometer in between the leg and breast I have always found that the breast actually cooks more slowly. So, yes I test there but I always test in the thickest part of the breast until I see that safe temperature of 74C/165F.
7. Rest
Once the turkey is out of the oven, you must rest it for 45 minutes to 1 hour. Don’t worry, it will remain hot inside. If it’s very cold in your home, tent it with foil.
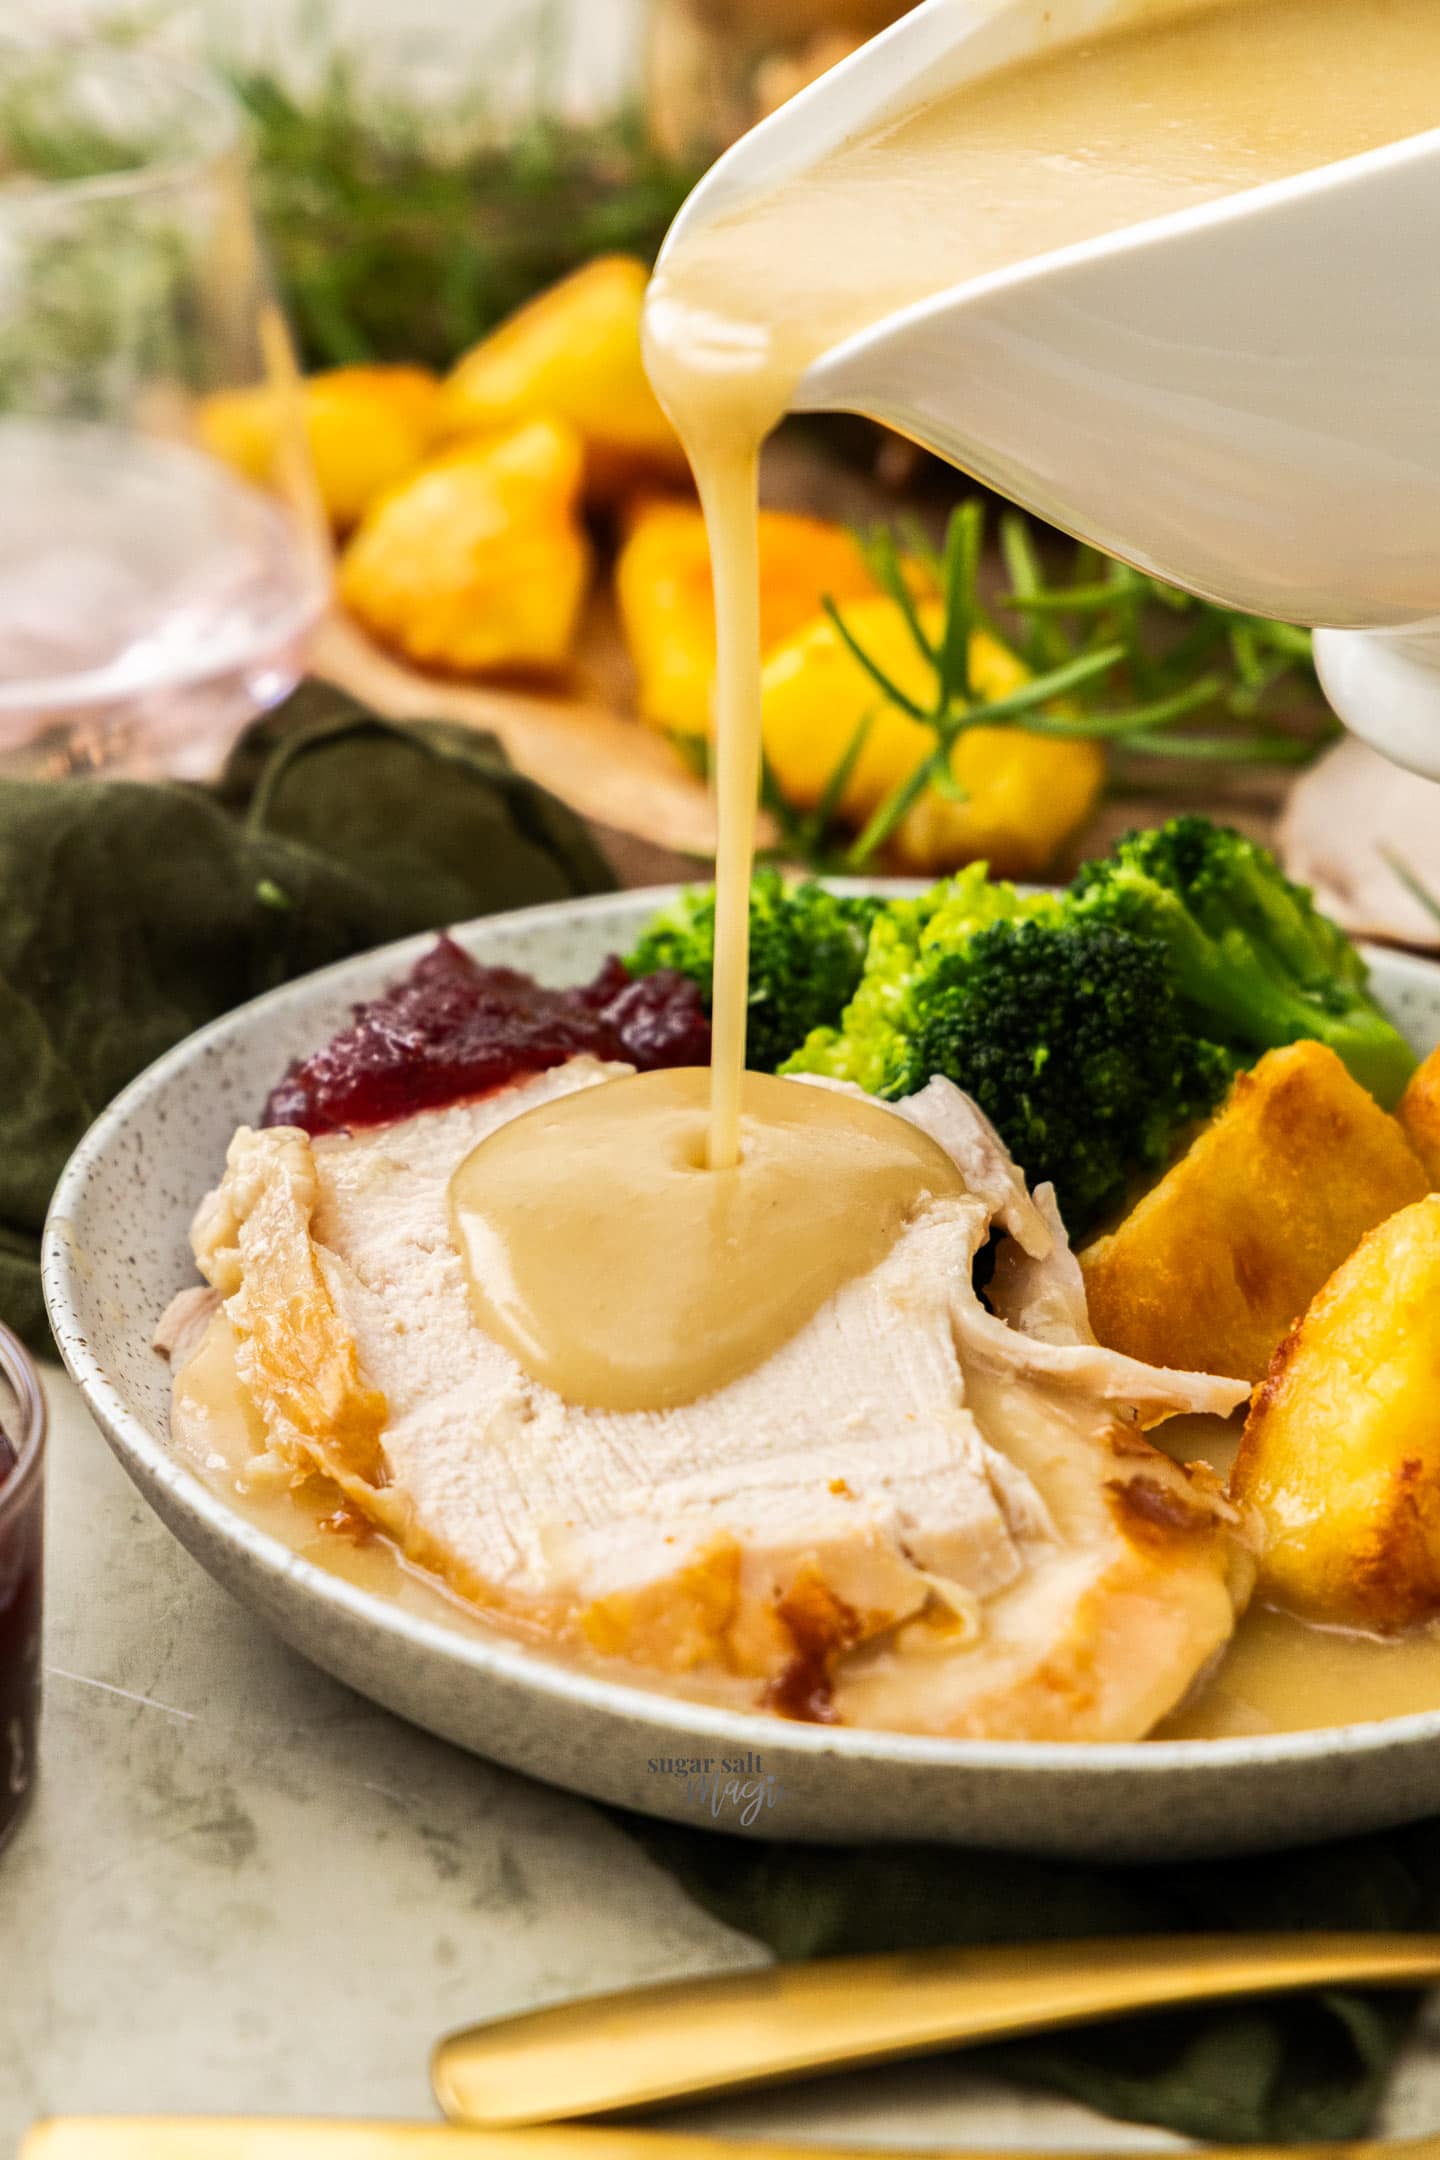
Turkey gravy
This recipe includes a simple recipe to turn the pan juices into a delicious turkey gravy, aka lick-the-plate-clean kind of delicious.
1. The pan juices
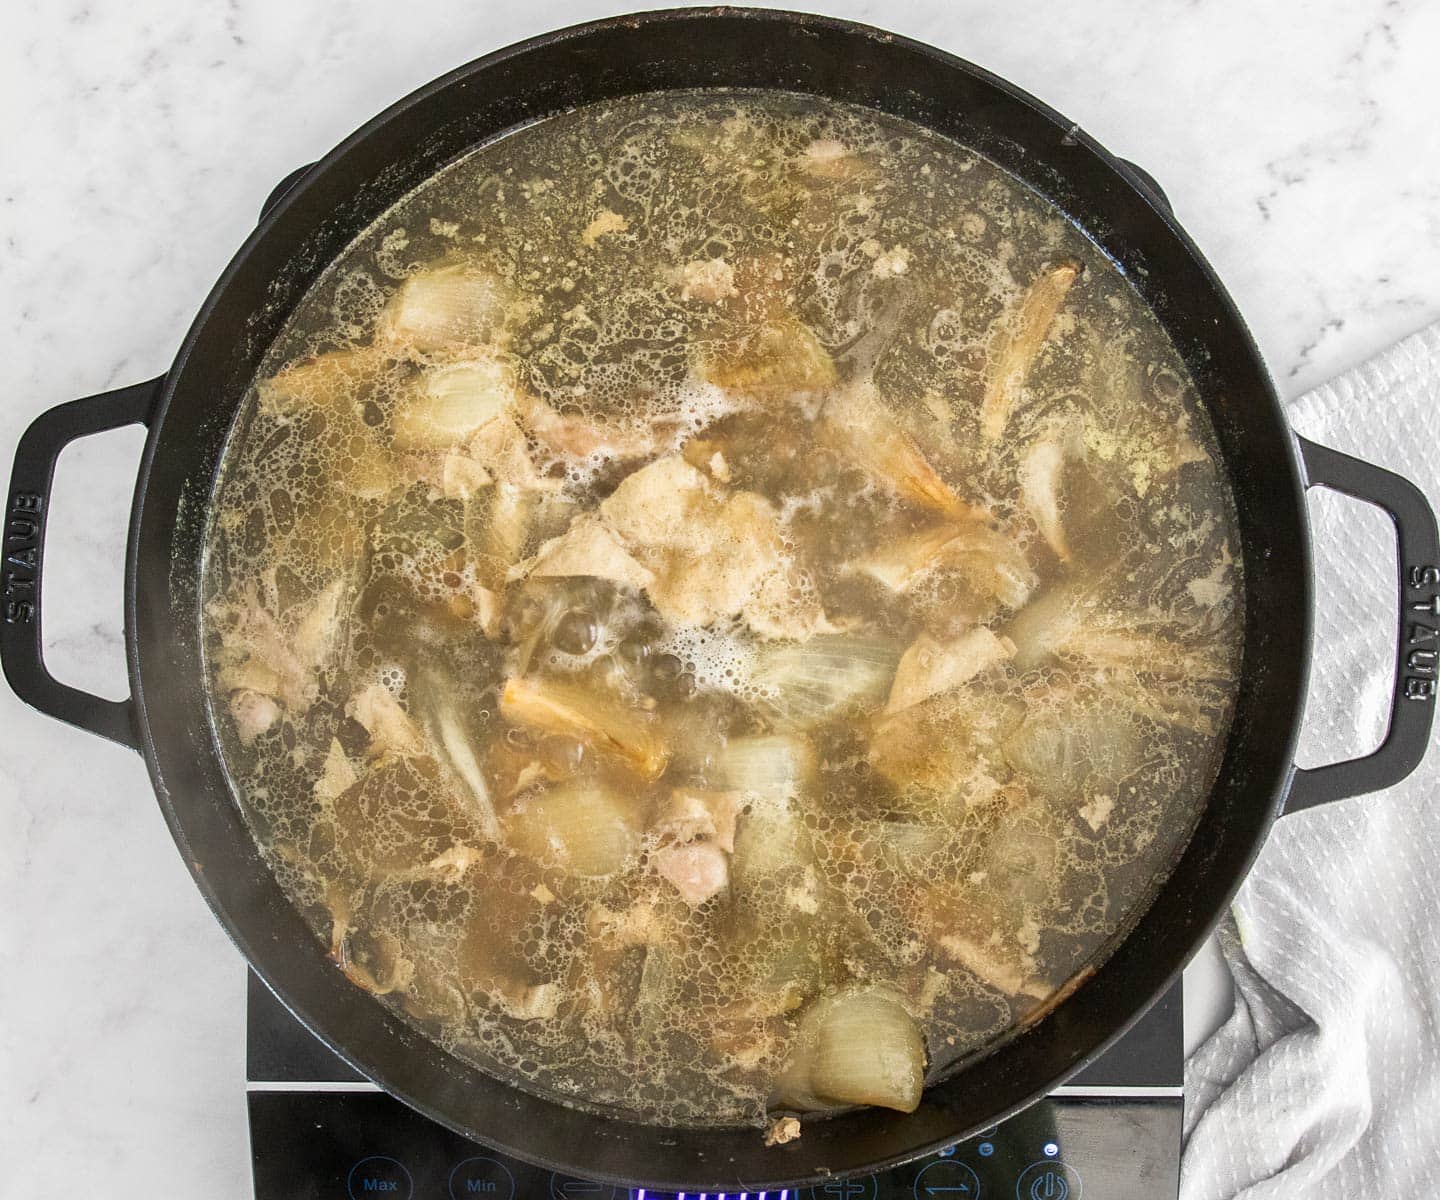
You’ll want to measure out the pan juices first by straining just the liquids into a jug. Top the liquids up to 3 ½ cups using some more chicken stock, then transfer it all (including all the solids from the pan) to a deep saucepan or the baking pan (if it’s suitable for the stove-top). Bring it to a boil.
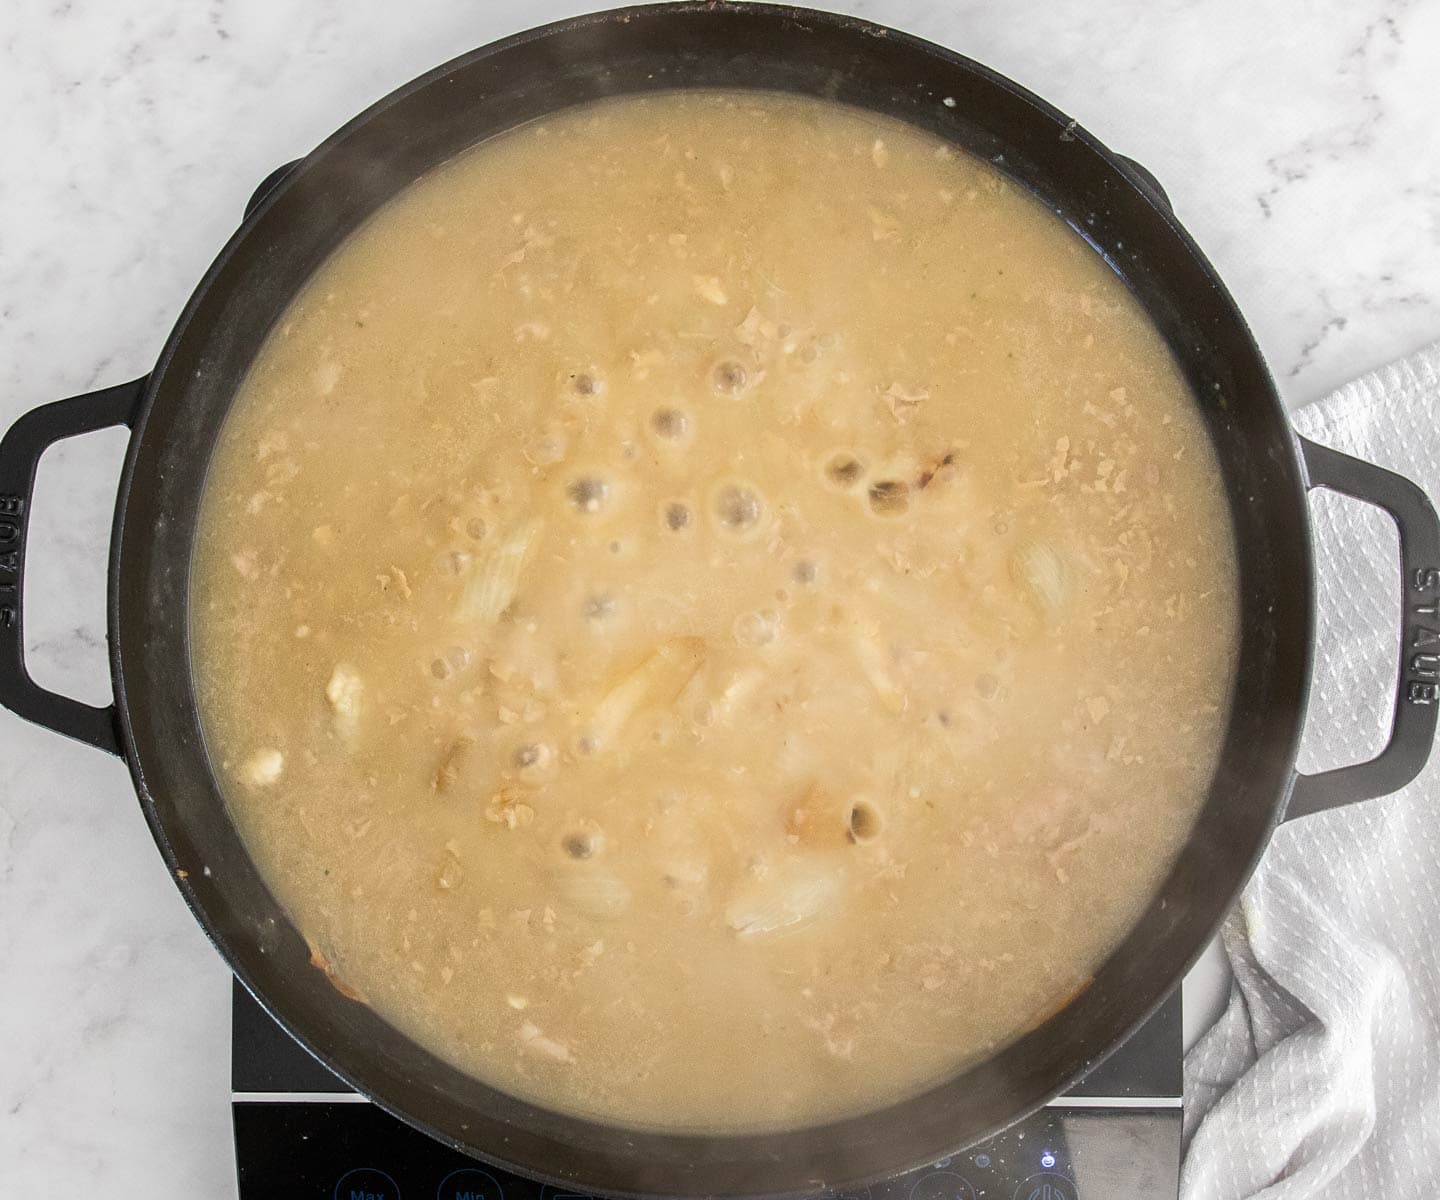
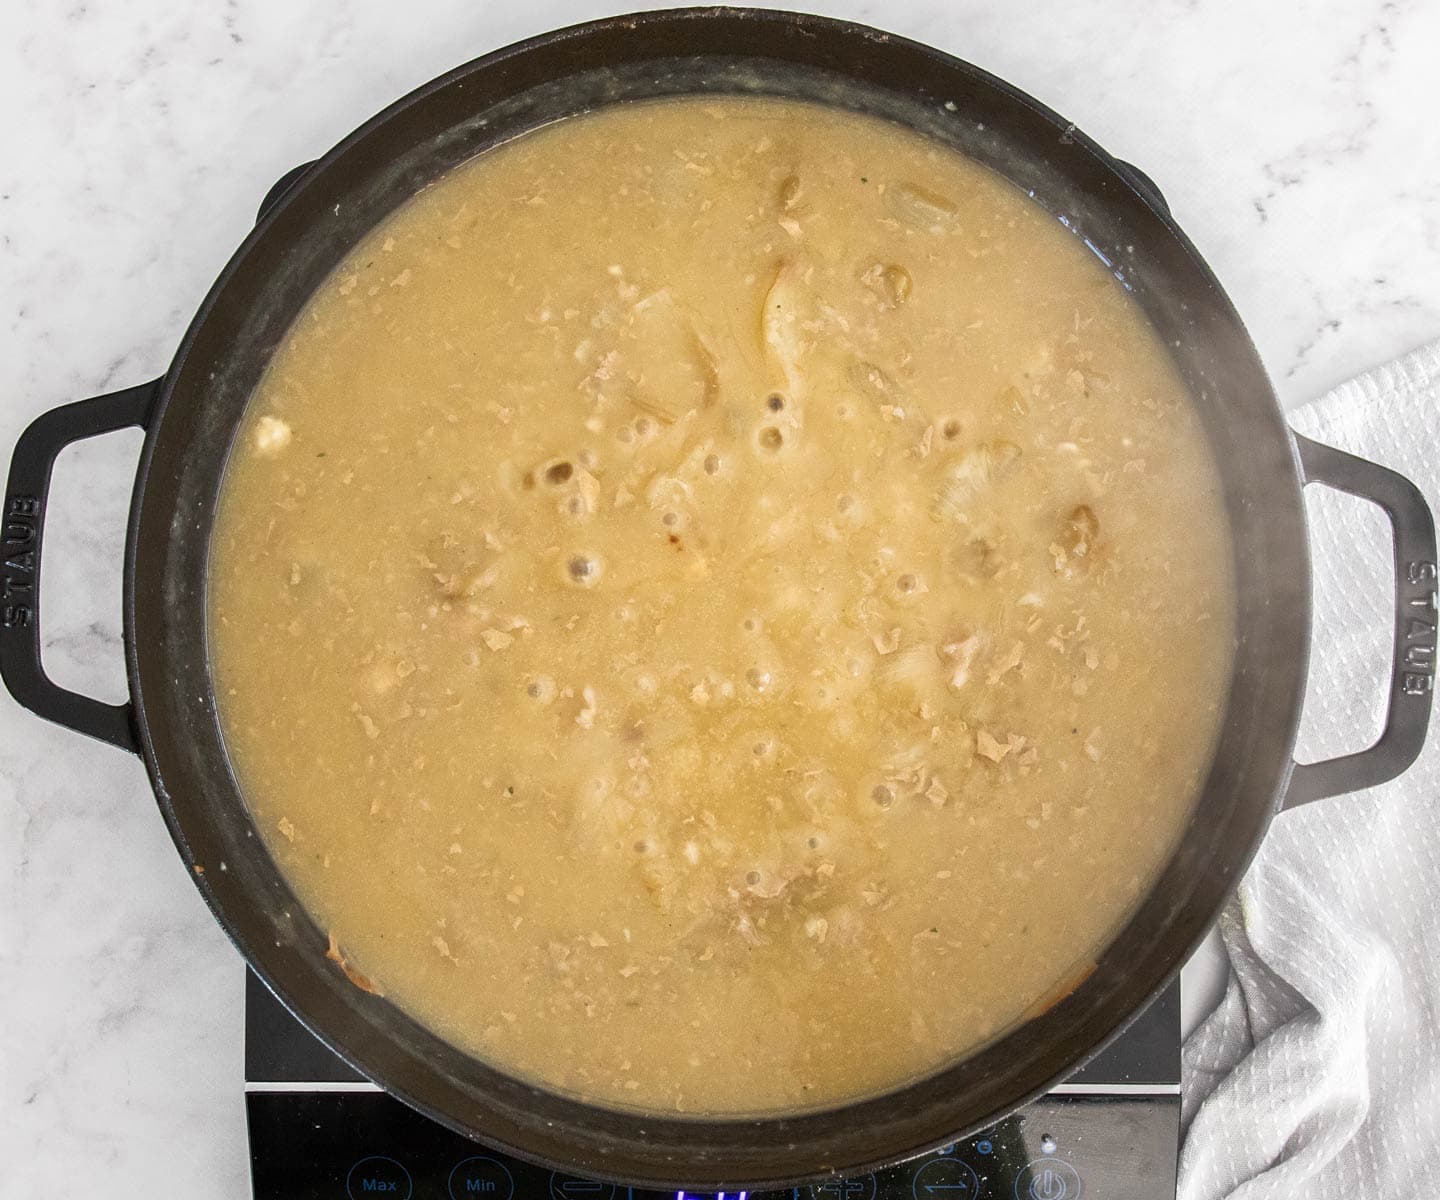
2. Add flour to thicken
Add flour and whisk until fully incorporated then continue on a high simmer until it’s thickened to your liking. You want to cook this for at least 2 minutes to cook out the raw flour but you might need 4-5 minutes to get it to a nice thickness.
3. Add butter
Finally, melt in some butter to make it extra rich and silky.
Turkey stuffing
For those of you wondering “where’s the stuffing” – I don’t do it. By the time the stuffing is cooked through, the turkey is way overcooked leading to very dry turkey that no one wants. I never stuff chicken for the same reason.
Stuffing also stops the turkey from cooking evenly – the heat can only cook it from the outside whereas, without the stuffing, the heat can get through the cavity too.
On top of that, if I’m going to have stuffing, I want crispy bits so I will roast it separately in a casserole dish.
More recipes you’ll love
- Slow cooker turkey breast – great for a smaller gathering
- Pesto turkey flat bread – for using up the leftover turkey
- Leftover turkey pesto bake – a favourite every year
- Turkey corn chowder – easy, delicious and perfect for the leftovers
⭐⭐⭐⭐⭐
Did you try this juicy roast turkey recipe?
Show it some love with a comment and rating below.
Hungry for more?
- Subscribe via Email, Facebook, Pinterest and Instagram.
- Add Sugar Salt Magic as a Google Preferred Source.
Ingredients
- 5 kg turkey (11-12lb) (or any size you choose, notes 2)
- 3 teaspoons olive oil
- 2 tablespoons cooking salt
- handful fresh herbs like rosemary, thyme, sage
- 2 large onions peeled and quartered
- 2 cups chicken stock
FOR THE GRAVY
- the pan drippings
- 1 ½-2 cups chicken stock
- 1 clove garlic smashed/bruised only, optional
- ⅓ cup plain flour (all purpose flour)
- 2 tablespoons butter (28g / 1oz)
For best results, always weigh ingredients where a weight is provided
Equipment
- Large baking tray or casserole dish larger than the turkey
- Baking rack that fits the tray
Instructions
- THAW THE TURKEY:Make sure the turkey is at least half way thawed, if it was frozen. In the fridge a 5kg turkey will take 2 days to get half thawed or submerge it in a leak proof bag in a sink of water. Change the water every 30 minutes for 3-4 hours and it should be good to go.
- DRY BRINE THE TURKEY:Pat the turkey dry all over and inside with paper towel.
- Drizzle about 1 teaspoon of the oil onto the turkey and use your hands to massage it all over.
- Sprinkle over the salt patting it on as you go to stick it to the turkey. Push the herbs into the cavity.
- Use a skewer to poke small holes all over the breast and leg about 2 inches apart.
- Place the turkey onto a large baking tray or baking dish, uncovered and chill for 48 hours.
- ROAST THE TURKEY:Take the turkey out of the fridge 1 hour before you want to begin cooking (this takes the chill off and helps it cook more evenly).
- Preheat the oven to 180C / 350F. Place a large rack over a large baking sheet or casserole dish. Make sure you have enough room in the oven to fit your turkey on a baking sheet.
- The turkey skin will look darker and dried out now and will be tighter on the turkey.
- Tuck 1 quarter of onion inside the turkey. Twist and tuck the wing tips underneath the back and tie the ends of the drumsticks together with kitchen twine.
- Transfer the turkey to your prepared baking sheet and tuck the remaining onions around the turkey. Pour 2 cups of chicken stock into the pan. Gently rub the remaining oil all over the breast, wings and legs without rubbing away any salt that’s there.
- Make a large tent of aluminium foil to cover the turkey and rub some oil over the underside. Place it over the turkey, sealing it at the edges of the tray but keeping it as loose as possible over the turkey.
- Carefully transfer it to the oven and roast. It will need around 23 minutes per kilogram (~2lbs) total. For my 5kg turkey, a total of 1 hour 55 minutes.
- When there is approximately 60 minutes to go, remove the foil and insert a probe thermometer into the thickest part of the breast without touching the bone. Continue cooking and remove it from the oven when the thermometer hits 72C / 160F. The temperature is more important than roasting time. If any parts of the turkey are darkening too quickly, cover them with foil.
- REST:Rest the turkey on a platter for 45-60 minutes before serving. This will help redistribute the juices and don’t worry, it will still stay hot inside. If your house is very cold, you can cover it with aluminium foil but keep in mind this could cause the skin to soften. Any drippings in the pan can be used to make gravy.
- This is a good time to add anything to the oven that needs to roast.
- FOR THE GRAVY:Measure all the pan drippings by straining them through a sieve into a measuring jug. Top the jug up with chicken stock to make 3 ½ cups total.
- Add all the juices to a large saucepan, including all the onions from the roasting pan. Add the garlic clove, if using and you can even add the herbs from inside the turkey if you like.
- Place over high heat and bring to a boil, pressing the onions down with a spatula to crush their flavour into the gravy.
- Scatter over the flour and whisk until fully incorporated. Continue at a high-simmer for at least 2 minutes then more until thickened to your liking.
- Taste, add pepper if you like (it shouldn’t need salt).
- Strain the gravy to remove any solids and serve with the carved turkey.
- Please take a moment to leave a comment & rating. It's appreciated and so helpful.
Notes
- Tablespoons: I use a standard Australian 20ml tablespoon (equal to 4 teaspoons). Check yours before measuring.
- Turkey size: This recipe can work for any turkey but add another 2 teaspoons of salt for every extra 1kg/2lb beyond 5kg/11-12lb.
This post may contain affiliate links that earn me a small commission for my referral, at no extra cost to you. Thank you for supporting Sugar Salt Magic.

