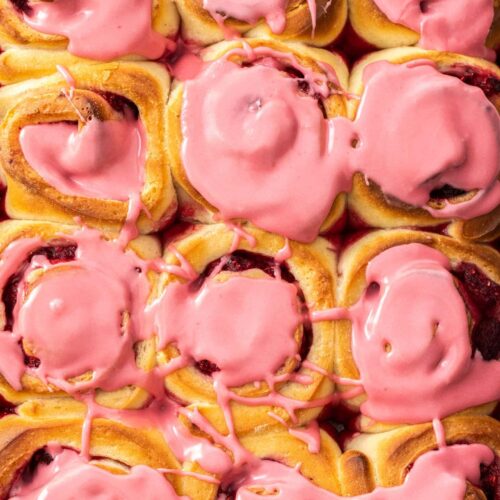

Raspberry sweet rolls are my current crush. With a sweet and gooey, real raspberry filling and that lovely raspberry icing, they’re absolutely irresistible. Completely made from scratch, everyone will love these.
These sweet rolls are a spin on my blueberry cinnamon rolls and are inspired by my classic cinnamon roll dough.

Why you’ll love it
A soft sweet roll, filled with sweet and tangy raspberries, then topped with a 3 ingredient raspberry icing – what better treat for a special sweet breakfast or brunch than these raspberry rolls. With Easter coming up, these would be the perfect thing.
Using frozen raspberries means you can make them all year round too, but you know what else it means? As they thaw, then release sweet raspberry juice which seeps down and gives these a gorgeous gooey raspberry bottom, as well as the filling.
The topping is just 3 ingredients, including raspberry puree and it’s the perfect gooey topping, though you could absolutely top these with a cream cheese frosting too, like a traditional cinnamon roll.
Ingredients for raspberry rolls

Detailed quantities and instructions in the recipe card below.
- Milk: Use full cream milk for the best flavour and texture.
- Flour: I just use regular plain flour / all-purpose flour for my sweet rolls.
- Yeast: I use instant dry yeast but you can also use active dry yeast, in the same quantity.
- Sugar: You’ll need granulated white sugar for the rolls and icing sugar / powdered sugar for the icing.
- Salt: Just a touch of salt intensifies flavour, even in sweets.
- Cardamom: Just like my jumbo Swedish buns, these have a touch of cardamom. It’s not overpowering but goes so nicely with raspberries.
- Oil: A slight change to my original cinnamon roll recipe, oil takes the place of butter in these. Use a neutral flavoured vegetable oil like grapeseed, sunflower or rice bran oil. It helps keep the dough soft and tender.
- Egg: Use a large egg, free-range if you have the means.
- Butter: While there is oil in the dough, there is still some butter in the filling just like a classic cinnamon roll.
- Raspberries: I use frozen raspberries here, firstly for their convenience and availability but also for the juice that they release for ultra raspberry gooeyness. You can swap them for fresh raspberries but you won’t get quite so much gooey raspberry in the bottom.
- Cornflour / cornstarch: This ingredient can get tricky. In some parts of the world it’s called cornflour and in others (especially the US) it’s called cornstarch. It’s the same thing. It’s the white starch powder that is used most often as a thickener as opposed to corn flour in the US which is what we call fine polenta here in Australia. Clear as mud? Good.
Feel free to add some lemon zest to your raspberry rolls as well as it goes beautifully with raspberry. You could use other berries too but if you want blueberries, try my blueberry cinnamon rolls.
How to make raspberry sweet rolls

Detailed quantities and instructions in the recipe card below.
As with any bread making project there is a little time involved in making these raspberry rolls. None of it is difficult though and they’re such a perfect weekend baking project and decadent Sunday breakfast.
- Bloom the yeast: Blooming or activating the yeast is a step I take every time I make bread, even though I use instant yeast which technically doesn’t require the step. I do this for 2 reasons. First you can make this recipe the same way whether you’re using instant or active dry yeast and secondly, this step allows you to make sure your yeast is alive before you go and waste all your other ingredients.
Let it sit in warm milk for about 10 minutes until frothy. If it doesn’t get frothy (photo 1), it’s no good, so get some fresh yeast before trying again. - Make the dough: I find a stand mixer easiest for this but it can be done by hand too. Once the yeast has bloomed, combine the flour, sugar, salt and cardamom in a large bowl. Add the wet ingredients – oil, yeast mixture and egg (photo 2) – then mix it and knead for about 10 minutes (stand mixer) or by hand for about 15 until it’s smooth and elastic.
- The first rise: Remove the dough from the bowl and brush a little oil around the bowl. Place the dough back, turning to lightly coat in the oil (photo 3), and place a tea towel over the top. Let it sit in a warm spot for about 1 – 1 ½ hours until it doubles in size (photo 4). Rising time will depend on the ambient temperature where the dough is sitting.

- Assemble the rolls: First mix together the filling ingredients (photo 5). Roll the dough out to a large rectangle, brush with melted butter, then scatter over the filling. Roll it up from the long side (photo 6). Cut the roll into 12 even pieces using a very sharp knife (photo 7) or dental floss.
- The second rise: Sit the rolls, evenly spaced, in a 9×13 baking tray, cut side up (photo 8). Cover lightly with a piece of plastic wrap and let them rise again for about 45 minutes to an hour until big and puffy (photo 9). Bake.
- The icing: Push raspberries through a sieve into the icing sugar, add a touch of milk (photo 10), then mix until you have a smooth icing. Add as much milk as you need to make it thick but able to run off the spoon.
Tips and tricks
- Weigh the flour: More important than any other bake, make sure to weigh the flour when making any type of bread. If you add too much it will dry them out. If you don’t have kitchen scales go order one but in the meantime, fluff up your flour, then spoon it into the cup measure before using a knife to scrape off the excess.
- Speeding up the first rise: I don’t recommend this unless your home is particularly cold as it can affect the texture. If you want to try it, preheat the oven to 80C / 175F then turn it off. Place the bowl of dough in there, covered with the door wedged open.
- Rising time: Both rising times will depend on the ambient temperature of wherever the dough is sitting.The second rise takes a little longer on these than a regular cinnamon roll, because the frozen raspberries chill the dough. Don’t worry, the wait is worth it.
- Use a sharp knife: A sharp knife or dental floss will give you lovely clean slices.
- The icing will be runnier and thinner, the warmer the raspberry rolls are when you frost them.

Storage
- Prep ahead: You can make the rolls completely the day before, then bake them the next morning. Once they’re on the baking tray, cover with plastic wrap and place in the fridge. Let them come to room temperature (about 1 hour) before baking them.
- Leftovers can be stored in the fridge for 2-3 days in an airtight container. The icing will melt and run, the longer they are in the fridge though. They can also be frozen. Place in an airtight container in the freezer for up to 2 months.
- Reheating: Before eating leftover sweet rolls, they’ll benefit from a 10-15 second burst in the microwave or 10-15 minutes in the oven at 180C / 350F. This will fluff them up again.
PIN IT:
Click to PIN this recipe for later!

If you try this raspberry rolls recipe, please take a moment to leave a rating and comment below. I love hearing from you, and it helps other readers too!
More sweet breakfast ideas
- Cranberry white chocolate hot cross buns
- Jumbo Swedish cinnamon buns
- Caramel apple cinnamon rolls
- Homemade crumpets
- Strawberry chocolate cinnamon rolls
- Iced Buns (with coconut)
Never Miss a Recipe!
Get the latest recipes straight to your inbox!

Ingredients
FOR THE SWEET ROLLS
- 1 cup cold milk (250ml)
- 2 ¼ teaspoons instant or active dry yeast (1 sachet / 8g) (notes)
- ⅓ cup white granulated sugar (66g / 2.3oz)
- 455 g plain (all purp) flour (3 ½ cups / 1lb)
- ½ teaspoon salt
- 1 teaspoon cardamom
- ⅓ cup vegetable oil
- 1 large egg, room temp
FOR THE RASPBERRY FILLING
- 2 tablespoons unsalted butter, melted (28g / 1oz)
- 3 cups frozen raspberries, not thawed
- ¼ cup white granulated sugar (50g / 1.8oz)
- 2 teaspoons cornflour (cornstarch)
- ¼ teaspoon cardamom
FOR THE TOPPING
- ½ cup thawed frozen raspberries
- 1 ½ cups icing (powdered) sugar
- 2-3 teaspoons milk
For best results, always weigh ingredients where a weight is provided
Equipment
- stand mixer Helpful but not absolutely necessary
- 9×13 baking tray
Instructions
- MAKING THE DOUGH: Heat the milk in a saucepan or microwave until just tepid / warm to the touch – not hot. If you have a thermometer, you’re looking for around 40C.
- Add the yeast and 1 tablespoon of the sugar to the warm milk, mix and let it sit for 5-10 minutes until frothy (if it doesn’t start getting frothy, your yeast is no good and you’ll need to start again with fresh yeast).
- In the bowl of a stand mixer (or see notes) add the remaining sugar, flour, salt and cardamom then give it a good mix around.
- Pour in the warm milk mixture and oil, give it a quick stir then add the egg.
- Attach the dough hook attachment to the stand mixer and mix the dough for 10-12 minutes until smooth and elastic looking.
- Remove the dough from the bowl then brush with a little oil. Place the dough into it and flip it over so that has a light coating of oil all over. Cover with a tea towel and let it sit in a warm place for 1 to 1 ½ hours or until doubled in size.
- ASSEMBLING THE CINNAMON ROLLS: Grease a 9×13 inch baking tray with butter.
- Punch down the dough and transfer it to a clean work surface. It shouldn’t be sticky but if it is just dust underneath with a little flour – not too much.
- Gently stretch or roll the dough out to a large 35x40cm (14×16 inches) rectangle, about 7mm thick.
- Brush the melted butter all over.
- In a large bowl, combine the raspberries, sugar, cornflour and cardamom, breaking up about ½ of the berries as you go.
- Scatter the raspberry mixture over the dough leaving 1 inch on the far long side uncovered.
- Roll up from the longest side nearest you towards the other, as tightly as you can without squeezing the filling out.
- Cut 12 even slices using a very sharp knife or dental floss.
- THE SECOND RISE: Place the rolls evenly spaced onto the baking tray cut side up (cleanest side up). Let them rest and rise for another 45-60 minutes until roughly 1 ½ times the size and they look puffy.
- Preheat the oven to 180C / 350F / 160C fan forced.
- BAKE: Bake for around 22 minutes, turning the tray at the halfway mark, until golden.
- Let them cool a little before serving, so they are warm and fluffy but not piping hot.
- FOR THE ICING: Sift the icing sugar into a medium mixing bowl.
- Push the extra thawed raspberries through a fine mesh sieve to remove seeds, directly into the sugar.
- Add 2 teaspoons of milk. Mix until smooth and runny adding a little more milk as necessary to get a thick consistency that still runs off the spoon.
- Pour over the raspberry rolls and serve.
- Please take a moment to rate this recipe. I really appreciate it and it helps me create more recipes.
Notes
- For best results, you should always weigh ingredients where a weight is the first measurement given. Kitchen scales are relatively cheap but if you can’t weigh the ingredients, use the spoon and level method (don’t scoop).
- All ovens vary – test for doneness 2-3 minutes before the recipe suggests
- Yeast: You can use instant or active dry yeast. If you use rapid rise, your dough may double in size quicker. If using active dry, add it to the milk mixture and let it sit for 5-10 minutes until it’s nice and frothy before proceeding.
- By hand: You can make the dough without a stand mixer, just make sure to knead until it is smooth and elastic – about 10-12 minutes.
- Cinnamon rolls are best eaten fresh but will keep in an airtight container 2-3 days. They can be warmed for 10-15 seconds in the microwave (even iced) to soften them if a little stale.
- Make ahead: The recipe can be made ahead up to the point that the individual rolls have been placed in the baking tin. Cover the tin with plastic wrap and keep in the fridge overnight. Let them come to room temperature before baking – roughly 60-90 minutes.
- Cutting with dental floss: Take a nice long piece of floss. Gently lift the dough log and lay the floss underneath, then lay the log back down. Take the two ends of the floss and cross them over the top, then pull the two ends away from each other in a quick movement to cut straight through.
This post may contain affiliate links that earn me a small commission for my referral, at no extra cost to you. Thank you for supporting Sugar Salt Magic.
2 Comments on “Raspberry Rolls”
These rolls look amazing! So perfect for Spring.
Thanks so much, Trang 🙂 Definitely perfect for Spring.