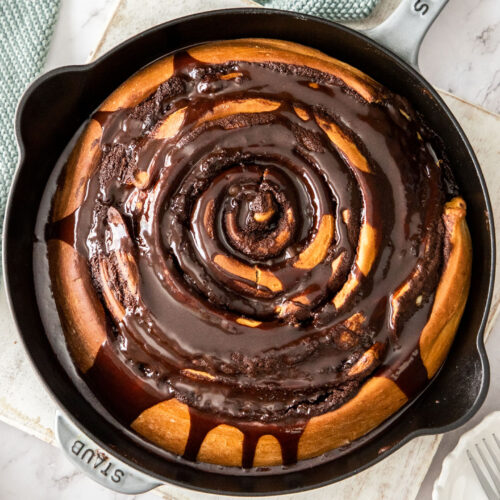
Why make a batch of normal chocolate cinnamon rolls when you can have this giant chocolate scroll. It’s a cake sized sweet roll, filled with chocolate. The combination of soft, sweet dough and loads of chocolate, plus the blissful aroma that fills your kitchen will have your family craving it.
- An easy dough that turns out perfectly fluffy.
- Loaded with chocolate.
- It smells and tastes divine.
- It can be made ahead for baking first thing in the morning.
- The perfect celebratory breakfast.
- Did I mention it’s loaded with chocolate?
If you love this you’ll love my jumbo Swedish cinnamon buns too.

Never Miss a Recipe!
Get the latest recipes straight to your inbox!
Ingredients you’ll need

Detailed quantities and instructions in the recipe card below.
- For the dough you’ll need flour, sugar, milk, butter, salt, egg and yeast. Everything is pretty self-explanatory, however the yeast you need is instant dry yeast. If using active dry yeast, you’ll need to activate it first by mixing it into the warm milk and letting it sit for 10 minutes until frothy. Also, use whole milk (full fat milk).
- The filling is a chocolate lovers dream with butter and brown sugar for richness then two types of chocolate – dutch process cocoa and dark chocolate (semisweet chocolate).
- The icing is a mixture of icing sugar, cocoa, butter and milk and tastes amazing. It’s the perfect indulgent chocolatey topping.
Variations
- Feel free to add a little cinnamon – 1-2 teaspoons to the filling mixture to make them chocolate cinnamon rolls.
- Also, you can use Nutella to fill them instead of the filling in the recipe. Use about ¾ – 1 cup and just warm it a little first so that it’s easy to spread.
- You can also use a cream cheese frosting similar to regular homemade cinnamon rolls.
How to make chocolate scroll (step-by-step)

Detailed quantities and instructions in the recipe card below.
- Make the dough: Start by melting some butter and milk together, then adding cold milk to bring the mixture to just a tepid temperature. Add that to a stand mixer (or large bowl) with flour, yeast, sugar, salt and egg then use a dough hook to knead it until it’s smooth and elastic (photo 1).
- The first rise: The first rise is actually more of a resting period and is only 20 minutes. While that’s happening, you can start preparing the filling.
- The filling: Mix together butter, sugar, cocoa and melted chocolate until smooth and set aside (photo 4). If it’s too firm when you come to spread it just warm it a little in the microwave. After 20 minutes, roll the dough out to large rectangle (photo 2) and cut into 4 thick, long strips (photo 3). Keep the strips together and spread over the filling (photo 5).

- Assembling:
- Now, roll up the first strip (photo 6).
- Place that first strip on top of the second one, so the two ends are meeting and roll that up too (photo 7).
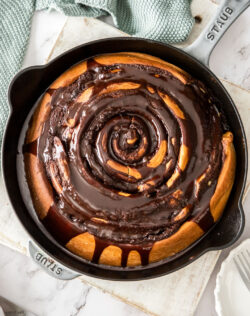
- Place the roll, swirl side up, in a greased baking dish or large skillet like I’ve used here.
- Lift up the next strip and gently feed it around the scroll in the pan, making sure the ends are meeting (photo 8).
- Repeat with the last strip.
- The second rise: The second rise may take 45-60 minutes (or longer if your house is cool). Make sure to put it in a warm place, covered loosely, and it should rise enough in 45 minutes (photos 9&10).
- Bake: Bake your giant chocolate scroll for around 30 minutes.
- The icing: Beat together icing sugar, cocoa and butter. Add the golden syrup, if using, and then just enough milk to make it thick but pourable. Pour it over the scroll or serve it with the chocolate scroll so everyone can add their own.
This recipe can be made into regular sized chocolate rolls. In this case, once you have rolled it out to a rectangle, spread over the filling and roll it up from long side to long side. Cut it into 12 equal portions and place them onto a 9×13 inch baking sheet or larger. They will bake in around 25 minutes.

Tips and tricks
- Weigh your ingredients: When it comes to flour and cocoa, you should always weigh these ingredients. The reason is, the way you fill your measuring cup can alter how much flour or cocoa you actually get. For instance, scooping straight out of the container will make the flour more compact and you’ll end up with more than you need.
As a general rule, the best way to fill cup measures (next to weighing ingredients) is to fluff up the ingredient first, then spoon it into your cup measure. Level it off with a knife.
- Yeast: I use instant dry yeast. You can use active dry yeast but you will need to activate it first. To activate the yeast, once you’ve added the cold milk to the warm milk, mix in the yeast and let it sit for 10 minutes. It should start getting fluffy.
- Dough not rising: If your dough isn’t rising it may either be too cold (you need to put it somewhere warm and draft-free) or it could be that your yeast is expired.
- Amount of flour: While I’ve given an exact weight of flour, how much you need can actually alter depending on the brand or the climate where you are. If using a stand mixer, it should be sticking to the bottom of the bowl but will have pulled away from the sides. If kneading by hand, it will be sticky but will gradually get less sticky the more you knead it. Unless it’s completely coating your hands, try not to add more flour. A dough scraper can be helpful in lifting it from the bench.

Yield and storage
This chocolate scroll recipe serves 12. To serve, cut into wedges like you would a cake.
Make ahead steps (for baking the next day)
Follow the instructions right through to placing the roll into the pan. Cover with plastic wrap and chill in the fridge overnight. Take it out of the fridge ½ an hour before baking and remove the plastic wrap before baking.
Make ahead steps (for freezing)
To freeze the chocolate sweet roll for another time, follow the instructions right through to starting the rolling process. Place a sheet of baking paper on a baking tray. Now roll the dough up per the instructions and place it on the baking tray.
Freeze until mostly solid then wrap 3 times in plastic wrap (or use an airtight container) and store up to 2 months in the freezer. Take the dough out of the freezer and place into the baking dish then chill in the fridge overnight. Take it out of the fridge 30 minutes before baking.
Storing and reheating leftover scroll
Only slice as much of the scroll as you’re going to serve. The leftover chocolate scroll can be stored in an airtight container in the fridge for 3-4 days. Reheat portions in the microwave for 10 seconds to fluff it up again.

Did you try this chocolate scroll recipe?
Leaving a rating and comment below the recipe is so helpful!
Hungry for more? Subscribe to the newsletter for free recipes straight to your inbox. Also, follow along on Facebook, Pinterest and Instagram.
Ingredients
FOR THE CHOCOLATE ROLL DOUGH
- 57 g unsalted butter (¼ cup / 2oz)
- 1 cup cold milk (250ml)
- 455 g plain flour (all purp flour) (3 ½ cups / 1lb)
- 2 ½ teaspoons instant dry yeast
- ⅓ cup white granulated sugar (66g / 2.3oz)
- ½ teaspoon salt
- 1 large egg
CHOCOLATE FILLING
- 115 g unsalted butter, softened (½ cup / 4oz / 1 stick)
- ½ cup brown sugar (105g / 3.7oz)
- ¼ cup cocoa powder (25g / 0.9oz)
- 180 g dark chocolate (semisweet chocolate), melted and cooled slightly, (6.3oz)
CHOCOLATE ICING
- 1 cup icing sugar (powdered sugar)
- 2 tablespoons cocoa powder (notes 1)
- ¼ cup unsalted butter, softened (¼ cup / 2oz)
- 1 tablespoon golden syrup (or corn syrup), optional (notes 1)
- Enough milk to make it thick but pourable
For best results, always weigh ingredients where a weight is provided
Equipment
- stand mixer (optional)
- 9-10 inch skillet or cake tin
Instructions
- MAKING THE DOUGH: In a small saucepan over low heat, melt together the butter and roughly one third of the milk. Stir or swirl constantly to melt without overheating. Add the remaining cold milk and set aside.
- In the bowl of a stand mixer (or see notes), add the flour, yeast, sugar and salt then give it a mix up.
- Pour in the warm milk mixture and one whole egg, then stir with the dough hook or a spoon to a shaggy dough.
- Attach the dough hook to the stand mixer and mix the dough for 6-7 minutes until smooth and elastic looking. See notes for kneading by hand.
- Remove the dough from the bowl using a dough scraper, then rub a little oil around the bottom and place the dough back in.
- Cover with a plate and let it rest at room temperature (or in a warm place if your home is cold) for 20 minutes.
- MAKE THE FILLING:In a medium bowl, beat together the butter, brown sugar, cocoa and melted chocolate until fully combined. Set aside.
- SHAPE AND FILL:Roll the dough out on a lightly floured surface to a rectangle 30x46cm (12×18 inch) and about 6-8mm thick – don't roll it too thin.
- Take a pizza cutter and roll it along the dough, short side to short side, into 4 long strips (see images in post to confirm before cutting) Keep the strips together, don’t move them.
- Spread filling all over the strips.
- ROLL THEM UP:Grease a 9-10 inch baking dish or skillet with soft butter. (My skillet in the pictures is actually an 11 inch skillet but the base is only about 10 inches).
- Roll up the first strip. Place the end of that roll onto the next strip so the two ends meet. Roll it up again.
- Place this roll into your prepared dish, cut side (or swirl side) upwards. Now take the third strip and carefully place it around the the roll, again starting where the last one finished. Repeat for the last strip.
- Cover lightly with plastic wrap and leave in a warm spot for 45 minutes to 1 hour until doubled. Or transfer it straight to the fridge if you’re baking in the morning.
- Preheat the oven to 180C (160C fan) / 350F. If the scroll was chilled overnight, take it out of the fridge 30 minutes before baking it may also need an extra 5-10 minutes baking time.
- Bake the scroll for 30 minutes until cooked through and golden on the outside. To make sure it’s cooked through, poke down into the centre to check the dough is cooked there and not still raw.
- THE ICING:Stir together the icing ingredients until fully combined.
- Pour it over the whole scroll or leave it in a jug for everyone to pour it over their own portion.
- Please take a moment to leave a comment & rating. It's appreciated and so helpful.
Notes
- Tablespoons: I use a standard Australian 20ml tablespoon (equal to 4 teaspoons worldwide). Many countries use a 15ml tablespoon so check before measuring.
- All ovens vary – always test for doneness 3-5 minutes before the recipe suggests
- For best results, you should always weigh ingredients like flour and cocoa. Kitchen scales are relatively cheap but if you can’t weigh the ingredients, use the spoon and level method (don’t scoop).
- Yeast: You can use instant or active dry yeast. If you use rapid rise, your dough may double in size quicker.
- Chocolate: You can use any chocolate you like. I use dark chocolate (50% cocoa).
- No stand mixer? You can make the dough without a stand mixer, just make sure to knead until it is smooth and elastic – about 10-12 minutes.
- If you want traditionally sized like cinnamon rolls, don’t cut the dough into strips. Roll it up, once filled, from long side to longe side and cut into 12 even portions. Sit them side by side in a greased 9×13 inch baking tin.
- Chocolate scroll is best eaten the day it is made but will keep in an airtight container 3-4 days. Portions can be warmed for 10-15 seconds in the microwave (even iced) to soften them again.
This post may contain affiliate links that earn me a small commission for my referral, at no extra cost to you. Thank you for supporting Sugar Salt Magic.