Why you’ll love it!
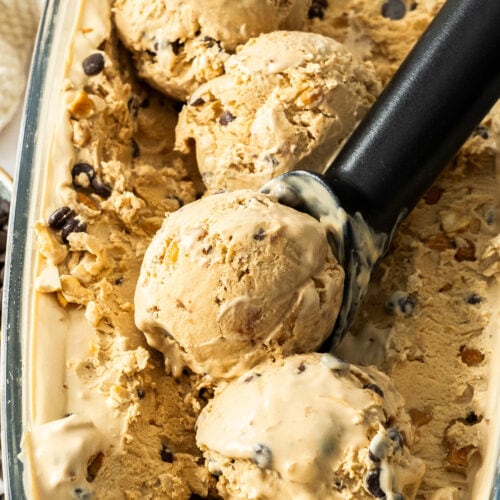
Homemade coffee crumble ice cream is incredibly easy to make — and eat! Made with sweetened condensed milk, instant coffee, vanilla, cream, and delicious add-ins, it’s a super creamy ice cream that’s perfect for grown up dessert at home.
- No churn creamy coffee ice cream, which is ridiculously easy to make.
- The coffee flavour is fantastic — punchy and perfect for true coffee lovers.
- The chocolate chips and cashews add such a nice crunch and textural element.
- It requires just 10 minutes of prep time – just be patient as it freezes.
I love ice cream, and homemade is even better. And while my favourite from childhood to this day is chocolate chip, I also like to switch things up and try new flavours. I’ve got to say, coffee ice cream is pretty special.
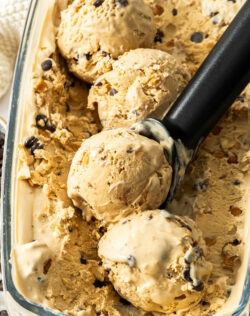
This coffee crumble ice cream recipe was inspired by the Selecta brand coffee crumble ice cream. The crumble isn’t made from cookies or biscuits, as you might see on an apple crumble; rather, it’s small pieces of cashew nuts and mini chocolate chips.
I think you’ll find it just as delicious as I do. Craving more flavours? Don’t miss all of my homemade ice cream recipes.

Never Miss a Recipe!
Get the latest recipes straight to your inbox!
Ingredients you’ll need
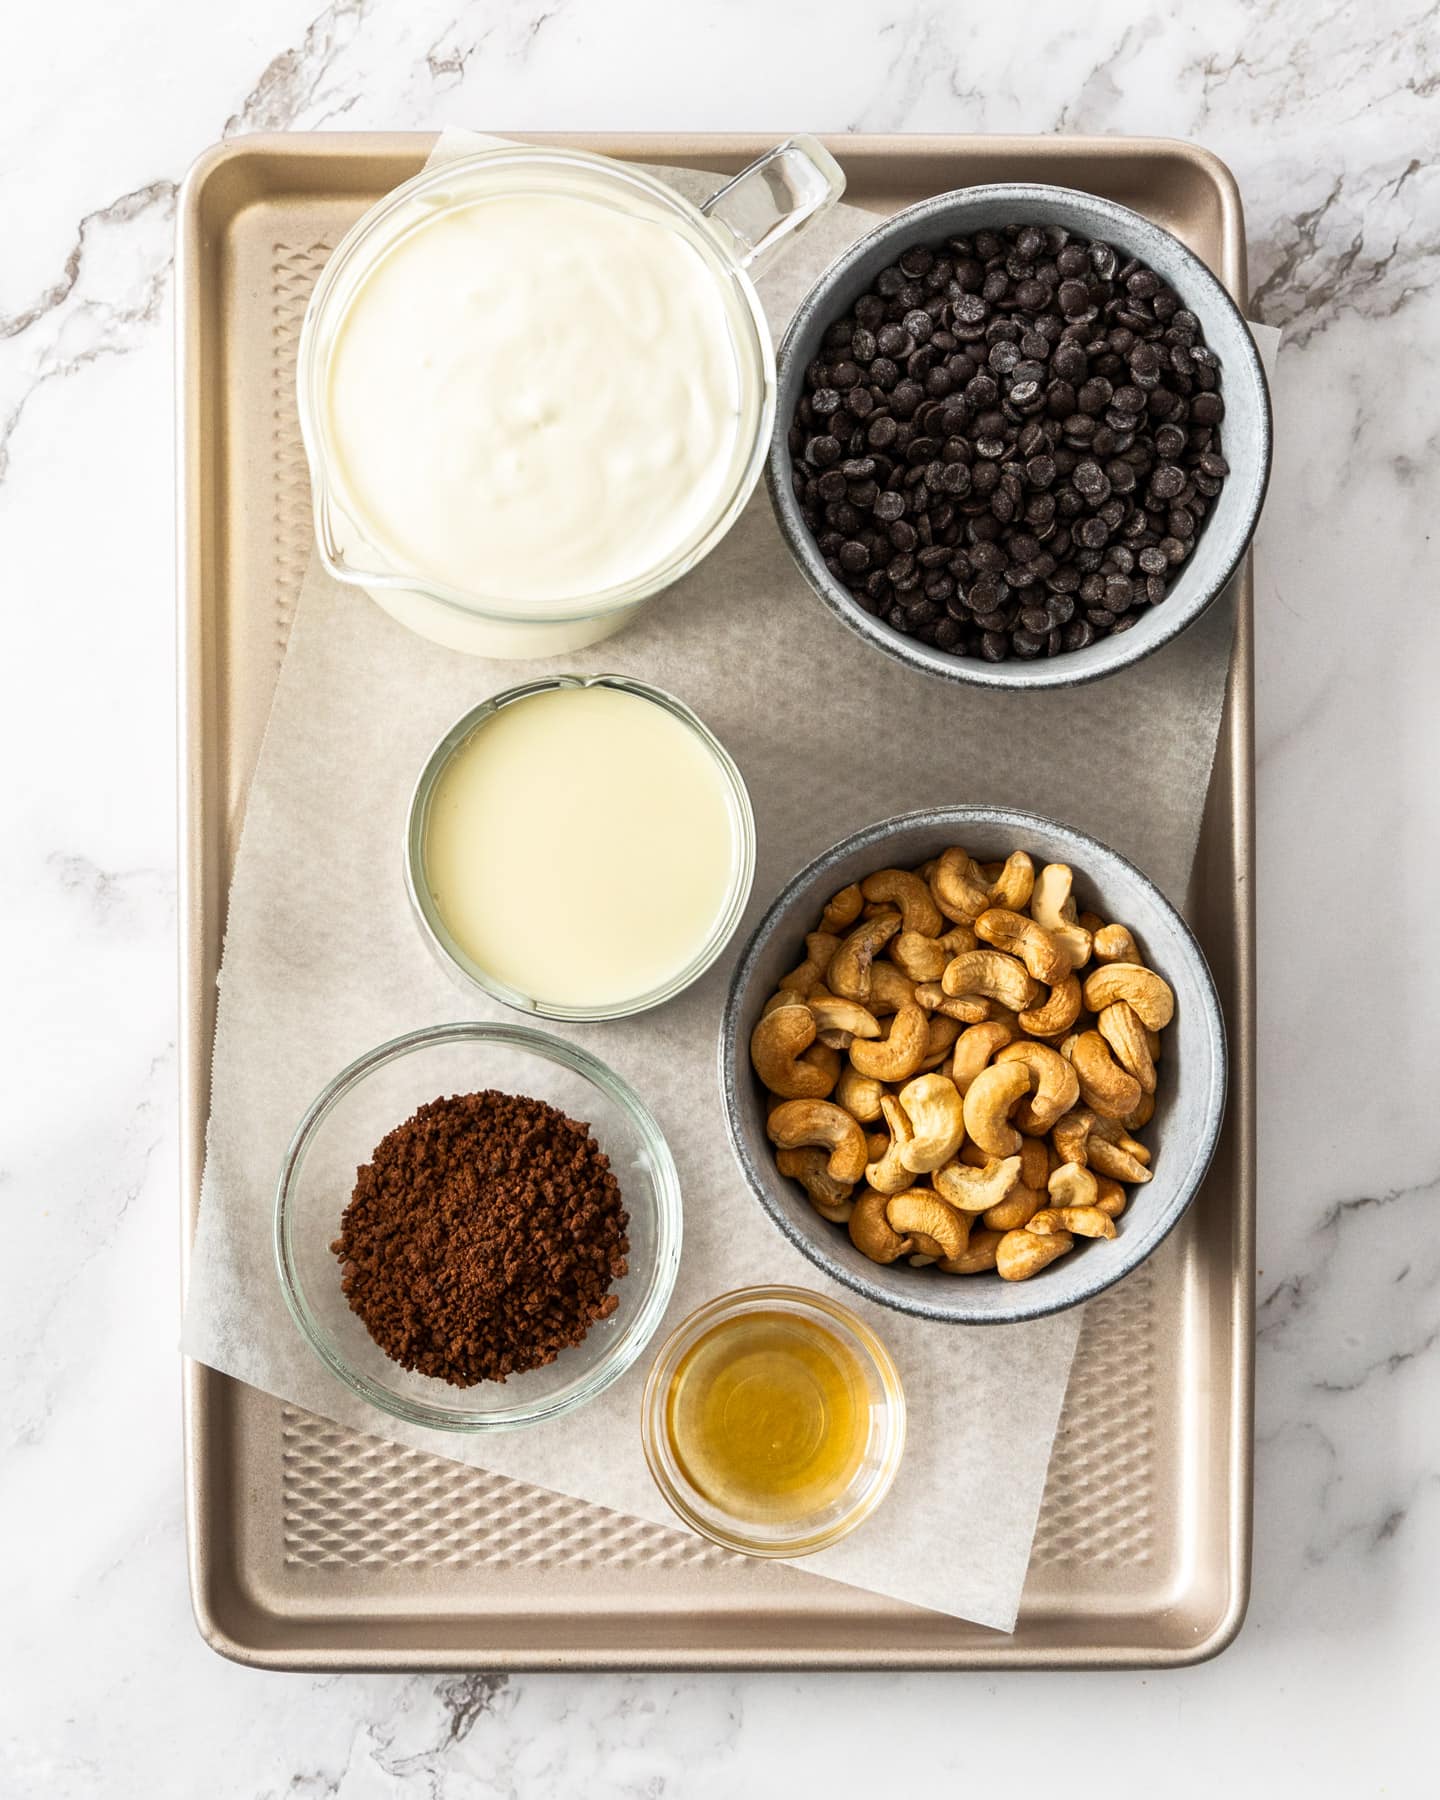
No churn ice cream recipes are incredibly simple to create and to customise too. Stick to the simple ice cream base of sweetened condensed milk, cream and vanilla, then add flavourings to your hearts desire. It really is that easy and the resulting ice cream is so perfectly creamy with just the right sweetness. Since there are so few, use high quality ingredients for the best flavour.
Detailed quantities and instructions in the recipe card below.
- Instant Coffee: I use instant coffee granules for my coffee-flavored ice cream. If using instant coffee powder, you won’t need as much (try 1 ½ to 2 tablespoon max). Because it’s finer, you’ll fit more into the tablespoon than you would with granules. I don’t suggest using ground coffee beans as they won’t dissolve, and you’ll end up with a very gritty texture.
- Sweetened Condensed Milk: The flavour of sweetened condensed milk can sometimes be quite obvious in no-churn ice cream, making it overly sweet. I’ve worked hard on getting the ratios of my cream to condensed milk right — creamy with the perfect amount of sweetness. It’s not sickly sugary, and the condensed milk blends with the other ingredients seamlessly.
- Vanilla Extract: Adds a touch of warmth to the overall taste of coffee crumble ice cream, and pairs wonderfully with the other flavours.
- Thickened Cream: Also called heavy whipping cream, this ingredient forms the creamy base of this recipe.
- Cashew Nuts: Make sure you toast the cashews – don’t skip it – before adding them to your mixing bowl. It brings out their flavour and adds a nice crunch to the mix.
- Chocolate Chips: I’m using mini chocolate chips for my coffee ice cream as I find the size to be just right. You could also use ½ cup of shaved chocolate instead.
How to make coffee ice cream (step-by-step)
Detailed quantities and instructions in the recipe card below.
- Recipe prep: Toast the cashews if you haven’t already and roughly chop them. Place the instant coffee granules in 1 tablespoon of boiling water and set aside to cool for 5 minutes.
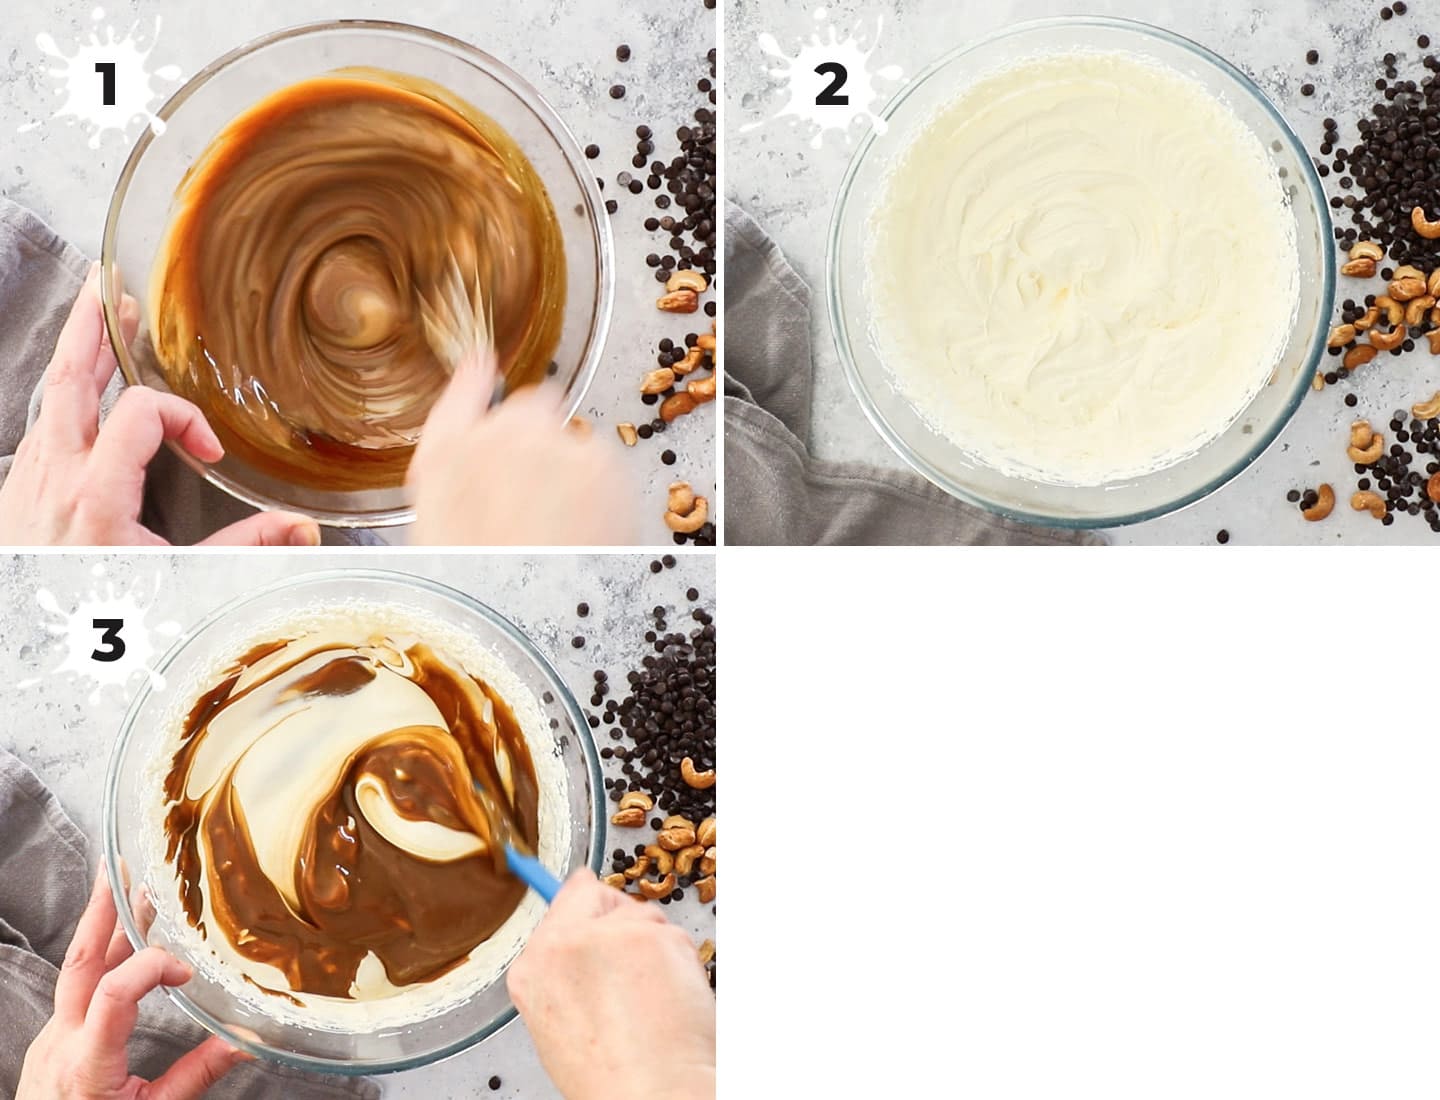
- Combine the base ingredients: Add the prepared coffee, sweetened condensed milk, and vanilla to a medium bowl and whisk to combine (photo 1).
- Whip the cream: In a separate large bowl, use a handheld mixer to whip the cream until soft peaks form (photo 2). Don’t overmix or the texture of your coffee crumble ice cream will be grainy.
- Add the coffee mixture: Pour the condensed milk mixture into the bowl of whipped cream and gently fold together (photo 3). Tread lightly, making sure not to knock all of the air out of the cream.
Adding the crumble
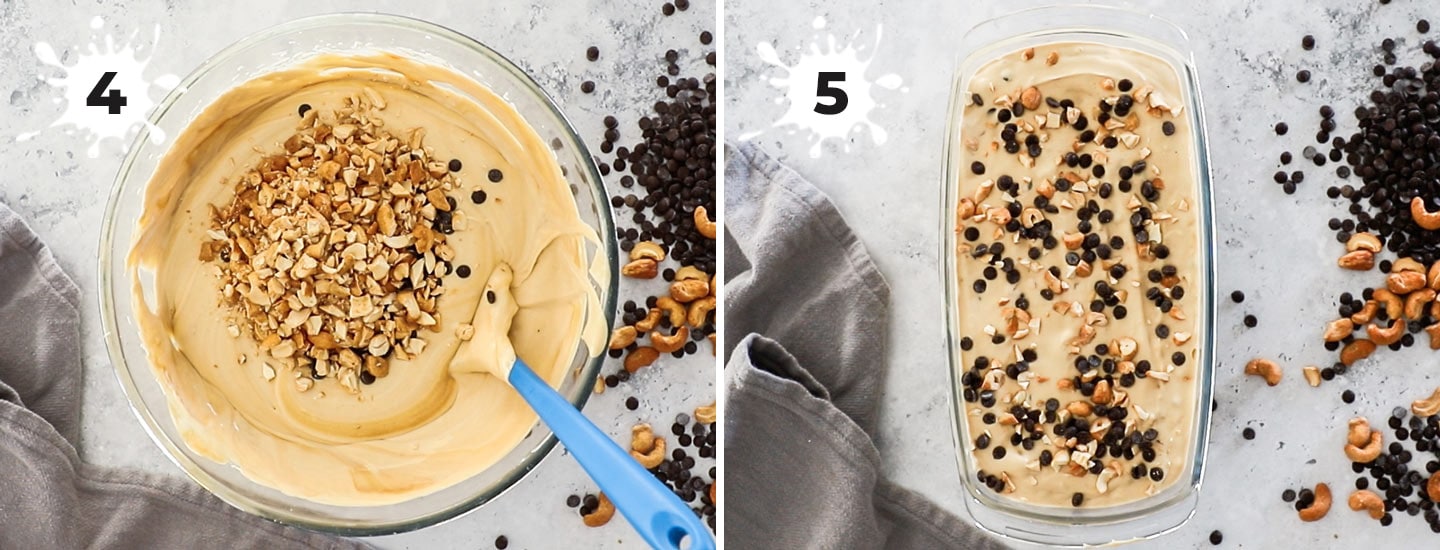
- Add the chocolate chips and cashews: Place a small handful of chocolate and nuts aside. Fold the rest into the coffee ice cream mixture so that they are evenly distributed (photo 4).
- Assemble: Pour your coffee crumble ice cream into a freezer-safe container with a lid (I’m loving these glass loaf pans for my ice creams). Level out the top and add the remaining cashews and chocolate chips on top (photo 5).
- Freeze: Cover and freeze for at least 8 hours (overnight is better!) before serving. Enjoy!
Tips and tricks
- Grab mini chocolate chips: Regular chocolate chips are too big, and you’ll end up hurting your teeth once they’re frozen. If you can’t find mini chocolate chips, just make chocolate shavings like I do for my old-style chocolate chip ice cream.
- Use a very gentle and methodical folding motion when adding the coffee mixture to the whipped cream, otherwise, you’ll knock all the air out of it.
- Be careful not to overbeat the cream. As you notice it starting to thicken and lines don’t disappear as quickly, slow the handheld mixer down to its lowest setting. Remove the mixer regularly so you can check for when you get to soft peaks — when just the tip of the peaks fall over.
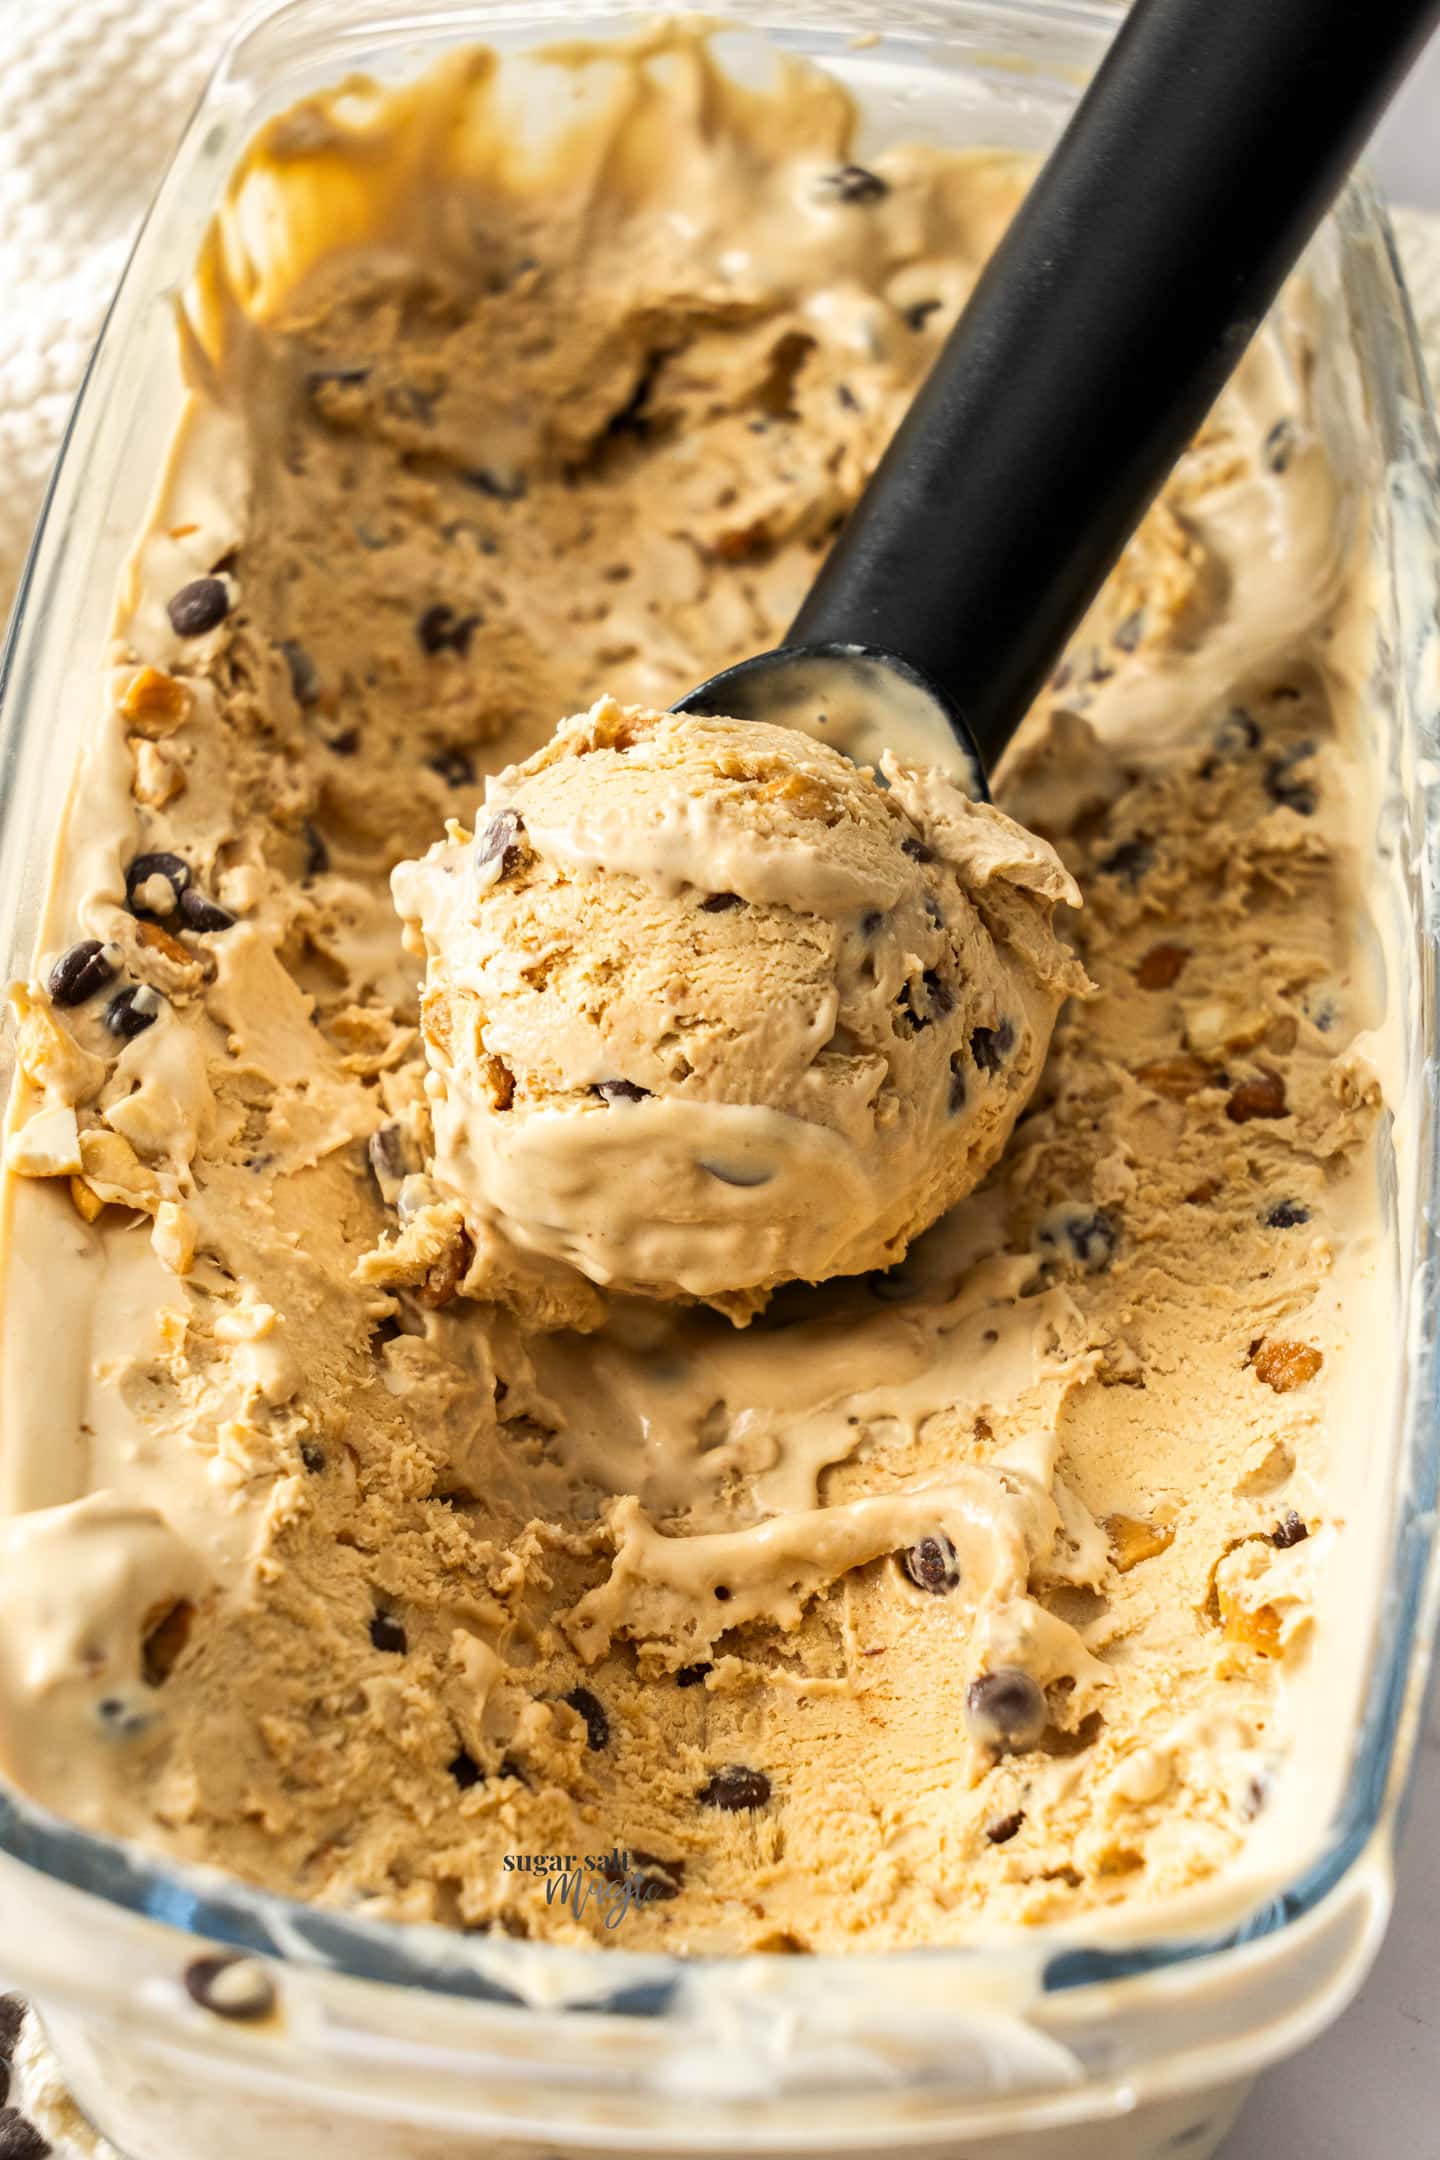
- I love these glass loaf pans for storing my ice cream. First, they have a lid that fits nice and tight. Secondly, since they’re long, you get nice big scoops just scooping the length of the dish.
- I get the best results from a Zeroll ice cream scoop or a Zeroll-style ice cream scoop.
- Don’t overfill the container. Your coffee crumble ice cream recipe will expand as it freezes, so make sure you have a little space in the top of your container (just 1 cm/ ½ inch or so) so that it has room to expand.
- Take your coffee flavored ice cream out of the freezer 10-20 minutes before scooping to make it easier. In fact, I saw a Jamie Oliver tip that suggests taking it from the freezer and placing it into the fridge an hour before scooping. This way it softens a little more evenly throughout rather than the edges first. I’ll be trying that tip myself soon.
- Make sure to use toasted cashews or toast them yourself in the oven. Don’t skip it. It adds such great flavour.
Storage
Store your homemade coffee ice cream in the freezer in a freezer-safe container with a tight-fitting lid. If your container doesn’t have a lid, cover it 2-3 times in plastic wrap. It will keep for up to 2 months.
FAQs
Yes, it does. For that reason, this coffee flavored ice cream is best kept for adults.
You only need 6 ingredients. Cream, sweetened condensed milk, vanilla, instant coffee, toasted cashews, and mini chocolate chips.
Yes, you can. That said, it won’t have quite such a punchy flavour.
Absolutely, and this coffee ice cream recipe is proof. The key is in using a hand mixer to create your whipped cream. Then, all you need to do is combine the other ingredients and freeze. I have lots of other ice cream without an ice cream maker recipes that you can browse here.
Mine is — with instant granules at least. I find that the instant stuff dissolves a lot more smoothly than regular coffee, all while keeping its intense coffee flavour. Remember that you can always use decaffeinated if caffeine is a concern.
Did you try this coffee crumble ice cream recipe?
Leaving a rating and comment below the recipe is so helpful!
Hungry for more? Subscribe to the newsletter for free recipes straight to your inbox. Also, follow along on Facebook, Pinterest and Instagram.
Ingredients
- 2 ½ tablespoons instant coffee granules (notes 1)
- 1 tin sweetened condensed milk (395g/14oz)
- 1 teaspoon vanilla extract
- 2 ½ cups thickened cream (heavy cream) (600ml)
- ¾ cup toasted cashew nuts, roughly chopped
- ¾ cup mini chocolate chips (or ½ cup shaved chocolate)
For best results, always weigh ingredients where a weight is provided
Equipment
- Freezer-safe airtight containers (these glass loaf pans are my faves)
Instructions
- If the cashew nuts are not toasted, do this first. Preheat the oven to 180C (160C fan) / 350F. Place the raw cashews onto a baking sheet lined with baking paper. Bake for around 10 minutes until golden brown. Set them aside to cool taking them off the baking sheet so they stop toasting immediately. Roughly chop them.
- Dissolve the coffee granules in 1 tablespoon of boiling water and set aside to cool for 5 minutes.
- In a medium bowl, whisk the coffee, sweetened condensed milk and vanilla together.
- In a large bowl, using a handheld mixer or with a balloon whisk, whip the cream to soft peaks. Don’t overwhip or it will turn grainy.
- Pour the coffee mixture into the whipped cream and gently fold the two together. Be careful not to knock all the air out of the cream.
- Keep aside a small handful of the chocolate chips and chopped cashews. Fold the rest carefully through the ice cream mixture.
- Pour the ice cream into a freezer-safe container with a lid. Level out the top and scatter over the remaining chocolate chips and cashew pieces.
- Cover with a lid or tightly with plastic wrap and freeze for 8 hours or overnight.
- Please take a moment to leave a comment & rating. It's appreciated and so helpful.
Notes
- Tablespoons: I use a standard Australian 20ml tablespoon (equal to 4 teaspoons). Check yours before measuring.
This post may contain affiliate links that earn me a small commission for my referral, at no extra cost to you. Thank you for supporting Sugar Salt Magic.
6 Comments on “Coffee Crumble Ice Cream”
Okay, now *this* is dangerous! I am personally not a fan of hard ice cream mix-ins, so I skipped the cashews and chocolate chips this time around and just did the base coffee ice cream. Wow. So simple and fast, but it’s still better than a lot of store-bought options! Can’t wait to try other flavor combinations!
Love this, Lauren and you’re so right about it being dangerous. The base ice cream mixture (without adding the coffee) is amazing for flavouring however you like. Add a good kick of vanilla for classic vanilla ice cream or try swirling through your favourite jam or caramel or something like a raspberry compote or lemon curd. You can easily scale the recipe too and pour it into smaller ice cream pots before swirling a different flavour through each.
It looks great! Can I use the recipe with an ice cream machine?
Hi Claudia. The genius of no churn recipes is you don’t need the extra equipment and they are made slightly differently with the cream being whipped before being added to the mixture. I’m not sure how this would go in an ice cream machine.
Easy to make and a very tasty recipe. The 8 hours freezing time sucks but it’s really worth the wait. Making this recipe is much less expensive than buying pre-made, hard to find coffee ice-cream.
So happy you love it, Nancy. Thanks so much for dropping back with a review.