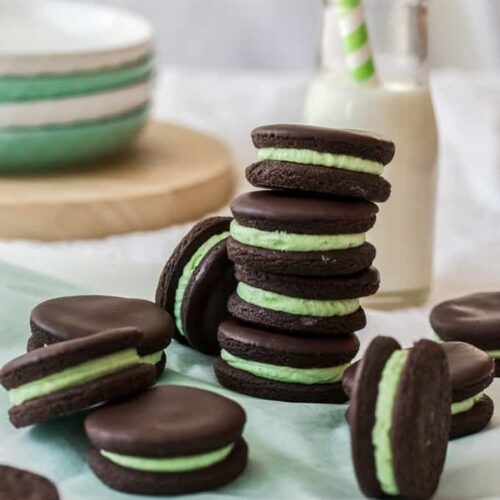

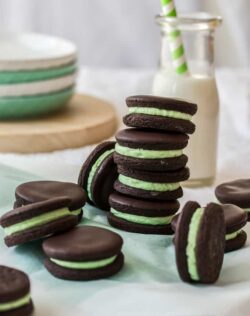
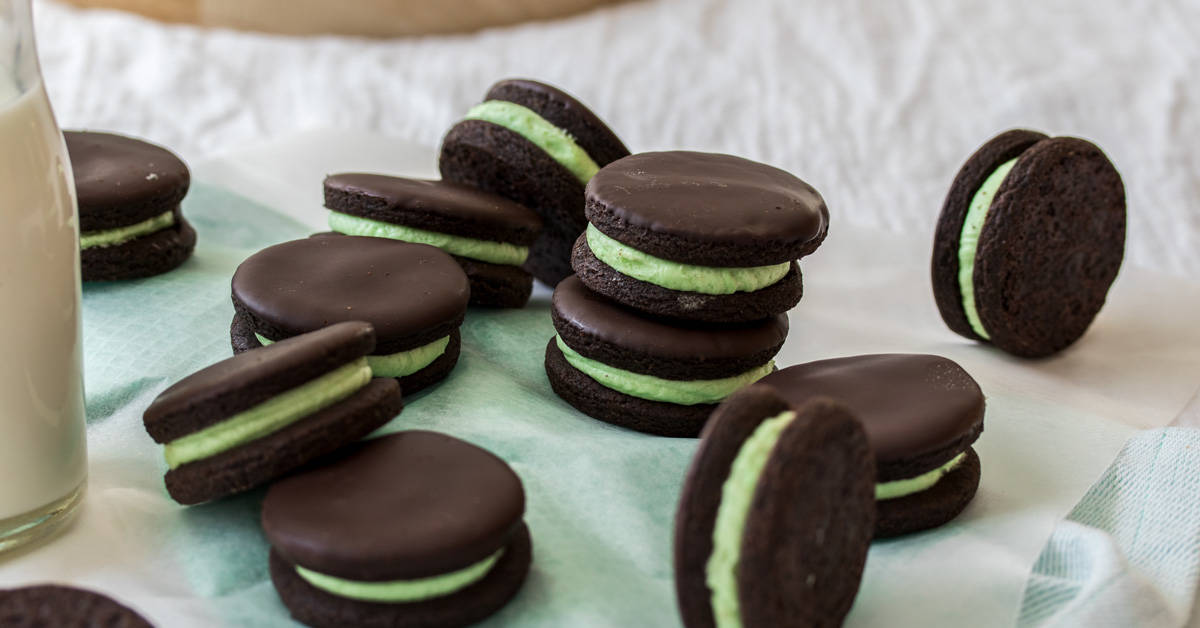
Ok, so I’d had this idea in my head for quite a while and, tadaa! I finally had time to test them out. You may think these Chocolate Peppermint Cookies have a passing resemblance to another very well known chocolate cookie. Yup. I wanted to make my very own homemade Oreo with a peppermint filling and here they are. Homemade Peppermint Oreos, if you will.
You’ll also love these chocolate sugar cookies, just perfect for decorating.

I actually use a version of these cookies on top of my Chocolate Cookies and Cream Cupcakes but with one minor difference. To get this really dark colour, I added the smallest touch of black food colouring. This is certainly not a requirement and obviously does nothing to alter the taste of the cookies but I just really wanted that deep, dark, almost black cookie colour that Oreos are famous for.
What is Dutch Process Cocoa
To get that almost black cookie, Oreos use whats called dutch processed cocoa. It’s also one of my favourites to use. Dutch process cocoa has a lower acidity than natural cocoa which means it has a more mellow flavour. It’s smoother and not quite as bitter. Both cocoas have their place in baking and I use both types but, I definitely use dutch process more than natural. My favourite chocolate cupcake recipe uses the dutched version.
There are different grades of cocoa and, whilst the dutched one I use is darker than natural cocoa, there are darker ones out there. Oreos uses particularly dark cocoa. Dutch process cocoa goes through a process where the cocoa is washed in a solution that reduces its acidity and, as a result, is the less bitter of the two.
Can I use regular unsweetened cocoa?
The two different cocoas require different leavening agents to work. For instance, if you’re making a cake with natural or regular unsweetened cocoa, you would be relying on baking soda (bicarbonate) as the leavening agent. However, dutch processed cocoa requires baking powder for leavening. This means that the two cocoas are not interchangeable in every recipe. As a general rule, I suggest it’s always best to stick to what the recipe uses but I do try to make a note in my recipes if you can use either.
In this recipe, I use baking soda but as we aren’t after a huge rise in the finished cookie, you are welcome to use either dutch process cocoa or natural cocoa. Yay!
How to make Chocolate Peppermint Cookies
This is a really quick and simple cookie dough recipe which means you get to eat them quicker. Here we go.

- Beat the butter and sugar until light and creamy. I use a stand mixer for this job but you can do it by hand or with a handheld beater.
- Add the dry ingredients and a little black food colouring if you like, then mix it all through.

- Roll out the dough and cut circles out using a circle cookie cutter.

- Bake the cookies for about 10 minutes to achieve a crispy end result.
- Pipe on the filling – a super quick and easy mint buttercream.
Finally, the cookie tops are dipped in a little melted dark chocolate and left to set. This step is totally optional though.
Tips and Tricks for Chocolate Peppermint Cookies
- Mix the dough just until it starts to form large clumps then pull it together with your hands
- I use 1/2 a teaspoon of peppermint extract (please not essence) but add more or less to your taste as you’re mixing up the buttercream. Careful though – it can be potent stuff.
How to keep cookies crisp
When you’re trying to get a crisp cookie, as in this recipe, it can be a little disappointing when those gorgeous crunch-in-the-mouth cookies go soft after a little time. I have a simple fix for that.
- Before adding buttercream: Store the cookies in an airtight container with a small dish of baking soda to keep them crisp. True story. It absorbs any moisture that may be in the air around them, keeping the cookies crisp.
- After adding the buttercream there is more chance the cookies will soften, due to the higher moisture content they have now been introduced to. You won’t be able to stop them softening but you can keep them crisp longer using the baking soda trick too.

Can you freeze Chocolate Peppermint Cookies?
Yes, you can – should you be lucky enough to have any leftover that you don’t think you’ll get to (I can’t believe these words are even coming out of my mouth right now).
Store them in an airtight container so they don’t soak up any freezer smells. You could take the extra step of wrapping them in plastic wrap or a zip lock bag first, then putting them into the container to be on the super-safe side.
You can also freeze the unbaked dough but I’m not sure why you’d need to as it’s so quick to make, it’s best to do it fresh anyway.
Substitutions
- You could make the buttercream red and white, perfect for Christmas, by omitting the green colour and mixing red colour through one half of it. Add the buttercreams to your piping bag, next to each other and pipe as normal.
- Change up the flavour of the buttercream. Add a little dissolved espresso powder or maybe make a raspberry buttercream like in these Melting Moments.
Click here to Pin this recipe for later!

I’m gonna put this out there. You need to make these Chocolate Peppermint Cookies now. So simple and delicious, you could even get the kids involved in this easy cookie recipe. And at just two bites, they make a great little afternoon treat.
More Cookies you’ll love
- Nutella Chocolate Sandwich Cookies
- Chocolate Pistachio Cookies
- Chocolate Candy Cane Cookies
- Homemade Oreo Cookies
- Birthday Cake Cookies
Ingredients
FOR THE COOKIES.
- 130 g (1 cup / 4.6oz) plain (all-purp) flour
- 35 g (1/4 cup / 1.2oz) corn flour (cornstarch)
- 1/3 cup (35g / 1.2oz) dutch processed cocoa
- 1/2 teaspoon baking soda (bicarb)
- 135 g (2/3 cup / 4.8oz) granulated sugar
- 95 g (3.4oz) unsalted butter, softened (notes)
- 1 tablespoon milk (notes)
- 1-2 drops black gel food colouring (optional)
FOR THE QUICK PEPPERMINT BUTTERCREAM
- 113 g (1/2 cup / 1 stick) unsalted butter, softened
- 1 1/2 cups (195g / 6.9oz) icing (powdered / confectioners) sugar
- 1/2 teaspoon peppermint extract (or to taste)
- 1-2 drops green gel food colouring (optional)
- 80 g dark (70%) chocolate for topping
For best results, always weigh ingredients where a weight is provided
Instructions
FOR THE COOKIES
- Preheat oven to 180C / 350F /160C fan forced. Line 2 large baking trays with baking paper.
- Sift together the flour, cornflour, cocoa and baking soda and whisk to thoroughly combine.
- In a separate bowl, beat together the butter and sugar until lightened and fluffy.
- Scrape down the sides of the bowl and add half the flour mix. Beat until just combined. Add the milk and food colouring (if using), and remainder of the flour. Mix until it starts to clump.
- Pull the dough together with your hands. Dust a sheet of baking paper lightly with cocoa, then the top of the dough. Roll the dough out to about 3-4mm thick and use a circle cookie cutter to cut out small circles (3-4cm or not quite 2 inches round). Re-roll as necessary.
- Sit on baking trays an inch apart. Bake for around 10 minutes, turning the trays halfway through.
- Allow the cookies to cool on the trays for a few minutes before using a spatula to help to transfer them to a wire cooling rack. Once cool, they will firm up and be crispy all the way through (notes).
- FOR THE QUICK PEPPERMINT BUTTERCREAM
- Add the butter, icing sugar, milk, peppermint extract and colouring (if using) to a bowl and beat with a handheld mixer (or in a stand mixer) until pale and creamy. Scrape down the sides of the bowl as necessary.
- Spread or pipe some buttercream onto the flat side of half of the cooled cookies, then top with another cookie.
- Melt the chocolate in 30 second intervals in the microwave stirring well between each until JUST melted (this should take no longer than 2 minutes). Dip the tops of each cookie into the chocolate, turn them back upright and let them set before serving.
Notes
- I use a standard Australian 20ml tablespoon (= 4 teaspoons worldwide)
- For best results, you should always weigh ingredients like flour and sugar. Kitchen scales are relatively cheap but if you can’t weigh the ingredients, use the spoon and level method (don’t scoop).
- I use corn starch a lot in my baking. Cake flour is a combination of all-purpose and cornstarch but in Australia is not so readily available. I use this combo in my recipes a lot instead of using cake flour.
- To keep the individual cookies crispy, store them in an airtight container along with a small bowl filled with a couple of tablespoons of baking soda (bicarb). Store them in the fridge and bring to room temp before serving.
- If you don't have scales, the butter in this recipe is equal to 1 stick less 4 teaspoons.
TOOLS USED IN THIS RECIPE
- Basic cookie trays
- A stand mixer or handheld beater is helpful but not absolutely necessary
- I love this circle cookie cutter set
WANT MORE COOKIE RECIPES? CLICK HERE
This post may contain affiliate links that earn me a small commission for my referral, at no extra cost to you. Thank you for supporting Sugar Salt Magic.


6 Comments on “Chocolate Peppermint Cookies”
Hi Marie
Am looking forward to trying your cookies, biscuits, biccies, goodies, oreos or whatever !
Call them whatever you like……I just want to eat them……oh yum!
Thank you so much, Pamela. Virtual hug coming at ya 🙂
Hey Marie!!! I absolutely love these delicious cookies!! They look fantastic and the color of the filling is super stunning!! Amazing job! Your pictures and your whole entire work is just inspiring to me and so many other bakers!!! Keep it up!!
Oh wow thank you so much for the incredibly kind words Camila ?