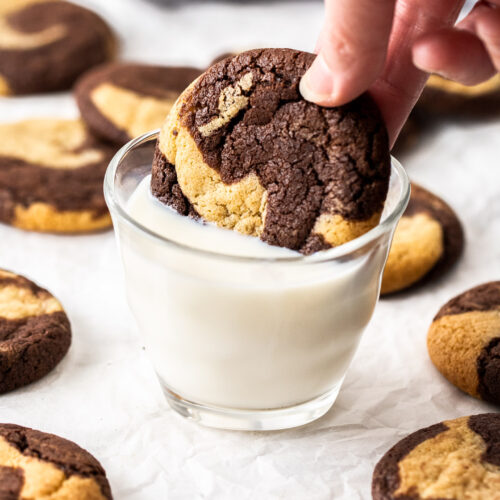

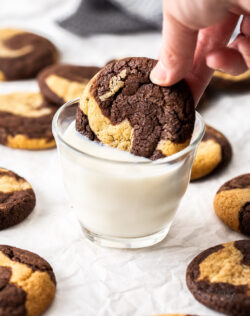
Can’t choose between chocolate cookies or vanilla cookies? Then make these marble cookies – a delicious combination of both.
- So fun and easy to make.
- The texture is deliciously soft, fudgy and chewy.
- Everyday, simple ingredients.
- No fancy equipment needed!
- No chilling time!
These marbled cookies are the perfect marriage of two delicious cookie worlds. You’ll love these chocolate vanilla cookies with an almost brownie like chocolate side and all round perfectly, decadent and delicious cookie.
And if you’re looking for some cookies to gift, look no further than these. Everyone will love them and just look how beautiful they look all stacked up!
If you love this, you’ll love these double chocolate fudge cookies.

Never Miss a Recipe!
Get the latest recipes straight to your inbox!
Ingredients you’ll need
A combination of white sugar and brown sugar in these marbled cookies gives them a delightfully crisp edge while still maintaining the perfect soft and chewy centre. Then the dutch cocoa powder gives them a luxuriously rich chocolate flavour.

Detailed quantities and instructions in the recipe card below.
- Butter: I stick to unsalted butter here and add a little hit of salt too. You can use salted butter though I recommend against it due to them all having varying degrees of salt. If you do though, just leave out the extra salt.
- Flour: Just regular plain flour / all-purpose flour is all you need.
- Baking soda: Baking soda (also known as bicarbonate of soda) does a number of things to these cookies. It helps them spread, adds to the browning (and hence flavour) and adds a crisp edge. Make sure it’s fresh and hasn’t been sitting in your pantry for a year. Don’t confuse this with baking powder.
- Sugar: Light brown sugar helps keep these cookies lusciously chewy, while a little white helps with that crisp edge. You can also use dark brown sugar if you like.
- Egg: I use large free-range eggs in all my baking. Make sure they’re at room temperature before beginning. You can do that quickly if you need by placing them into a bowl of warm water for 10 minutes.
- Vanilla extract: Please use pure vanilla extract for the best natural flavour. Vanilla essence is a synthetic product.
- Dutch process cocoa powder: Dutch-processed cocoa powder has a wonderful rich cocoa flavour and is less bitter than regular unsweetened cocoa powder. It also gives a lovely dark colour.
You could also add some mini dark / semi-sweet chocolate chips for some chocolate gooeyness inside or fold in some mini marshmallows.
How to make marble cookies (step-by-step)
Not even 30 minutes stand between you and these fudgy, chewy chocolate vanilla cookies.
Detailed quantities and instructions in the recipe card below.

Making the cookie dough
- The plain dough: The cookie dough itself is fairly simple. In a mixing bowl, you’ll stir together melted butter, sugar, egg and vanilla (photo 1), then flour and baking soda (photo 2). No special equipment! No creaming butter and sugar. It’s so easy.
- Split the dough: Now split that cookie dough into two equal portions (equal is important). Add a little more flour to one – this will be your vanilla cookie dough – and cocoa powder to the other, to make your chocolate cookie dough (photo 3).

Shaping the cookies
Here’s where things get really fun. Take a tablespoon sizes scoop of each dough (I find a cookie scoop just makes this process so quick). Press one on top of the other into a disk shape (photo 4). Split the disk in two (photo 5), then flip one side over so you’ll almost have a yin and yang symbol (photo 6). Press them back together then roll between the palms of your hands into a ball (photo 7). That’s it!
Bake the cookies
Sit the cookies about 2 inches apart (they spread a lot) on a baking sheet and bake for 11 minutes.
The cookies will still be soft when they come out of the oven and you can take a moment if needed to swirl a large cookie cutter around each one to make them perfectly round. Then just let them cool on the trays for 10 minutes before transferring to a cooling rack.

Tips and tricks
- Make sure to use dutch process cocoa – it will give you the most beautiful rich chocolate flavour and lovely colour
- Make sure to evenly divide the dough in half before adding the extra flour and cocoa. If you don’t you may find that one part of your cookie turns out dry while the other is too soft. You can eyeball it but you could also weigh the dough, and then split it in half that way.
- Weigh ingredients: Please use a kitchen scale to weigh ingredients like flour and cocoa. The different ways you can fill a cup measure results in very different quantities and just a little too much of either will give you dry cookies.
- All ovens vary and many thermostats are out of whack so I always recommend keeping an oven thermometer in your oven at all times so you can keep an eye on it. I find 11 minutes is perfect for my cookies.
- Use a cookie scoop for evenly portioned cookies and so you don’t run out of one dough before the other.
- The dough is a little tacky but that’s perfect. Don’t be tempted to add more flour or cocoa.
Another tip: I recommend making a second batch because these marble cookies will disappear quickly. You can even freeze some balls of dough for another time.
Yield and storage
This recipe makes 14 marble cookies (or kind of 13 plus a slightly smaller one with all the leftover bits of dough).
These cookies can be frozen before or after baking for up to 3 months in an airtight container.
The dough can be made a day ahead and wrapped in plastic wrap in the fridge overnight. Or you can freeze the dough like this or formed into cookie dough balls. If you freeze some balls of dough, you can bake them straight from the freezer, while still frozen, whenever a craving hits. Just add an extra 2 minutes to the baking time.

Did you try this chocolate marble cookies recipe?
Leaving a rating and comment below the recipe is so helpful!
Hungry for more? Subscribe to the newsletter for free recipes straight to your inbox. Also, follow along on Facebook, Pinterest and Instagram.
Video
Ingredients
- 165 g plain flour (all purp flour) (1 ¼ cups / 5.8oz)
- ¾ teaspoon baking soda (bicarb soda)
- ½ teaspoon salt
- 113 g unsalted butter, melted and cooled slightly (1 stick / ½ cup / 4oz)
- ⅔ cup light brown sugar (135g / 4.8oz)
- ¼ cup white granulated sugar (50g / 1.8oz)
- 1 large egg, room temp
- 1 teaspoon vanilla extract
- 33 g plain flour, extra (¼ cup / 1.2oz)
- 25 g dutch processed cocoa powder (¼ cup / 0.9oz
For best results, always weigh ingredients where a weight is provided
Equipment
- Balloon whisk and spatula or wooden spoon
- Cookie scoop (1 tablespoon)
- Baking sheets.
Instructions
- Preheat oven to 180C / 350F /160C fan forced. Line 2 large baking sheets with baking paper.
- In a medium bowl, whisk together the flour, baking soda and salt. Set aside.
- In a large bowl, add the sugars to the melted butter and whisk until well combined.
- Add the egg and vanilla and whisk until smooth.
- Add the flour mixture and stir together with a spatula until just combined.
- Transfer half of the dough to a separate mixing bowl – be as accurate as possible – you can even weigh the dough out to be precise.
- To one of the bowls add the extra plain flour and mix in until combined. Add the cocoa to the other bowl and mix in until combined. Now you have a bowl of vanilla dough and a bowl of chocolate dough. Let them both rest 10 minutes.
- Use a 1 tablespoon sized scoop to take 1 scoop of each cookie dough. Put one on top of the other and press them into a thick disk. Break the disk in half and flip one of the sides over (so it looks almost like yin and yang). Now press them back together at the tear and roll them together into a ball.
- Space the cookies about 2 inches apart on the cookie sheets.
- Bake one tray at a time on the middle rack, for around 11 minutes. As soon as you take the trays out of the oven, you can use a larger round cookie cutter and swirl it around the cookie to make them more round if you like.
- Allow them to cool on the trays for 10 minutes before using a spatula to help to transfer them to a wire rack. Once cool, they will firm up and be crispy on the edges, while being soft, chewy and fudgy in the middle
- Please take a moment to leave a comment & rating. It's appreciated and so helpful.
Notes
- All ovens vary – check your cookies at 10 minutes – they should look dry and ‘set’ but will still be very soft.
- For best results you should always weigh ingredients like flour and sugar. Kitchen scales are relatively cheap but if you can’t weigh the ingredients, use the spoon and level method (don’t scoop).
- You are welcome to use a stand mixer with paddle attachment, if you prefer. Make sure to scrape the sides of the bowl regularly.
This post may contain affiliate links that earn me a small commission for my referral, at no extra cost to you. Thank you for supporting Sugar Salt Magic.
13 Comments on “Marble Cookies”
Made this recipe with my two year old they turned out delicious! I also refrigerated the dough overnight before baking.
That’s so nice to hear, Heather Jane. So happy you love them.
I’ve made this twice
I just made two logs and swirled them together
Great tip, Jb. Thanks so much.
Great fun, classy marble cookies.
So happy you love them, Sam. Thanks for making my recipe 🙂
Thank you so much for this recipe, my kids love these cookies. I can’t wait to try other recipes from your site!
This makes my heart happy. So glad you love them. Thansk Isabelle
These were easy to make and went very quickly. I cooked them for a couple of minutes longer and they turned out great. Thanks Marie
So happy you love them, Kim.
These look so fun! Can’t wait to try them. Thanks for your great recipes Marie. I love your site.
Your support truly means so much to me, Barbara. I’m so happy you’re enjoying my recipes 🙂
Amazing recipe 😁