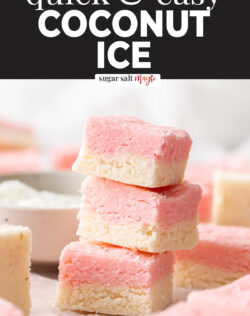
Coconut lovers, this one’s for you. Homemade coconut ice is such a nostalgic treat. With just 5 basic ingredients, it’s a no bake slice that’s sweet and coconutty and only takes 10 minutes to make! One bite and you’ll be hooked.
- 5 ingredients.
- No bake, no cooking.
- Sweet, rich and so delicious.
- Perfect for gifting.
- Keeps well and can be frozen.
This is the time of year I break out all my favourite candy recipes. From fudge to marshmallows, I love making sweets and candy. These coconut ice slice is British in origin but here in Australia and in New Zealand and South Africa, it’s a big favourite.
If you love this you’ll love this peppermint coconut fudge and these coconut balls.

Never Miss a Recipe!
Get the latest recipes straight to your inbox!
Ingredients you’ll need

Detailed quantities and instructions in the recipe card below.
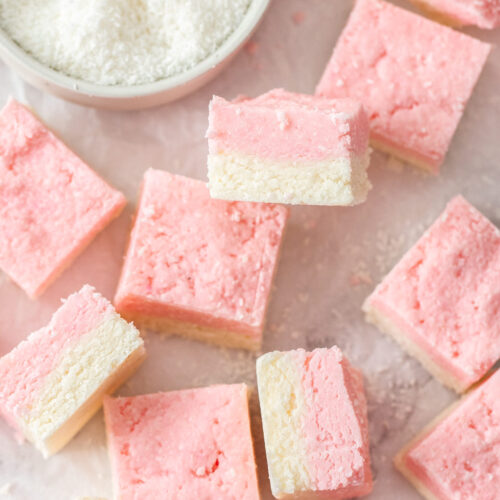
Coconut ice is a combination of 4 main ingredients – desiccated coconut, sugar, sweetened condensed milk and pink food colouring. I add vanilla extract because I just love it.
Make sure to use fine desiccated coconut as the more coarsely grated coconut won’t hold together so well in this slice.
You’ll want to use icing sugar (aka powdered sugar or confectioners sugar). This along with the sweetened condensed milk is what helps it hold together.
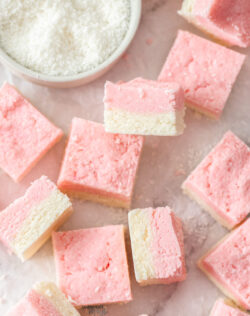
Finally, there is always two layers – a pink layer and a white layer. The pink one is achieved with a little pink food colouring.
Variations
Variations to coconut ice aren’t common but there’s no reason you can’t change it up. For instance, I created some gorgeous colourful coconut ice using packets of jelly crystals to colour and flavour it. Definitely a favourite. Also, this cherry ripe slice is essentially a cherry flavoured coconut ice.
How to make coconut ice (step-by-step)

Detailed quantities and instructions in the recipe card below.
- Mix it: Just combine all the ingredients, except the colour in a mixing bowl.
- Colour it: Transfer half the mix to a separate bowl and mix through the colouring.
- Shape it: Press the white mixture into a baking tin, then press the pink over the top.
- Chill: Now just chill for 2-3 hours until firm and cut into pieces.
My recipe, shown here, is the easy recipe which is most common these days. It’s quick, easy and there is no cooking involved meaning even the kids can have a go. The traditional method involves bringing sugar and milk to a boil in a pan for 5-7 minutes before adding the coconut and cooking a little longer. It becomes a very hot sticky mixture and tends to set firmer than the easy method.

Tips and tricks
- Weigh the icing sugar or spoon and level: For best results, I suggest weighing the icing sugar so you get the exact right amount. If you don’t have kitchen scales, spoon it into your cup measure then level it off with the back of a knife. That will get you closest to the right amount.
- Wear gloves: Coconut ice is a very sticky mixture and you will need to use your hands to easily bring it together so, if you don’t want sticky hands, just use some food-safe gloves.
- Don’t reduce the sugar: This is a sweet treat and it’s meant to be sweet, but moreover, the combination of sugar and condensed milk is part of the reason it sets firm enough to slice so don’t reduce it.
Yield and storage
This recipe makes enough for 25 pieces (though you can certainly cut them smaller). The recipe is scalable though it will likely get hard to handle so it’s probably easiest to make one batch at a time
Coconut ice squares keep very well. Store them in a cool place, like the pantry, and even in the fridge for up to 4 weeks, in an airtight container. It can also be frozen for up to 3 months. Let it thaw in the fridge overnight.

More recipes you’ll love
Did you try this easy coconut ice recipe?
Leaving a rating and comment below the recipe is so helpful!
Hungry for more? Subscribe to the newsletter for free recipes straight to your inbox. Also, follow along on Facebook, Pinterest and Instagram.
Ingredients
- 390 g icing sugar, sifted (3 cups / 13.8oz)
- 320 g fine desiccated coconut (4 cups / 11.3oz)
- 395 g can sweetened condensed milk (14oz)
- 2 teaspoons vanilla extract
- Pink or red food colouring
For best results, always weigh ingredients where a weight is provided
Equipment
- large mixing bowl & medium mixing bowl
- wooden spoon or spatula
- food safe gloves, optional
- 20cm / 8 inch square baking pan
Instructions
- Combine the sugar, condensed milk, coconut and vanilla in a large mixing bowl. Stir well to combine. Mix with a spoon, then you may need to use your hands. Use gloves if you don’t want your hands to get sticky.
- Transfer half the mixture to a second bowl and add just a drop of food colouring. Knead to distribute it through the mix (I use food safe gloves for this part).
- Line an 20cm/8 inch square baking tin with baking paper.
- Just lightly wet your hand and press the white mixture firmly into the bottom of the tin.
- Break the pink mixture into pieces over the white and again press down all over.
- Place in the fridge to set for 3 hours.
- Use a sharp knife to slice the coconut ice into 25 squares.
- Please take a moment to leave a comment & rating. It's appreciated and so helpful.
Notes
- Storage: Store in the fridge or at room temperature for up to 4 weeks in an airtight container. It can also be frozen for up to 3 months.
- Gifting: Coconut ice makes a perfect gift, especially at Christmas. Wrap a few pieces up in cellophane and tie it up with a pretty ribbon and everyone will be delighted.
This post may contain affiliate links that earn me a small commission for my referral, at no extra cost to you. Thank you for supporting Sugar Salt Magic.
2 Comments on “Coconut Ice”
This is delicious! We make a similar version at home in East Africa but with heating the milk as you mentioned. I’m definitely trying this easy no cook version to save time. I love everything coconut! Thank you so much for all your wonderful yummy recipes! And I love the pictures with every recipe, so beautiful 🙂
So interesting! Thanks so much for sharing Aasha. Enjoy 🙂