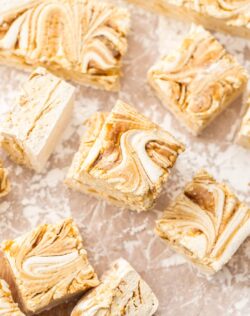
Soft, fluffy, pillowy caramel marshmallows. With caramel mixed right in and a ripples right through, you’ll love these fun candies. Sweet and a little salty if you want it, homemade truly are the best marshmallows.
Video
Ingredients
- 1 ½ cups water (375ml)
- 6 teaspoons powdered gelatine
- 466 g caster (superfine) sugar (or granulated) (2 ⅓ cups)
- 4 teaspoons liquid glucose (or light corn syrup)
- 1 teaspoon vanilla extract
- ¾ cup caramel sauce, room temp (notes)
- ¼ cup icing sugar (powdered sugar)
- ¼ cup cornflour
For best results, always weigh ingredients where a weight is provided
Equipment
- Candy thermometer or digital meat thermometer
- Stainless steel, heavy-based saucepan
- Stand mixer with whisk attachment
- 9 inch square baking tin
Instructions
- If using homemade caramel, make that first. Chill in the fridge while you make the marshmallows and it should be room temperature by the time you need it.
- Grease a 9 inch square baking tin (or similar) with butter and set aside.
- Pour ½ cup of water into the bowl of a stand mixer fitted with a whisk attachment, then sprinkle the gelatine over the top and leave it to soften.
- Place the remaining water, sugar and glucose into a stainless steel (preferably heavy based) medium saucepan. Give it a little stir to start the sugar dissolving. Sit a candy thermometer into the pan and place it over medium-high heat until the mixture starts to boil.
- Once it reaches 130C / 260F on the thermometer (after 10-15 minutes), take it off the heat. Let the bubble start to subside.
- With the mixer running on low, slowly pour in the sugar syrup into the gelatine mixture, until combined.
- Turn the mixer up to high and beat for 10-12 minutes until white and tripled in volume. It’s done when you can see strings of marshmallow pulling away from the side. See the images in the post for the texture.
- If the caramel is still cold, warm ½ cup in the microwave for 15 seconds.
- Add the vanilla and the ½ cup of caramel to the marshmallow, then beat just enough to combine.
- Scoop / scrape half the marshmallow into the prepared pan, nudging it out to the edges, then use slightly damp (not soaking wet - see notes) hands to gently level it out. It will be beginning to set so work as quickly as you can.
- Drizzle over 1 ½ tablespoons of caramel. Drag a knife through a few times to create a swirl pattern.
- Scrape the remaining marshmallow on top. Spread it out again then drizzle over another 1 ½ tablespoons of caramel and swirl it again with the knife.
- In a small bowl combine the icing sugar and cornflour, then sprinkle a little over the top of the marshmallows reserving the rest in a sealed container for later.
- Allow it to set in a cool place (not the fridge) for at least 8 hours or overnight (better) with a larger pan over the top to keep it sealed. When ready, slice into squares and dust well with the remaining sugar mixture.
- Store in an airtight container in the pantry for up to 1 month.
- Please take a moment to rate this recipe. I helps me to keep creating free recipes and helps other readers too.
Notes
- Make your own caramel sauce using this recipe. The caramel solidifies in the fridge - just use the microwave to warm it slightly before using.
- There will be about ½ cup of my homemade caramel leftover. Excess caramel can be stored in a preserving jar, in the fridge, for up to a month.
- When wetting your hands, make sure to shake them off well so they're just damp. If you add too much moisture, the marshmallow will start to melt.
- You can make these salted caramel marshmallows by simply adding ½ teaspoon of sea salt flakes to the caramel or using a salted caramel to start with.
- I prefer to use butter for greasing as opposed to cooking spray or oil spray as it will stay in place and not bead or run.
- Marshmallows can be frozen too which will prolong their life up to 4 months.
Have you tried this recipe?Don't forget to leave a rating and comment below and let me know how it was! I love hearing from you. Nutrition information is approximate and derived from an online calculator. The brands you use may cause variations.