
Why they’re so good!
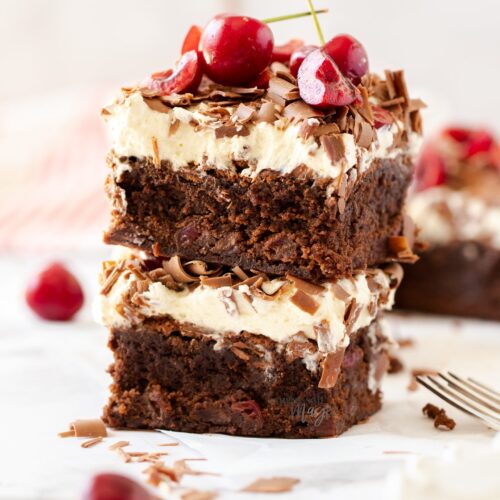
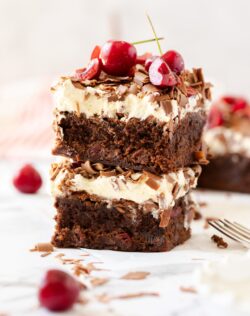
Black forest brownies – fudgy chocolate brownies laced with macerated cherries – are an indulgent combination of luxurious cherries and chocolate. They’re the more decadent cousin of the classic black forest cake.
These are dense yet soft, rich and fudgy – everything a brownie should be. They’re easy to make too (pinky promise) and very portable. Taking humble brownies to a celebratory level, these cherry brownies are great for Christmas or Valentines especially.
I have loads of cherry recipes from this easy baked cheesecake with fresh cherry sauce right through to this puff pastry cherry strudel. Both so good but just type cherry in the search box to see more you’ll love.
This recipe was first published here on September 7th, 2019. It has been updated with better images and step by step photos.

Never Miss a Recipe!
Get the latest recipes straight to your inbox!
Ingredients in black forest brownies
Along with baking regulars like eggs, flour, butter and salt there’s a handful of ingredients in these brownies that give such amazing flavour.

Jump to the recipe for full ingredients and instructions.
Flour: You just need plain flour / all purpose flour.
Cherries: Fresh are best but you can use frozen in a bind. Make sure they are defrosted and drain any excess liquid away.
Chocolate: Use a dark 50%-70% chocolate that has a good flavour. Don’t use compound chocolate but a good quality baking chocolate works great. Choc chips are fine too.
Sugar: White and brown in this recipe. Both for sweetness but a little brown sugar adds moisture and chewiness.
Cocoa powder: I just use regular unsweetened cocoa powder but you can also use dutch-processed cocoa.
Vanilla extract: I always add a little vanilla to chocolate recipes as it actually accentuates the chocolate flavour.
Feel free to add some chocolate chips to make them extra indulgent. Any will work from white chocolate chips right through to dark chocolate chips. Or for extra luxury and gooeyness, use some big chocolate chunks.
Handy tools to have
While you really don’t need much more than a hand whisk and a couple of bowls;
- 8 inch square baking pan: to bake them in
- Handheld beater: makes them even quicker.
- Large mixing bowl
- Cherry pitter: not absolutely necessary but it does make pitting cherries much quicker
- Speed peeler or vegetable peeler: perfect for creating shaved chocolate and small chocolate curls.
How to make black forest brownies – step by step
Macerated fresh cherries mixed through a thick chocolate brownie batter and a layer of whipped cream – here we go.
Jump to the recipe for full ingredients and instructions.
1. Macerate the cherries
Pit the cherries, if they aren’t already – see my tips below – then chop them into quarters and sprinkle over some sugar. Just set them aside to macerate while you make the black forest brownie batter. They’ll soften and create their own syrup.

2. Melt butter and chocolate
Melt together butter and chocolate in a bowl. You can use the microwave or a bowl over boiling water. If using the microwave, zap it in 30 second increments stirring really well between each. If using the double-boiler method, make sure the bowl isn’t touching the water.

3. Beat the eggs and sugar
Beat the eggs and sugar until really pale and fluffy looking.

4. Add the chocolate and butter
Add the melted chocolate and butter mixture and beat that in.

5. Add the dry ingredients
Sift in the flour, cocoa powder and salt to remove any lumps then mix it in with a spatula.

6. Add the cherries
Now, add those gorgeous ruby-looking macerated cherries and gently mix them through the brownie batter.

7. Bake
Pour the cherry brownie batter into a lined baking pan and bake.

8. Add the topping
Once the brownies have cooled whip up some thickened cream (aka heavy or whipping cream) and spread that over, then dot with more cherries and shaved chocolate. Done!
Tips and Tricks
- Pitting cherries: If you don’t have a cherry pitter (which admittedly makes the process much easier), place the cherry on a board, sit the blade of a sharp knife on top, then with two fingers holding it from the top, roll it so the knife cuts straight around the centre. Pull the two halves apart and pull out the pit with your fingers.
- The eggs and sugar: I beat these for a good 1-2 minutes until pale. It’s not absolutely necessary for the brownies to work but gives an amazing almost meringue-like crust on top. You can just beat for 30 seconds though and they’ll work out fine.
- Baking time: This will depend on your oven and your brownie texture preference. A toothpick inserted should come out looking sticky but not wet or unbaked. Brownies will continue to bake purely from their own internal heat after they’ve been removed from the oven, so leaving them longer than this will give you dry brownies.
- Shaving the chocolate: I use a regular speed peeler or vegetable peeler to make the shaved chocolate and chocolate curls on top. Use room temperature chocolate, and run the blade along the thin edge of the chocolate.
- Swap the cream for ice cream: If you want to make a super decadent dessert from these black forest brownies, skip the whipped cream and instead, serve them slightly warmed with a scoop of vanilla ice cream before topping with the shaved chocolate and cherries.

Storage and serving
Black forest brownies are lovely served at room temperature so take them out of the fridge at least 30-40 minutes before you want to serve them. If it’s very hot where they are, don’t leave them out too long as the freshly whipped cream may suffer.
Any leftovers (lucky you) will keep for 3-4 days in the fridge in an airtight container.
The brownies can be made ahead a day or two then top with whipped cream closer to serving time.
Go ahead and spoil your family with these gorgeous cherry brownies. They’re a wonderfully easy, make ahead dessert that still look like a total celebration.

⭐⭐⭐⭐⭐
Did you try this black forest brownies recipe? Show it some love in the comments below.
Hungry for more? Subscribe to the newsletter for free recipes straight to your inbox. Also, follow along on Facebook, Pinterest and Instagram.
Ingredients
FOR THE CHERRIES
- 2 ½ cups fresh cherries (or frozen) (310g / 11oz with pits OR 270g / 9.5oz pitted)
- 1 tablespoon white sugar (notes)
FOR THE BROWNIES
- 100 g dark chocolate (70% cocoa solids) (3.5oz)
- 113 g unsalted butter (1 stick / ½ cup)
- 3 large eggs, room temp
- 1 cup white granulated sugar (200g / 7oz)
- ¼ cup dark brown sugar, packed (50g / 1.8oz)
- 1 ½ teaspoon vanilla extract
- 130 g plain flour (all purp flour) (1 cup / 5.6oz)
- 25 g cocoa powder (0.9oz / ¼ cup)
- ¼ teaspoon salt
FOR THE TOPPING
- ¾ cup whipping cream (heavy whipping cream) (250ml)
- 100 g milk chocolate, shaved (3.5oz) (notes)
For best results, always weigh ingredients where a weight is provided
Instructions
- Preheat the oven to 180C / 350F / 160C fan forced. Grease and line an 8×8 inch square baking tin with baking paper.
- Pit the cherries and chop into quarters. Set aside ½ cup for the topping. Add the rest to a bowl with 1 tablespoon of white sugar. Set aside to macerate for 10 minutes.
- Place the butter and chocolate in a heat proof bowl and microwave for 30 seconds at a time, stirring between each until melted and smooth. Set aside.
- Place the eggs and both of the remaining sugars in a large bowl. Whisk with a handheld mixer for around 2 minutes until light and fluffy (or in a stand mixer with paddle attachment for 3-5 minutes)
- Add the melted butter and chocolate mixture, along with the vanilla, and stir through with a spatula.
- Sift over the plain flour, cocoa and salt and stir through with a spatula until just combined.
- Use a fork to lightly mash the macerated cherries, then stir them through the brownie batter.
- Pour the mixture into the prepared tin and bake for around 40-45 minutes or until a toothpick comes out with some sticky crumbs on it (see notes).
- Let them cool completely before proceeding. You can speed this up by putting chilling them in the fridge.
- Whip the cream in a bowl until soft peaks, then spread over the top. Dot with remaining cherries then scatter with chocolate shavings.
- Please take a moment to leave a comment & rating. It's appreciated and so helpful.
Notes
- Tablespoons: I use a standard Australian 20ml tablespoon (equal to 4 teaspoons). Check yours before measuring.
- For best results, you should always weigh ingredients like flour and sugar. Kitchen scales are relatively cheap but if you can’t weigh the ingredients, use the spoon and level method (don’t scoop).
- To shave the chocolate, make sure it is at room temperature then run a speed peeler or vegetable peeler along the edge, over and over to create small curls and shavings.
- Brownies are done when a toothpick comes out with a few sticky crumbs on it. They will carry-over bake in the tin.
- Nutrition details are approximate only – scroll below the recipe to find the full nutritional information.
This post may contain affiliate links that earn me a small commission for my referral, at no extra cost to you. Thank you for supporting Sugar Salt Magic.
17 Comments on “Black Forest Brownies”
Could you use gluten free flour in this recipe
Hello Angela. I’m sorry, I haven’t tested it with gluten free flour. I have found different GF flours to vary greatly in their results so if you have one you already know works in other recipes then definitely stick to that brand.
Made this for a birthday celebration recently….oh man, THE best brownies I’ve ever had! My husband, who is not a huge fan of sweets, said it’s the best dessert I’ve ever made (and I’ve made loads!). Our guests were blown away by how beautiful and tasty it is. We’ll be making this a lot in the future, thanks!
Wow! Big praise indeed. I’m so happy you all love them Anna.
Made these for an afternoon tea. Very moist and turned out great. Thanks for sharing
So happy you loved them, Kim. Thanks for trying my recipe
I have made these brownies twice now and they are delicious, I love them.
Thank you, Hannah. I’m so so happy you love them 🙂
These brownies looking amazing! I have to wait until cherries are back in season, such a great play on black forest cake. Love it!
Thanks Trang
I want to make these ahead. How long can they keep in fridge please?
They have fruit in them so I wouldn’t make them too far ahead but a day or two should be fine and keep them in the fridge.
My husband requested Black Forest Cake for his birthday and even though I’m not a baker, I decided I’d give it it a shot since it’s his 40th and we’re in quarantine. I was nervous about making a traditional cake, but I thought I could maybe pull off a brownie and I did! He loved it and so did the kids!
So happy you loved it Jen. Now you are a baker 🙂
I made this recipe for my birthday and it was a huge hit. I admittedly cut the butter to one stick, however the results were still heavenly. I’m so glad I discovered your site.
Thats wonderful to hear Chrystyna. So glad you enjoyed them 🙂
Ha! Absolutely. I have no idea how actual cake shops manage to transport cakes safely 🙂 Experience, I guess.