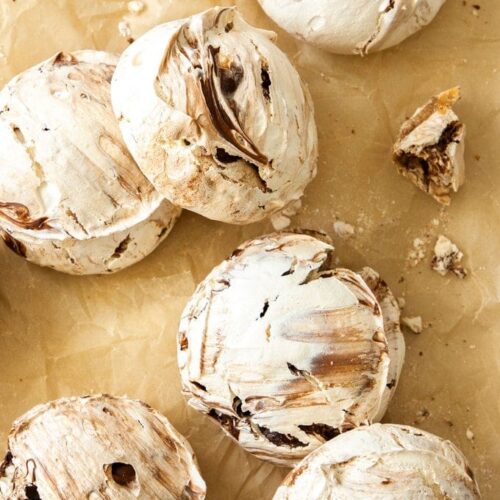
If you’ve had a meringue before, you know how crispy and crunchy they are and how they totally melt away on your tongue. If you’ve never made them before you may not know how easy this swirled chocolate meringues recipe truly is.
You can also see this recipe turned into a gorgeous Chocolate Pavlova or make them into mini pavs like this Mini Pavlova Grazing Board.
Meringue, whether it be in the form of pavlova, meringue pie or on it’s own, just like these chocolate meringues, is my favourite of all sweet treats. As a kid, I could barely walk past a bakery without buying one of those crunchy little clouds, covered in sprinkles.
Since I learnt to make them from scratch, there’s been no looking back. Now, not just reserved to one of my favourite treats, they are also one of my favourite things to make. Meringues take minimal effort but reward in so many ways – flavour, texture, portability and they’re even perfect for gifting … I could go on.
It’s fitting that my favourite place in the world has inspired my favourite treat – Venice. These swirled chocolate meringues are my absolute faves, inspired by those I saw in ‘pasticceria’ windows while we wandered around Venice many years ago on our honeymoon.
I’ve made them countless times ever since, and they never disappoint.
What is it?
So what exactly is meringue? It’s a mixture of egg whites and sugar whipped to thick clouds and then baked. Once baked, they’re crispy and very light and just melt on your tongue. This amazingly simple recipe can be used in so many ways. A pavlova is meringue, just like meringue kisses. Marshmallow even uses a meringue base.
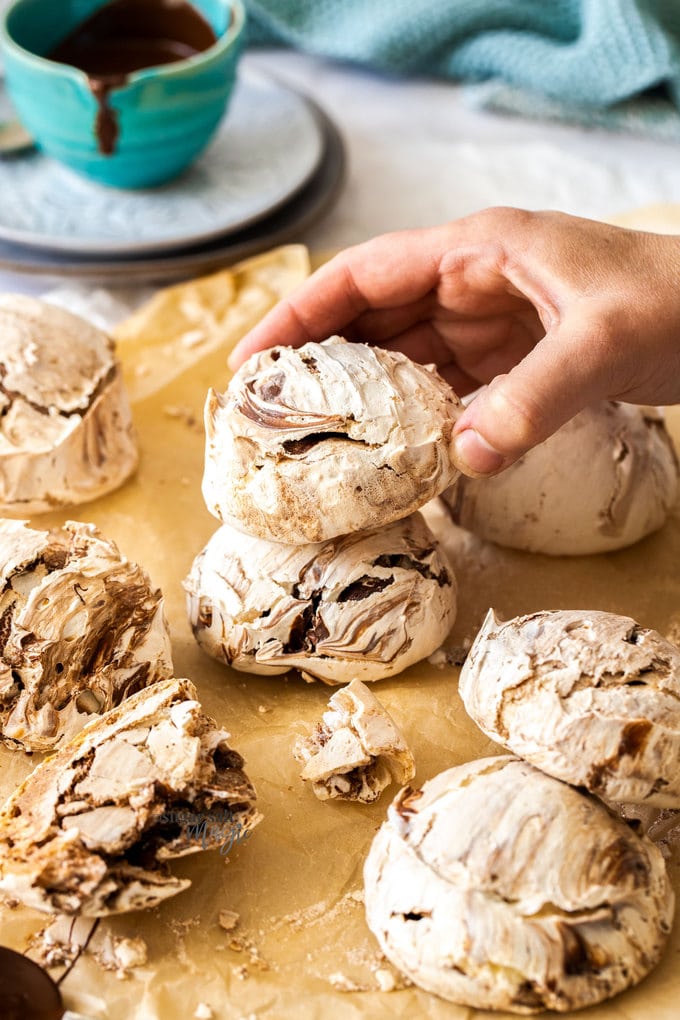
These chocolate meringues are crisp and light. They don’t have the thick, soft centre of pavlova, though you can bake them to taste. I like mine with just a touch of chewy centre but if you want them crisp all the way through, you just cook them longer.
What you’ll need
You need only 4 ingredients to create these ethereal treats. Just like the surreal, fairy tale world that is Venice, meringues are totally magical.
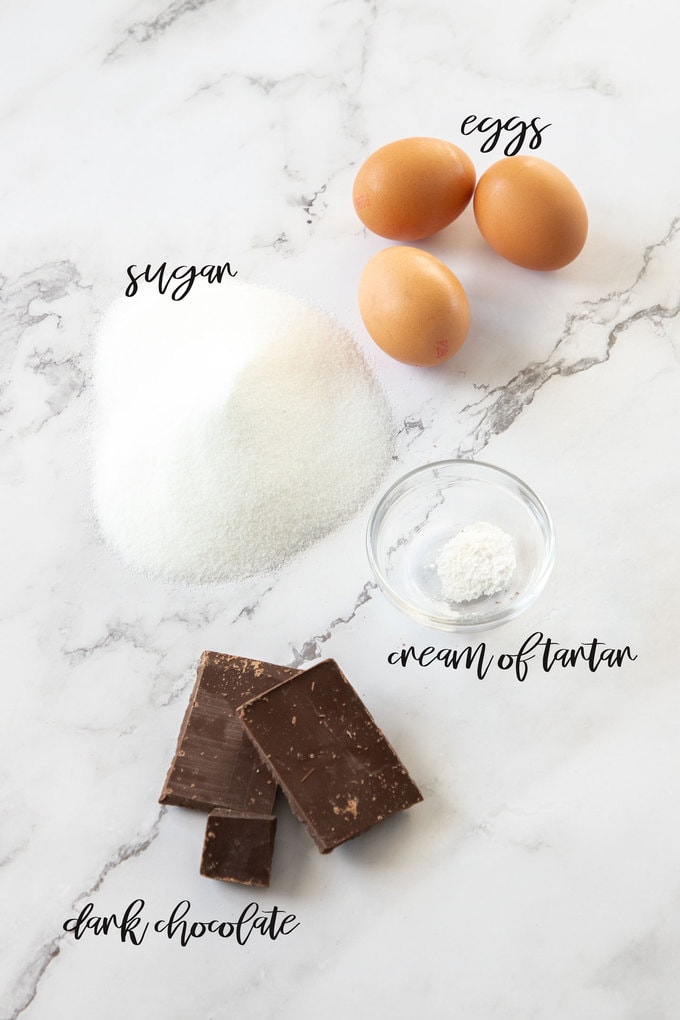
- Egg whites: no yolks – save those for custard or pastry cream.
- Sugar: just white sugar and I prefer caster (superfine) as it dissolves into the egg whites more easily.
- Cream of tartar: you may not have heard of it, but this helps to stablise the egg whites and help get those firm peaks. You can swap it for lemon juice if you prefer.
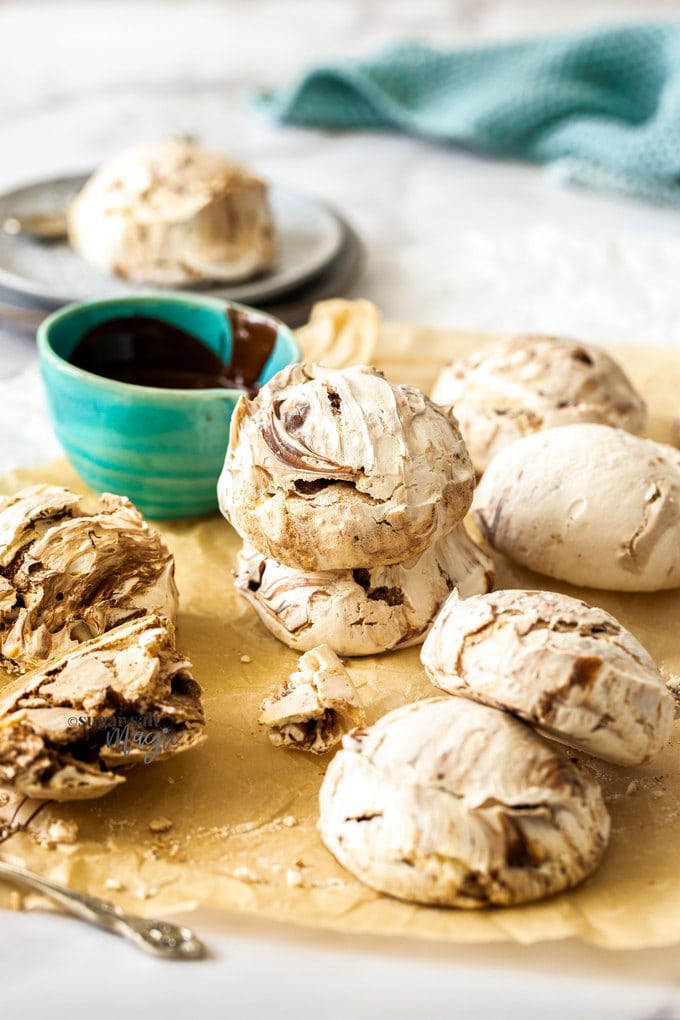
- Chocolate: Use a good eating chocolate – not compound or baking chocolate. I like dark chocolate in these. The meringue is sweet and the bitterness of the dark chocolate helps to balance it out.
How to make chocolate meringues
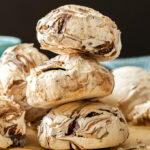
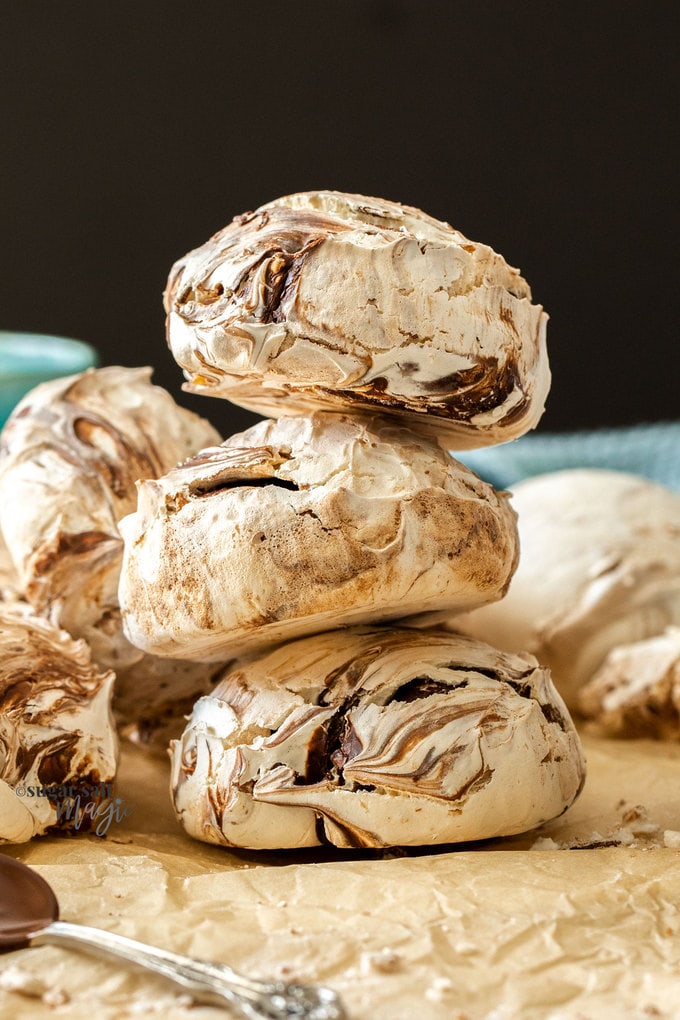
These meringues are half the size of the Venetian counterparts that inspired them, but they’re still every bit as delicious and as big as your fist.
- Start by whipping egg whites to soft peaks. You can do this in a stand mixer with a whisk attachment or just using a regular electric beater.
- Add the cream of tartar then while whisking, add the sugar one spoonful at a time, counting to 20 before adding the next one.
- Once all the sugar is added, keep on beating until you have stiff glossy peaks and you can’t feel any sugar granules when you rub it between your fingers.
- Pour over melted chocolate, then just fold it in two times, no more.
- Use a large ice cream scoop to scoop and release balls of meringue onto a baking tray lined with baking paper.
- Bake them for 1 – 1.5 hours.
Steps 1-5 take only around 10-15 minutes. That’s it. The only effort you need to put in is for 15 minutes and with 4 ingredients they’re just so easy. The hardest part is waiting for them to cook and the cool before you crunch down on one.

Meringue recipe tips and tricks
- Use very clean equipment: Make sure your bowl and whisk or beaters are perfectly clean or you’ll risk the egg whites not whipping. Rubbing half a lemon around the inside of the bowl before beating your egg whites will remove any traces of grease and so will a quick rinse with hot water (then dry it out before tipping in your egg whites).
- Carefully separate your eggs: You don’t want any yolk in with the whites – the fat in egg yolks stops the egg whites from whipping.
- Which eggs?: Use fresh, cold eggs for best results.
- Soft peaks: Pull the beater out and the egg whites should be able to hold a shape but the peaks will droop over. This is when you can move on.
- Adding the sugar: It’s very important to add the sugar one tablespoon at a time and give it at least 20 seconds before adding another. I literally stand by my stand mixer and count slowly to 20 before adding another spoonful. This ensures each spoonful of sugar is fully incorporated and well on the way to dissolving.
- Stiff peaks: The meringue is ready to use when it looks glossy and it holds a stiff, pointy peak. Lift the beater out of the bowl and you should see a pointy peak standing up.
- Adding the chocolate: Just fold it in twice. You’ll still see pools of it but that’s completely ok. It will mix in more as you scoop it. Also, when you bite into a meringue and there’s big bite of real chocolate in there it’s amaaaaazing.
Choose your baking time
- I bake mine for 1 hour and this leaves them just a little soft on the inside.
- An extra 15 minutes will leave just a slight chewiness on the inside.
- If you’d like them crispy all the way through, turn the oven off at this point and let them sit in the oven for another 1/2 hour before taking them out.
Storing meringues
- Store meringues in an airtight container in a cool, dry spot for up to 3 weeks. Chewy centred meringues should be eaten in 7-10 days.
- You can freeze meringues too. Store them in a hard, airtight container so they don’t get crushed and freeze for up to 3 months. Let them thaw at room temperature for 1/2 an hour.
PIN IT:
Click to Pin this recipe for later!
More recipes with meringue
- Lemon Meringue Cake
- Chocolate meringue cake
- No Bake Chocolate Meringue Pie
- Chocolate Meringue Brownie Cake
- Easy Peppermint Meringues
- How To Make Perfect Pavlova
- Mini Lemon Meringue Pies
Never Miss a Recipe!
Get the latest recipes straight to your inbox!
Video
Ingredients
- 3 large egg whites
- ¼ teaspoon cream of tartar
- ¾ cup caster (superfine) sugar (150g / 5.3oz)
- 75 g dark (50%) chocolate, melted and cooled slightly (2.7oz)
For best results, always weigh ingredients where a weight is provided
Equipment
- large ice cream scoop
- large baking trays
Instructions
- Preheat oven to 140C / 285F / 120C fan forced. Line 2 baking trays with baking paper.
- In a stand mixer, with the whisk attachment (or using a handheld beater), beat the egg whites on medium high to soft peak stage. About 5 minutes.
- Sift over the cream of tartar and beat through.
- While beating on medium, start adding the sugar, one tablespoon at a time. Wait 20 seconds before adding the next one.
- Once all the sugar is added, continue beating on medium-high until the egg whites are thick and glossy and at stiff peak stage. Rub a little between your fingers to make sure there are no sugar grains left. If there is, keep beating.
- Pour the cooled, melted chocolate over the top and just fold through carefully twice. No more, otherwise you'll end up with brown meringues and less of a swirl.
- Now use a large ice cream scoop, to take large scoops of the meringue mixture and carefully release them onto the baking trays at least 2 inches apart.
- Place in the oven on the middle rack and bake for 1 hour (see notes). The outside is cooked enough when the meringue releases easily from the baking paper. If it's still sticky, it needs to bake longer.
- Let them cool completely before storing in an airtight container in a cool, dry place for up to 3 weeks.
Notes
- In my oven, 1 hour baking time allows for just a little softness in the centre. For a chewy centre bake an extra 15 minutes. If you want your meringues totally crisp, turn the oven off at this point and leave them in there for 1/2 an hour.
- All ovens vary so make sure to check 5-6 minutes before the recipes suggests.
- Don’t have an ice cream scoop? No worries. Meringue is very easy to shape. Just use a regular spoon to scoop, then push it off on to the baking tray with another. You can then shape it slightly. You can also pipe meringue into small kisses like the ones on my mini lemon meringue pies.
- Store in an airtight container in a cool place and these can keep for up to 3 weeks. They also freeze well, also stored in an airtight container.

Venice is by far my favourite place I’ve ever travelled and I’ve been lucky enough to go there twice. It feels to me like this surreal little, fairy-tale world, within a world, you know, like it’s the town in one of those snow globes, minus the snow. I find the maze-like alleys and streets lined with majestic old-world mansions just mesmerising. It just has such an interesting history and to think that someone thought they could not only build a city on water, but that more people would want to make it home, and now even more people want to experience it.
I always wander the streets and get lost and then realise I’m not lost. It’s still Venice and at the end of the next turn, I’m likely to see the grand canal with all the polished black gondolas floating by and speedboats cruising through to drop off goods or tourists. Or maybe not, maybe I’ll come across a little bridge over a much smaller canal, or a newspaper stall with nothing else around or a quaint little café sitting happily in the shadows of centuries-old buildings. Then while I’m looking into pasticciera windows and fruit and vegetable stalls, I remember that people live here and work here. They buy their veggies here and take them home and cook their dinners in their apartments.
It’s true that there are less and less people living there now (around 50,000 I think at last count) due to tourism making it increasingly expensive to live there but just imagine your front door, opening onto The Grand Canal. To me it’s a beautiful insanity. It shouldn’t work, but it does and it has for hundreds of years. People do live their lives in the floating city, and more people want to travel there. Amazing! Anyway, breaking out of my dream and back to meringues…..
Right, so I have a little exercise for you. Take your hands and make two fists. Put your fists together. That’s the size of Venetian meringues.
They come in all different colours and flavours, with some swirled and some in solid colour. Flavours like pistachio, stawberry, lemon and chocolate are most prominent and they’re all piled high in the pasticceria windows beckoning likely customers to come on in and have a closer look. I bought myself a pink meringue but the photo I took of it doesn’t even do it justice but all I know is it took me two sittings to eat it up.
I knew those meringues would be one of the things I recreated when we got home and here they are in all their crispy glory, if only a little smaller.
This post may contain affiliate links that earn me a small commission for my referral, at no extra cost to you. Thank you for supporting Sugar Salt Magic.
39 Comments on “Swirled Chocolate Meringues”
These are amazing!!! Love that they can freeze too..
A question, could I use this recipe and make a wreath? Should be ok do you think?
Thanks in advance
So happy you love them, Gemma. Yes, they work well as a wreath too 🙂
Best recipe ever, use it all the time. I use it with different flavours ie peanut butter and chopped pretzels sprinkled on top, or candy folded through with sprinkles on top. Now looking for a simple lemon curd to use up the yolks. Thank you for your awesome recipes.
I’m so happy you love them, Valerie. Try my lemon curd recipe – I promise you’ll love it. Then you can swirl that through the meringues too!
Hi, I’ve seen a number of other meringue recipes that bake for quite a bit longer and then rest in the oven for a few hours after turning off the oven. I saw here they only bake for one hour. Just curious if you know why the difference in times? I’ve never made them before so just want to make sure I get it right 🙂 thank you!
Hi Jenna. Often pavlova recipes will sit in the oven overnight and the slow cooling process helps to limit cracks in the pavlova. With meringues, they don’t really need that length of time due to their smaller size and drier nature (a pavlova has a marshmallow centre). Lastly, it just depends on the recipe. With mine, I like a slightly softer centre so I take them out earlier to prevent that drying out.
Thanks so much!! I made them exactly as your recipe says and they turned out perfect! Sooo yummy!
So happy you loved them, Jenna 🙂
Best cookies ever. OMG I love these and rarely share but am making a double batch for the weekend retreat I am hosting.
So happy you love them, Samantha 🙂
Great Meringues and the recipe is accurate and easy to follow. Very pretty!
This makes my day, Heather. So happy you love them.
I had never made French Meringue before but I am now hooked. I’ve made this recipe twice this week and everyone loves them. The second time I baked them slightly longer and I must say I prefer a chewier version. My mom is now asking for a maple version tho so it’s next to be baked.
So so happy you love them Samantha. I truly appreciate you trying my recipe.
I made these cookies for guests and I received positive feedback from everyone – 5 stars out of 5.
So happy you love them Dinija. Thanks for trying my recipe.
I have been on a quest to find the best chocolate swirl meringues and am excited to try yours — they are in the oven as we speak. One question: How should I melt the chocolate? Mine got a bit dried out over a Bain Marie.
Hi Tami, I normally melt chocolate in the microwave. Place it in a microwave safe bowl and heat for 30 seconds at a time, stirring really well between each, until it’s just melted. It should take no more than 1 1/2 to 2 minutes this way. It’s very important not to overheat chocolate when melting it. I’ve never heard of chocolate drying out in a bain marie but possibly a little water got into the chocolate and it siezed up which can definitely happen.
Made these today to use up a bunch of egg whites left over from making lemon curd – best decision! First time I’ve made meringues and I’ll definitely be coming back to this recipe 🙂
So happy you love them, Vinnie. Definitely a favourite of mine too.
Hi! Do we whip the egg whites while it’s still cold or at room temperature? Thanks.
Hi Ela. It will whip either way but my preferred method is cold egg whites as they tend to have a better structure.
Just made these! I divided the meringue in half and did one portion with melted chocolate and the other with instant coffee diluted slightly…yumm!
Love that coffee version too. Thanks Lisa.
These were incredible! I had left over egg whites to use after making your lemon curd (out of this world good) and figured I give the merinnues a try. This was my first attempt at meringues and I was pleasantly surprised how easy it was. They were both beautiful and delicious. Will definitely make these again.
So happy you love them Amy.
If stored in an air tight container, how long will the meringue keep?
Thanks!
If you store them in a cool place in an airtight container, they’ll easily keep for up to 3 weeks.
Thank you! Made these and they were delicious!
So happy you love them Lily.
Made these tonight and they are delicious!
Actually I don’t know if mine turned out as how it is supposed to be or not, but they tasted great. I do have a question, when it’s stiff peak, if the peak just kinda droops down a little, is it fine? Or do I have to keep beating until they’re completely pointy without even the slightest droop
So happy you enjoyed them Cynthia. Stiff peaks mean the peak stays upright.
How do you check if they’re done or not?
They’ll have a dry, matte finish on the outside and they’ll move easily off the baking paper.
I made these Saturday for my husband’s birthday celebration. They are delicious!! Thanks for the recipe and tips!
Thank you so much. I’m so happy you enjoyed them 🙂
Marie, you are one of the best discoveries that happened to me this year.! Your work is amazing ! Sincerely,
Wow! What a lovely comment. Thank you so much ?